How-To
Hands-On with WSL: Installing Kali Linux
Tom Fenton outlines the steps to take to install Kali on Windows Subsystem for Linux (WSL), and discusses some of the issues he encountered and how he worked around them.
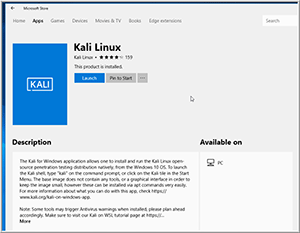
The other day, I noticed that the Microsoft Store now carries two additional Linux distributions: Debian and Kali (Figure 1). Of these two I decided to install Kali. Kali, being designed for digital forensics and penetration testing, is an interesting Linux distribution. It's maintained and funded by Offensive Security Ltd., and comes preinstalled with many common security and penetration-testing programs, including Nmap (a port scanner), Wireshark (a packet analyzer), John the Ripper (a password cracker), as well as forensics tools such as Binwalk, Foremost and Volatility. In this article, I'll outline the steps I took to install Kali on Windows Subsystem for Linux (WSL), and discuss some of the issues I encountered and how I worked around them.
 [Click on image for larger view.]
Figure 1. Linux Distributions.
[Click on image for larger view.]
Figure 1. Linux Distributions.
In a previous article, I outlined steps to enable WSL on a Windows 10 system, so if you haven't yet enabled WSL for your system, be sure to do so by following the instructions from that article prior to installing and trying Kali.
To install Kali, I went to the Microsoft Store (I searched for "Kali" in the Windows Store in the Apps section), then selected Kali and Get; it only took a few minutes to download and complete the initial installation of the product (Figure 2).
 [Click on image for larger view.]
Figure 2. Installing Kali.
[Click on image for larger view.]
Figure 2. Installing Kali.
Once Kali was installed I clicked launch to bring up the Kali bash shell. It took a few minutes for Kali to initialize itself and then was prompted to create a new user and set its password. I then entered
dpkg -l | more to look at what packages were installed on the system. I was disappointed to see that many of the popular testing tools such as Wireshark do not come preinstalled on the WSL version of Kali.
Fortunately, Kali has created a set of metapackages that will install a set of tools for a specific field including kali-linux-forensic, kali-linux-pwtools (password cracking tools), and kali-linux-top10. To update the list of available packages and to see a list of these metapackages, I entered:
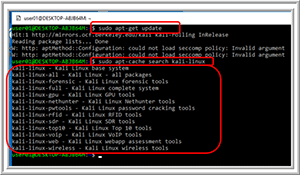
sudo apt-get update
sudo apt-cache search kali-linux
The results indicated that a dozen metapackages were available (Figure 3).
 [Click on image for larger view.]
Figure 3. The list of metapackages.
[Click on image for larger view.]
Figure 3. The list of metapackages.
It needs to be noted that these metapackages range in size from 1.5GB (kali-linux) to 15GB (kali-linux-all); I installed the top 10 metapackages by entering:
apt-get install kali-linux-top10
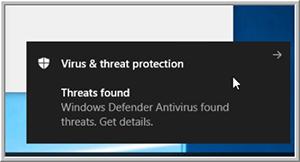
It took about 10 minutes to download and install this metapackage, and during the installation process I got warnings about viruses and threats being detected (Figure 4).
 [Click on image for larger view.]
Figure 4. Threat warning message.
[Click on image for larger view.]
Figure 4. Threat warning message.
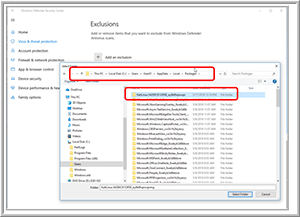
To get around these warnings, I added an exclusion to Windows Defender (Figure 5) for the folder C:\Users\user01\AppData\Local\Packages\ where "user01" is the WSL user that I created when I installed Kali Linux. I needed to unhide all the folders to be able to select the folder. To unhide folders, I entered folders in the search box on the taskbar, and then selected Show hidden files and folders from the search results (Figure 6).
 [Click on image for larger view.]
Figure 5. The Windows Defender exclusion.
[Click on image for larger view.]
Figure 5. The Windows Defender exclusion.
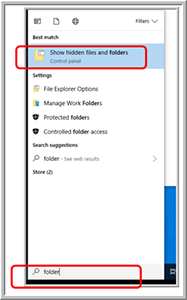 [Click on image for larger view.]
Figure 6. Unhide folders.
[Click on image for larger view.]
Figure 6. Unhide folders.
In a future article, I'll show you how to use some of the tools that come with Kali, as well as list some tools that do not work and explain why this is the case.
About the Author
Tom Fenton has a wealth of hands-on IT experience gained over the past 30 years in a variety of technologies, with the past 20 years focusing on virtualization and storage. He previously worked as a Technical Marketing Manager for ControlUp. He also previously worked at VMware in Staff and Senior level positions. He has also worked as a Senior Validation Engineer with The Taneja Group, where he headed the Validation Service Lab and was instrumental in starting up its vSphere Virtual Volumes practice. He's on X @vDoppler.