How-To
Creating a Snapshot Lifecycle Policy in AWS
Amazon Web Services (AWS) helps you automate the snapshot process by allowing you to create snapshot lifecycle policies. Here's a look at how these policies work.
Although snapshots can be very useful for protecting Amazon Elastic Compute Cloud (EC2) instances, managing snapshots becomes increasingly difficult with scale. It's one thing to create snapshots for a few Amazon EC2 instances, but it's quite another thing to create snapshots for a thousand instances. And of course there's more to snapshot management than just creating snapshots. At some point, you'll probably want to begin removing old snapshots that are no longer useful. Amazon Web Services (AWS) helps you automate this once-tedious process by allowing you to create snapshot lifecycle policies. Let's take a look at how these policies work.
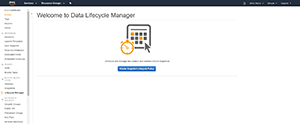
To get started, log into AWS and open the Amazon EC2 dashboard. Next, click on the Lifecycle Manager link (it's located in the Elastic Block Storage section of the console tree). Upon doing so, you'll be taken to the Welcome to Data Lifecycle Manager screen, which you can see in Figure 1. Click on the big blue Create Snapshot Lifecycle Policy button to get started.
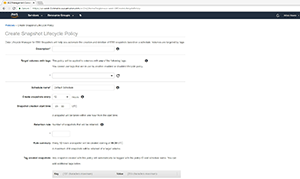
At this point, you'll be taken to the Create Snapshot Lifecycle Policy screen. You can see the top half of this screen in Figure 2.
 [Click on image for larger view.]
Figure 1. The Data Lifecycle Manager screen.
[Click on image for larger view.]
Figure 1. The Data Lifecycle Manager screen.
 [Click on image for larger view.]
Figure 2. This is the upper portion of the Create Snapshot Lifecycle Policy screen.
[Click on image for larger view.]
Figure 2. This is the upper portion of the Create Snapshot Lifecycle Policy screen.
The first thing you'll need to do is enter a description of the policy that you're creating. The description should convey the purpose of the policy.
Next, you'll have to specify which volumes to which the policy will apply. AWS uses tags for this purpose. You can enter one or more tags that have been (or will be) applied to your volumes. The snapshot lifecycle policy will apply to any volume with a matching tag. The one caveat to the use of tags is that you can only apply one snapshot lifecycle policy to a volume. This means that you cannot specify a tag that has already been assigned to a different policy.
The policy's snapshot creation process is driven by a schedule. For example, you might schedule a snapshot to be created every four hours for any volume to which the policy applies. That being the case, the next thing you'll have to do is enter a name for the schedule. Any snapshot that's created by the policy will list the schedule name within a tag.
Once you've supplied a schedule name, you'll then need to specify how frequently you want snapshots to be created, and when the snapshot creation process will begin. It's worth noting that the snapshot creation start time is a little bit misleading, because snapshots aren't actually created at the time specified. Instead, the first snapshot is created an hour after the specified time.
One more thing you should pay attention to is that the snapshot creation time is expressed in universal time, not in your local time. Hence, you'll have to convert your desired start time into universal time before entering it.
After you specify the snapshot creation time, you'll need to enter the number of snapshots you want to retain. If, for example, you're creating two snapshots a day (every 12 hours), and you want to keep a week's worth of snapshots on hand, then you would set the value of the retention rule to 14. Once the specified retention limit is reached, the oldest snapshot will be deleted to make room for a new snapshot.
The lower section of the Create Snapshot Lifecycle Policy screen, which you can see in Figure 3, allows you to apply tags to any snapshot that's been created by the policy. You don't necessarily have to apply tags to the snapshots, but tagging snapshots can be a great way of staying organized. It's worth noting that you're limited to using 50 tags.
 [Click on image for larger view.]
Figure 3. This is the lower portion of the Create Snapshot Lifecycle Policy screen.
[Click on image for larger view.]
Figure 3. This is the lower portion of the Create Snapshot Lifecycle Policy screen.
Now, you have to associate the policy with an IAM role. IAM is short for Identity and Access Management, and refers to the AWS role-based access control mechanism. You can choose between using the default role, or an IAM role that you've created. If you select the Default Role option, but no default role exists, a default IAM role will be automatically created.
The last thing that you have to do is specify whether the policy should be enabled (or made active) upon creation. If you don't want the policy to go to work right away, then choose the Disable Policy option. When you're done, click the Create Policy button to create the policy.
About the Author
Brien Posey is a 22-time Microsoft MVP with decades of IT experience. As a freelance writer, Posey has written thousands of articles and contributed to several dozen books on a wide variety of IT topics. Prior to going freelance, Posey was a CIO for a national chain of hospitals and health care facilities. He has also served as a network administrator for some of the country's largest insurance companies and for the Department of Defense at Fort Knox. In addition to his continued work in IT, Posey has spent the last several years actively training as a commercial scientist-astronaut candidate in preparation to fly on a mission to study polar mesospheric clouds from space. You can follow his spaceflight training on his Web site.