How-To
Create a Mailing List with AWS Pinpoint, Part 2: Set up a Segment and Launch a Campaign
Brien Posey wraps up how to easily set up an e-mail campaign with the customer engagement service from Amazon Web Services.
In the first article, I talked about the process of setting up a project and verifying e-mail addresses in preparation for a mail campaign. Now I want to wrap things up by showing you how to set up a segment and launch a campaign.
Before you'll be able to create a mail campaign, you'll have to define one or more segments. A segment is essentially just a mailing list. It's a collection of names and addresses to which you'll be sending messages.
The easiest way to create a segment is to set up a spreadsheet containing the required data. Once you've done that, you can save the spreadsheet as a CSV file, and import it into Amazon Web Services (AWS). At that point, the segment will be ready to use (assuming that the e-mail addresses or domains have been verified).
The most important thing to understand about the process of creating a segment is that the spreadsheet will have to use very specific column header names. Otherwise, AWS won't know how to import the resulting CSV file. AWS actually supports a large number of attributes that you can include in your spreadsheet. You can find the full attribute list here. You can use any combination of up to 20 of the available attributes.
At the very least, though, you'll need to specify the ChannelType and Address attributes. The ChannelType attribute lets you specify whether the specified address is an e-mail address of an SMS address. Many administrators will also include other key attributes within the spreadsheet, such as User.UserAttributes.FirstName.
This brings up an important point. The list of supported attributes in AWS isn't completely static. The attributes are designed in a way that allows for the creation of custom attributes. User.UserAttributes, for example, can be expanded to include custom, user-related headers such as User.UserAttributes.Name.
The other thing that I want to quickly mention is that AWS has the ability to send messages to a subset of the members of a segment based on attributes. For example, you might limit a campaign so that messages are sent only to recipients in a specific location, or recipients who use a specific device.
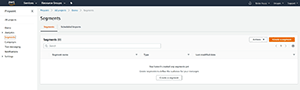
Once you've created the mailing list CSV file, importing it is easy. Just go to the Segments tab, which you can see in Figure 1, and enter a name for the segment you want to create.
 [Click on image for larger view.]
Figure 1. Enter a name for the segment that you're creating.
[Click on image for larger view.]
Figure 1. Enter a name for the segment that you're creating.
Click the Create a Segment button, and you'll be taken to the Create a Segment screen. Now just choose the Import a Segment option, and then enter the path to the CSV file containing your segment data, as shown in Figure 2.
 [Click on image for larger view.]
Figure 2. Select the Import a Segment option.
[Click on image for larger view.]
Figure 2. Select the Import a Segment option.
There are two things that are worth paying attention to on this screen. First, although I've focused primarily on the use of CSV files, JSON files are also supported. Second, whichever file format you choose to use, you'll have to upload the file to an S3 bucket before you'll be able to import it.
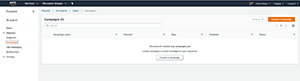
Once you finish creating your segment, the last thing that you'll have to do is create the actual mail campaign. To do so, click the Campaigns tab, and then click on the Create a Campaign button, shown in Figure 3.
 [Click on image for larger view.]
Figure 3. Click on the Create a Campaign button.
[Click on image for larger view.]
Figure 3. Click on the Create a Campaign button.
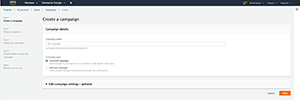
You'll now see a prompt asking you to enter a name for the campaign that you're creating, as shown in Figure 4. While you're at it, you'll need to specify whether you're creating a standard campaign (a "real" campaign) or a test campaign. Make your selection, and click Next.
 [Click on image for larger view.]
Figure 4. Enter a name for your campaign.
[Click on image for larger view.]
Figure 4. Enter a name for your campaign.
You'll now be taken to the Choose a Segment screen, which you can see in Figure 5. Choose the option to use an existing segment, and then choose one of the segments that you created earlier. Click Next to continue.
 [Click on image for larger view.]
Figure 5. On the Choose a Sement screen, choose an existing segment, which will be the one you created earlier..
[Click on image for larger view.]
Figure 5. On the Choose a Sement screen, choose an existing segment, which will be the one you created earlier..
Now, AWS will display the Create Your Message screen. Choose e-mail as the message channel, and then click on the Create a New Message option. You'll now need to enter a subject line and provide the actual text for your message.
One of the message editor's nicer features is its ability to send personalized messages. Simply work in any of the attributes from the CSV file that you imported. For example, if you wanted to add the recipient's first name to the message, you could simply insert {{User.UserAttributes.FirstName}} into the message. Keep in mind that this is a custom user attribute as defined by Amazon's list of supported attributes. Once you 've finished composing your message, click Next.
AWS will now open the Schedule Your Campaign page. Specify the delivery schedule for the message and click Next. Now, take a moment to review the summary screen. If everything appears to be correct, click the Launch Campaign button to initiate the mail campaign.
About the Author
Brien Posey is a 22-time Microsoft MVP with decades of IT experience. As a freelance writer, Posey has written thousands of articles and contributed to several dozen books on a wide variety of IT topics. Prior to going freelance, Posey was a CIO for a national chain of hospitals and health care facilities. He has also served as a network administrator for some of the country's largest insurance companies and for the Department of Defense at Fort Knox. In addition to his continued work in IT, Posey has spent the last several years actively training as a commercial scientist-astronaut candidate in preparation to fly on a mission to study polar mesospheric clouds from space. You can follow his spaceflight training on his Web site.