How To Do VDI POC Like a Top Chef
Okay, I have to admit that Top Chef can be pretty addictive for me to watch. The idea that chefs can whip up an authentic and tasty gourmet dish in under an hour is fascinating.
When it comes to desktop virtualization, we would like to do something similar: Build a proof-of-concept that we can test in real-life scenarios but deploy the POC quickly and affordably. Say you want to set up a VDI POC for a handful of your end users, and you have a spare afternoon in which to do this.
Here, I'll walk you through the steps to deploy a live POC within an afternoon using Kaviza VDI-in-a-box..
Step 1: Identify the scenarios and use cases for the POC
As with any project, it is best to identify up front the goals and usage scenarios you are trying to model with the POC. Perhaps you want to start with more of the task workers, or you may want to test access via an iPad for your mobile users, etc.
Step 2: Size and procure your server. You need servers to host and run your virtual desktops
With Kaviza, these same servers also run the VDI-in-a-box virtual appliance, so once you size your virtual desktop host servers, you are ready to begin. A complete sizing guide is available on the support Web site, but a dual-core sever with 8GB RAM is sufficient to run 10 Windows XP desktops (use 12 to 18 GB for Windows 7). As you run out of capacity on a server, you can add more servers and Kaviza will create a grid across them and automatically load-balance the workload.
Step 3: Deploy the VDI-in-a-box appliance
To run VDI-in-a-box, simply install the free Citrix XenServer or the VMware ESX/ESXi hypervisor on the server, and import VDI-in-a-box as a virtual machine. You can download a free trial of the software from the Kaviza site.
Step 4: Configure the VDI-in-a-box grid
Log into the VDI-in-a-box appliance using a browser (see Fig. 1), and answer three questions: the hypervisor access privileges that are needed to create and manage the virtual desktops, read-access to your Active Directory, and the name of your grid.
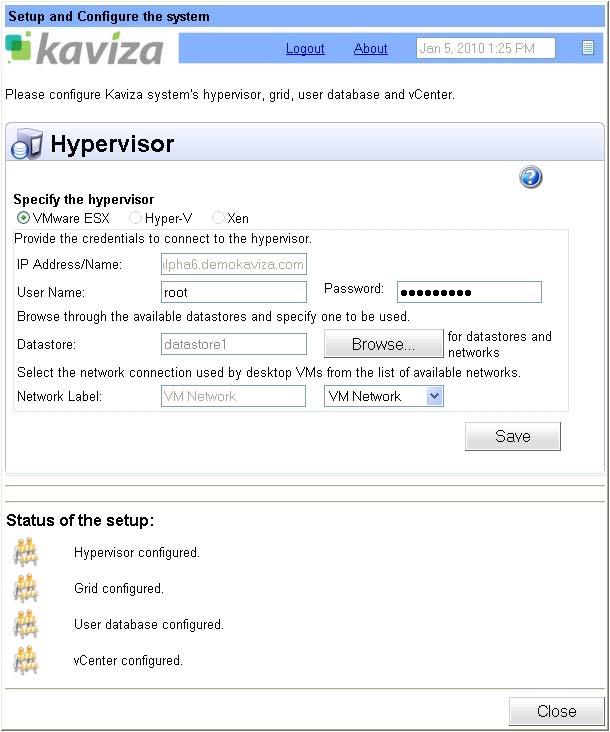 |
Figure 1. Setup, configuration of servers. (Click image to view larger version.) |
Once you enter these three pieces of information, your VDI environment setup is complete and now we can start provisioning desktops.
Step 5: Set up desktop pools
Kaviza has an image management wizard that steps you through the process of creating master desktop images and pools. You can set up a master image for each class of users that have unique desktop requirements (e.g. a master image for accounting, one for administrators, etc). To set up a master image, you import a Windows XP or Windows 7 image and prepare it to run within Kaviza. The image management wizard walks through the preparation process.
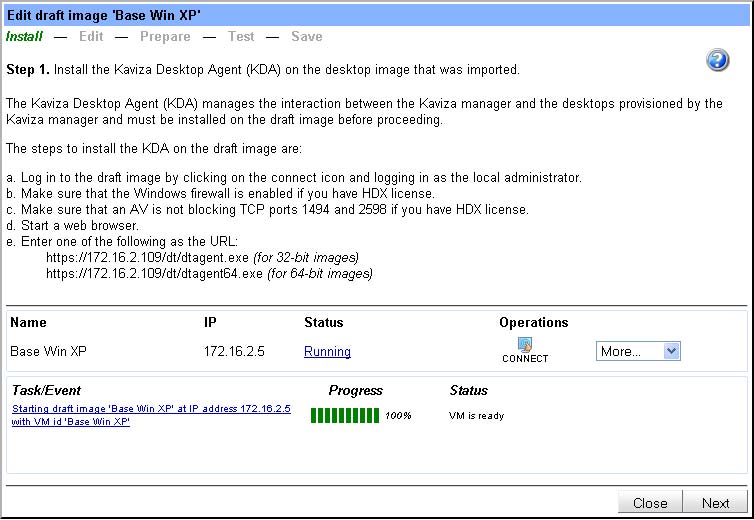 |
Figure 2. Set up desktop pools. (Click image to view larger version.) |
Step 6: Create desktops and assign to users
From your master images, you can now provision virtual desktops in Kaviza and assign them to users by simply specifying the number of virtual desktops you would like to generate from the master image. Kaviza automatically provisions and manages the virtual desktops based on policies you set.
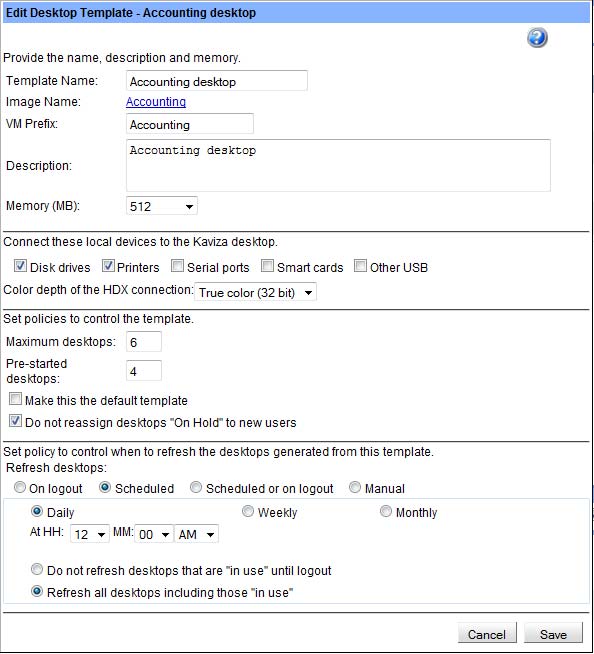 |
Figure 3. Create desktops and users. (Click image to view larger version.) |
Now that your virtual desktops are ready, you simply assign desktops to any user or group from your Active Directory by simply associating them.
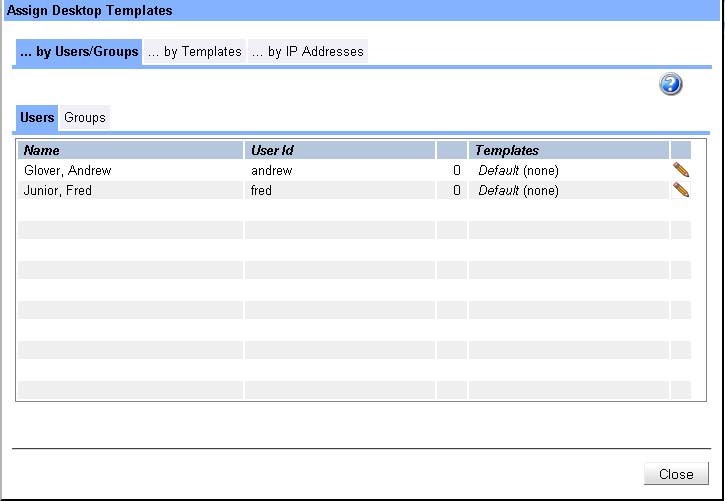 |
Figure 4. Assign Desktop Templates. (Click image to view larger version.) |
End Users Are Now Connected, Virtually
Kaviza delivers virtual desktops using the Citrix HDX protocol – so you can access the desktops from any endpoint that is HDX enabled. This includes iPads, thin-clients, smart phones, Android devices and traditional PCs or Macs. End users can connect to the desktops using either the Kaviza Desktop client or through the native Citrix Receiver. Depending on the use cases you identified, you can have end users test the virtual desktops from a variety of endpoints and locations.
In these few simple steps using spare servers you may already have, you can easily set up a live proof-of-concept with virtual desktops and test out the idea with your end-users and become a VDI top-chef!
Posted by Krishna Subramanian on 06/06/2011 at 12:47 PM