10 Steps To Setting Up vCenter Server Appliance The Right Way, The First Time
The appliance model is here to stay and when done correctly, it works well. That's the case with the vCenter Server Appliance, which I've been using for a while in various capacities, including some production-class clusters. And I've learned a few things along the way.
If you are like me and are familiar with using the Windows version of the vCenter Server application, then this is for you! Here's a 10-step program to setting up the vCSA:
- Deploy the vCenter Server Appliance -- Download the OVF and deploy it locally. Don't try to pull it from the Internet. Besides, if you need to do it again (in case you mess something up, for example), you'll have it locally.
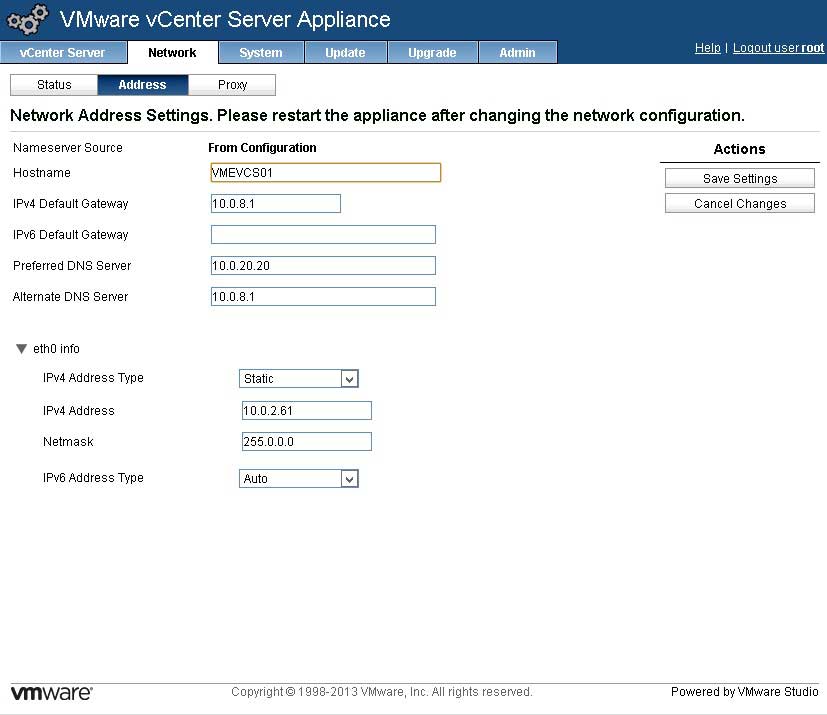
- Give the vCSA a name and set DNS -- One thing we always keep learning about VMware is that DNS needs to be correct. The vCSA doesn't change that. So take the time before you do anything to set the DNS server settings for the vCSA and give it a name. It's important to NOT let it go on any further thinking it is "localhost". You do this in the Network section, address tab (see Fig. 1).
 |
|
Figure 1. Set DNS and name before doing anything else with the vCSA. (Click image to view larger version.)
|
- Restart vCSA -- This will get DNS and naming correct on the vCSA.
- Join Active Directory-- If you so desire to add vCSA to Active Directory and use groups and users already setup there, this will allow subsequent settings (such as vCenter Single Sign On) to go much easier later. Better to do this step now.
- Reboot vCSA -- While reboots are boring, your chances of success will increase greatly by rebooting at this point.
- Check configuration -- This is an easy step, but it is very important. Ensure that everything points to the vCSA being the name you set it in step 2. This includes external pings, nslookups, etc. If you need to add any static DNS A records, now is the time.
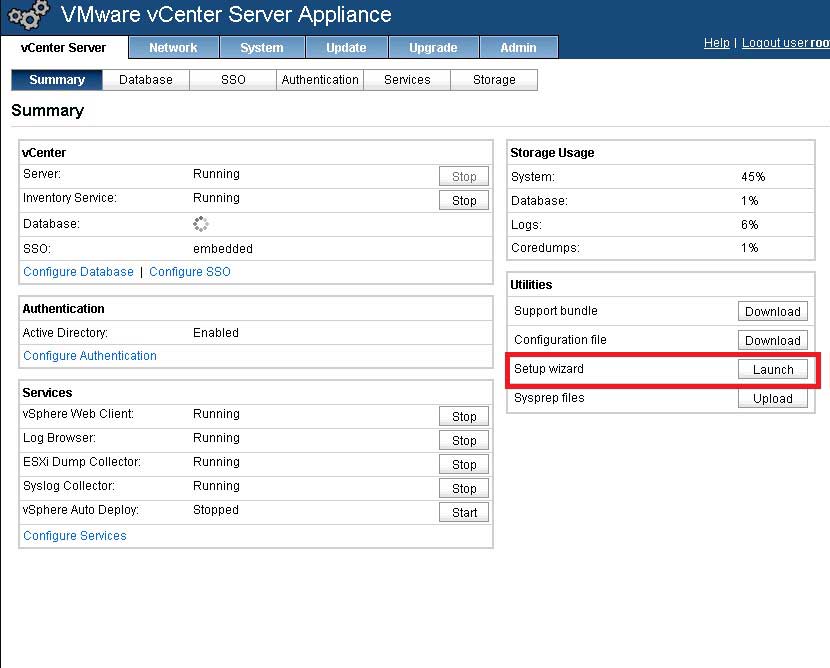
- Run vCenter Setup -- Inside the Web UI of the vCSA is a button to launch the setup wizard (see Fig. 2). If you are like me, you've run this as step #1 or #2, and chances are some things just didn't work as expected. Run this as one of the last steps.
 |
|
Figure 2. The setup wizard will configure the vCenter Server application on the appliance. (Click image to view larger version.)
|
- Add the domain as an identity source in SSO Configuration -- If you are using Active Directory, you should get the domain as an identity source, to then enable permissions assignment.
- Assign permissions -- Once step #8 is done, you can add Active Directory users and/or groups to the ___Administrators____ group in SSO's System Domain so that vCenter logins can happen easily with Active Directory logins.
- Build a cluster!
At this point, this appliance will work very well for you and weird issues that you may have experienced along the way should be made easier. In particular, certificates that always mention "localhost" and Active Directory not working as expected may behave better.
What tips do you have to set up the vCenter Server Appliance? Share your comments below.
Posted by Rick Vanover on 09/25/2013 at 3:28 PM