How To Guy
Deploy vCenter Server Appliance 5.1 in 5 Easy Steps
VMware wants you to start getting used to the vSphere Web client. One way to do that is to start using the vCSA.
The vSphere Web client offers many advantages over the traditional Windows-based vSphere client. Check out Using the vSphere 5.1 Web Client by VMware Product Manager Justin King on this site; it's a great overview on what the vSphere Web client can do with vSphere 5.1 and why you should use it.
VMware has stated that it will be going exclusively to the Web client in the next version of vSphere. That means that there won't be any more vSphere Client for Windows. To use the vSphere Web client, you'll either:
- Use vCenter server for Windows and add the vSphere Web client server on top of it
- Use the vCenter Server appliance
The easiest option is to just install the vCenter Server appliance, as VMware will be moving to that in the future. Added benefits are that there's no Windows license to buy, it's faster to install, there's no Windows OS to patch, and it contains the vCenter Server Appliance.
To make this as easy as possible, let me show you how to deploy and connect to the vCSA in five easy steps:
1.Download vCSA
As part of the entire vCloud Suite, the vCSA is available as a 60-day evaluation download. You can download the vCSA as either a single 2GB OVA file or as multiple pieces (an OVF, system VMDK, and data VMDK). I downloaded the single OVA file.
2. Deploy vCSA
The minimum you'll need to deploy vCSA 5.1 is an ESXi 5.1 host and the vSphere Client (Windows edition) on a Windows workstation. (Yes, it is ironic that to get to the Web client you must first install the Windows client. I'm sure VMware will fix that soon.) This is done with File | Deploy OVF Template in the vSphere client and then pointing to the OVA file.
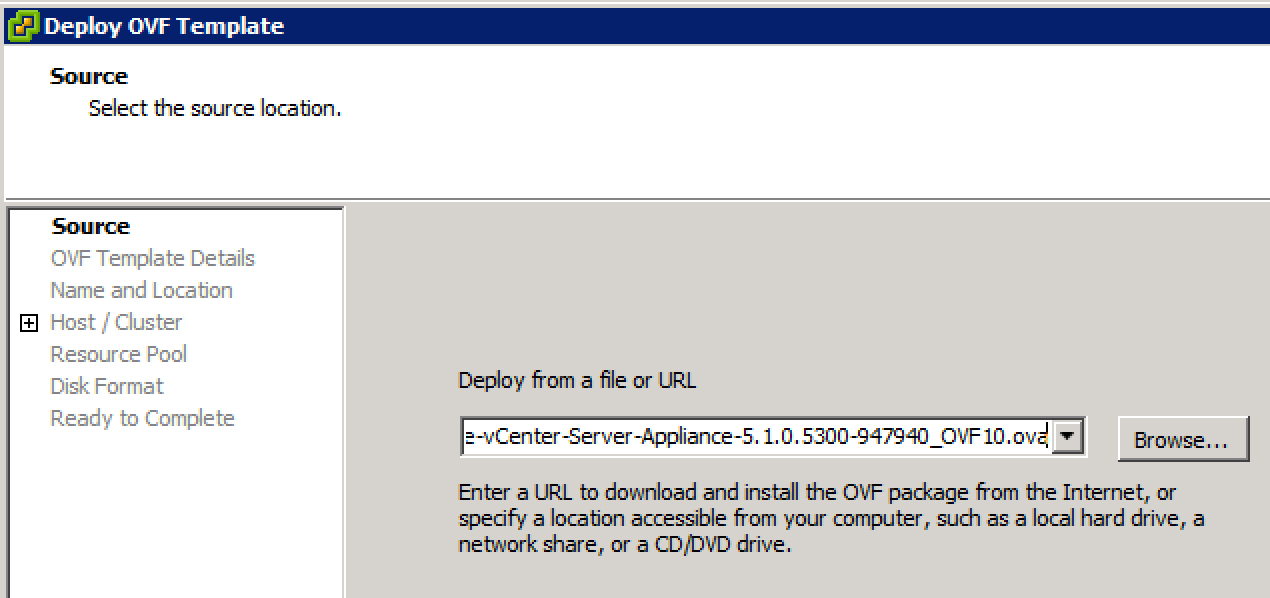 |
Figure 1. Deploying vCSA. (Click image to view larger version.) |
For the vCSA deployment, I specified what virtual datacenter it would go on, what host in the cluster, what the static network settings are (you could use dynamic for testing if you wish), etc. In the end, I chose to power on the VM after deployment.
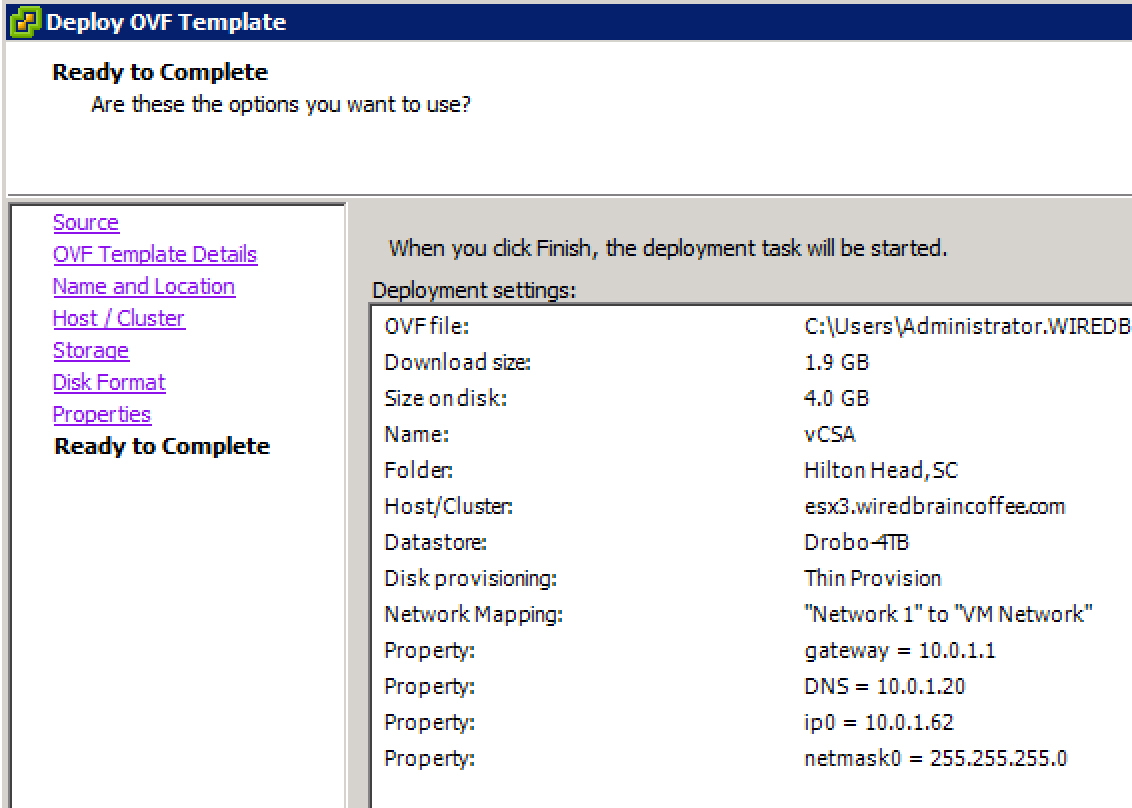 |
Figure 2. Powering on the VM. (Click image to view larger version.) |
3. Go to the vCSA VM console
After just a few minutes, the vCSA window will say that the deployment "completed successful." If you are a veteran at configuring vCSA, you'll know that you can go directly to the vCSA Web interface for configuration using proper IP or name and port number. However, those new to vCSA and those who need a reminder (like me) will just open up the vCSA VM console to get some important info. From here, you'll get the IP address and proper URL (with port number) to access the Web interface for vCSA.
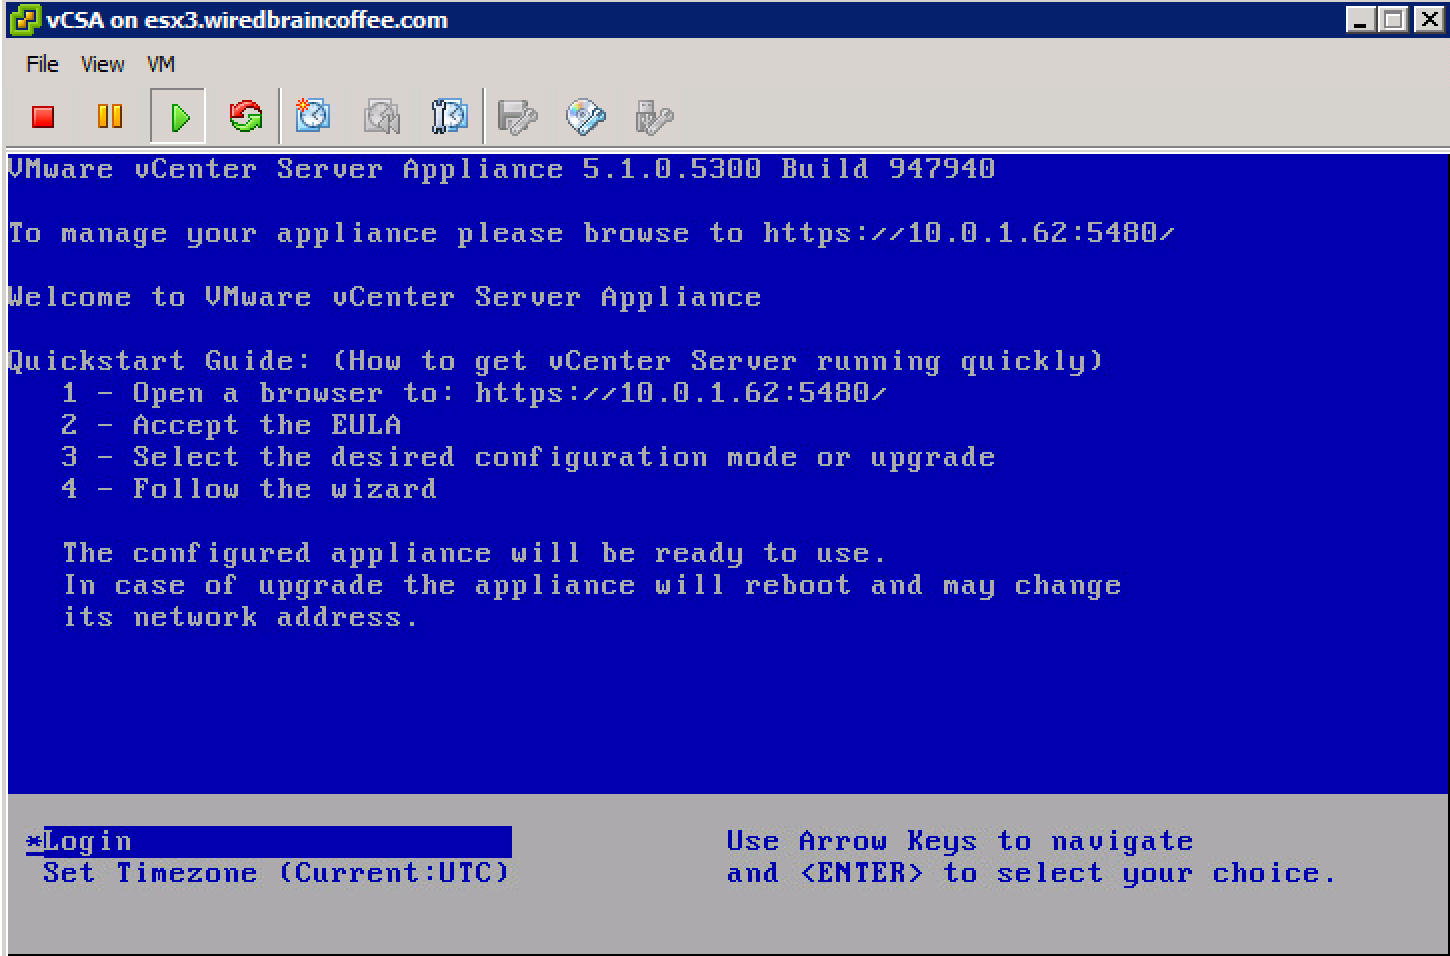 |
Figure 3. The vCSA Web interface. (Click image to view larger version.) |
Here, you'll find that URL along with the steps you'll need to perform to configure vCSA through the Web interface. They include accepting the EULA, initializing the database, and starting the services. What you won't have is the default username and password needed to log in to the Web interface (or the vCSA console). Those are: root and vmware.
4. Connect and configure the vCSA
With your Web browser, go to the URL you were provided, which will look something like https://10.0.1.62:5480 (where the IP address or DNS name is your own).
Now, log in with the default username and password, accept the EULA, choose your configuration type (I chose a new default configuration), and click Start to configure the default embedded database.
When done, it will look like Fig. 4.
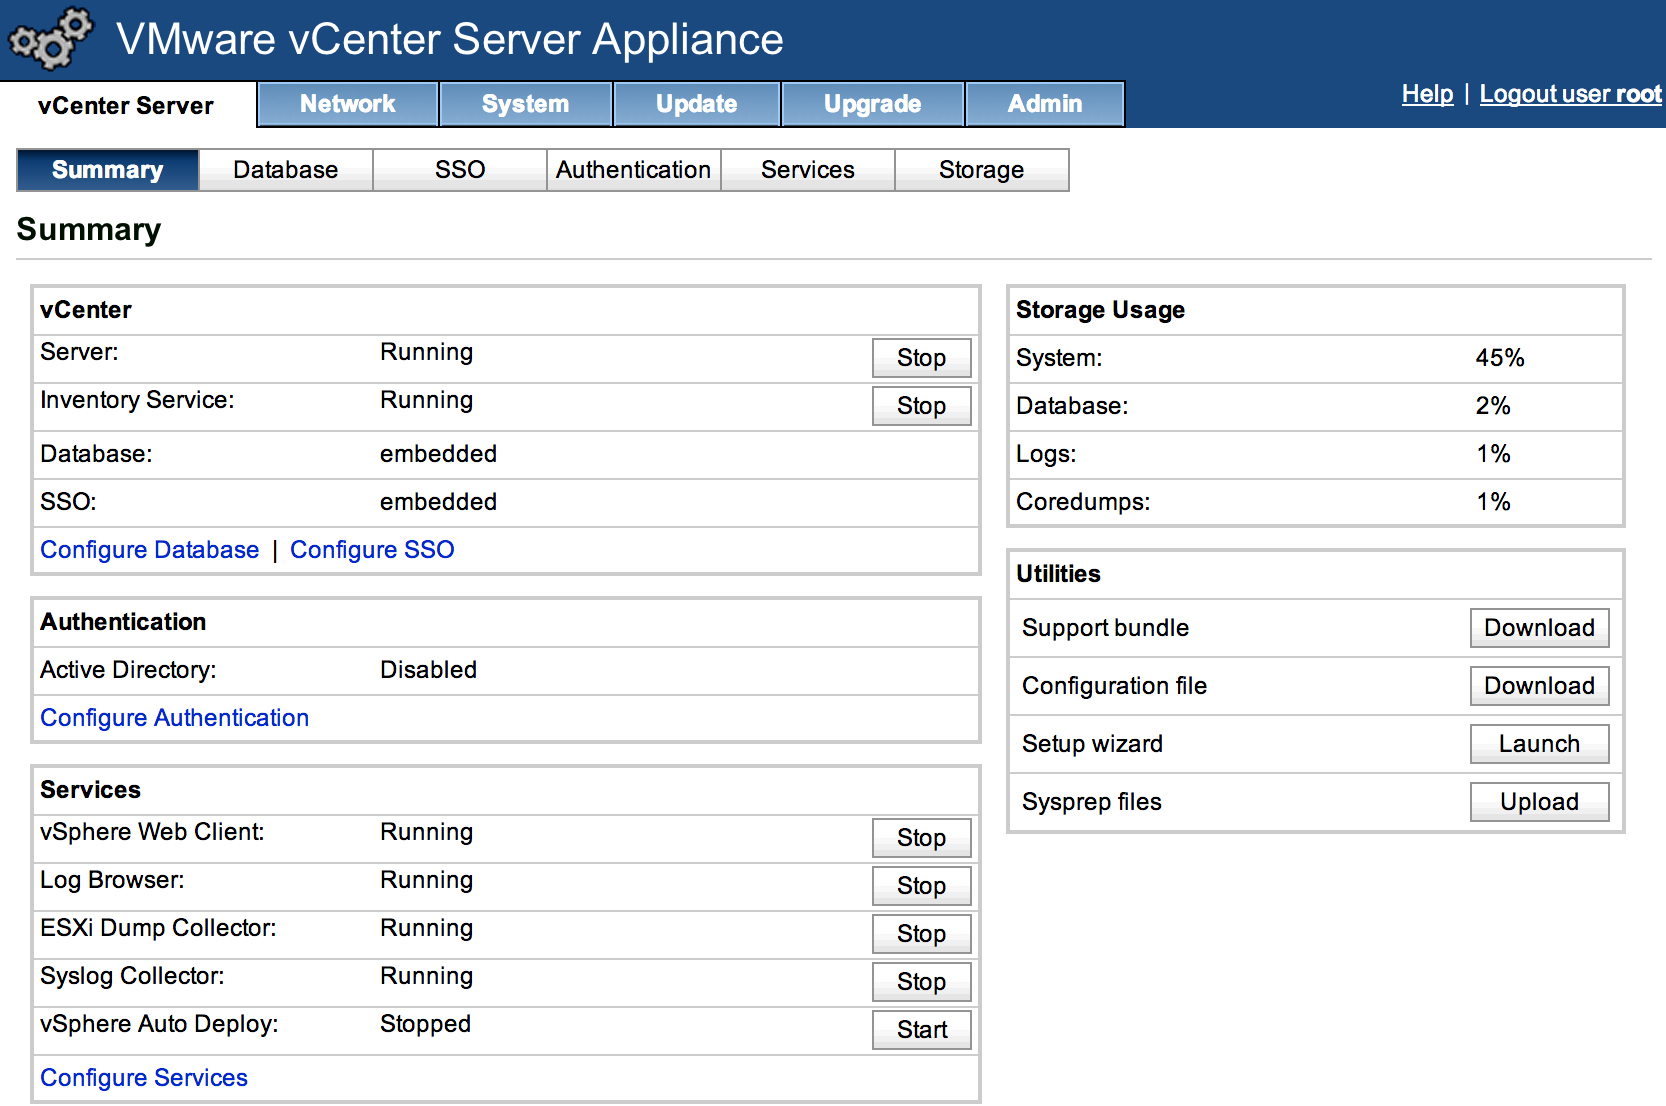 |
Figure 4. Connecting and configuring the vCSA. (Click image to view larger version.) |
5. Add Your ESXi Host to the vCSA
Now that vCSA is configured, point your Web browser to it with the same URL but with the port, like this: https://10.0.1.62:9943. (It's also accessible by going to the IP address or name of the vCSA server.) Log in with the default username and password (which you need to change) and you are now ready to mange hosts and virtual machines.
The first thing you will likely do is to go into the vCenter Hosts and Clusters inventory tree and opt to Add Create a New Virtual Datacenter. Next, you'll Add a New Host.
Obviously, there is a lot more to configuring and using vCSA than this, but this article gives you a jumpstart on vCSA deployment and tells you what you need to know. I am really impressed with it.
About the Author
David Davis is a well-known virtualization and cloud computing expert, author, speaker, and analyst. David’s library of popular video training courses can be found at Pluralsight.com. To contact David about his speaking schedule and his latest project, go to VirtualizationSoftware.com.