How To Enable IntelliCache on Citrix XenServer and XenDesktop
IntelliCache is a Citrix XenServer technology that was developed to ease the I/O traffic that VDI environments place on shared storage. It is used in conjunction with XenDesktop Machine Creation Services (MCS).
In a nutshell, IntelliCache caches blocks of data accessed from shared storage locally. For example, if your master Windows 7 image resides in shared storage, the first VM that launches on a particular host will get its bits from that shared storage. At that point IntelliCache kicks in and saves those blocks; for Windows 7, IntelliCache will reserve about 200MB. The subsequent VMs that launch on this host will no longer need to connect to shared storage; instead, the VMs will get their bits from the locally cached copy, and so on.
As new blocks are accessed, they are accessed once from shared storage then cached locally -- as you can see, Intellicache can substantially reduce the I/O load of shared storage.
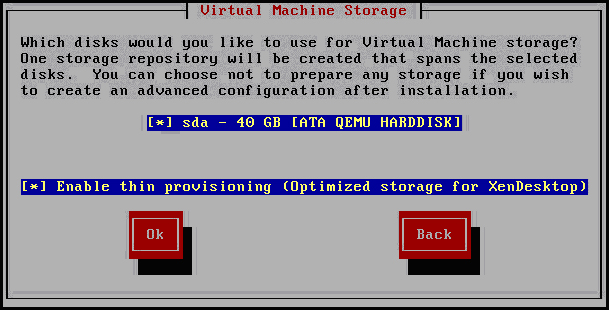
Enabling IntelliCache involves configuration on the XenServer side and on the XenDesktop side. Let's start with XenServer. First, you need to be on XenServer 5.6 service pack 2 or newer. During installation of XenServer, select "Enable thin provisioning (Optimized storage for XenDesktop)"; see Fig. 1. This option will change the local storage repository type from LVM to EXT3.
 |
|
Figure 1. Enabling IntelliCache during XenServer installation. (Click image to view larger version.) |
Now for those of you that want to configure an existing XenServer to use IntelliCache, beware that doing so will completely destroy the local storage repository and any virtual machines on it. Remember, you are converting from LVM to EXT3, so all will be lost. I find it easier to reinstall XenServer, but in the event that you can't do that, use the following commands:
localsr='xe sr-list type=lvm host=<hostname> params=uuid --minimal'
echo localsr=$localsr
pbd='xe pbd-list sr-uuid=$localsr params=uuid --minimal'
echo pbd=$pbd
xe pbd-unplug uuid=$pbd
xe pbd-destroy uuid=$pbd
xe sr-forget uuid=$localsr
sed -i "s/'lvm'/'ext'/" /etc/firstboot.d/data/default-storage.conf
rm -f /etc/firstboot.d/state/10-prepare-storage
rm -f /etc/firstboot.d/state/15-set-default-storage
service firstboot start
xe sr-list type=ext
To enable local caching, enter these commands:
xe host-disable host=<hostname>
localsr='xe sr-list type=ext host=<hostname> params=uuid --minimal'
xe host-enable-local-storage-caching host=<hostname> sr-uuid=$localsr
xe host-enable host=<hostname>
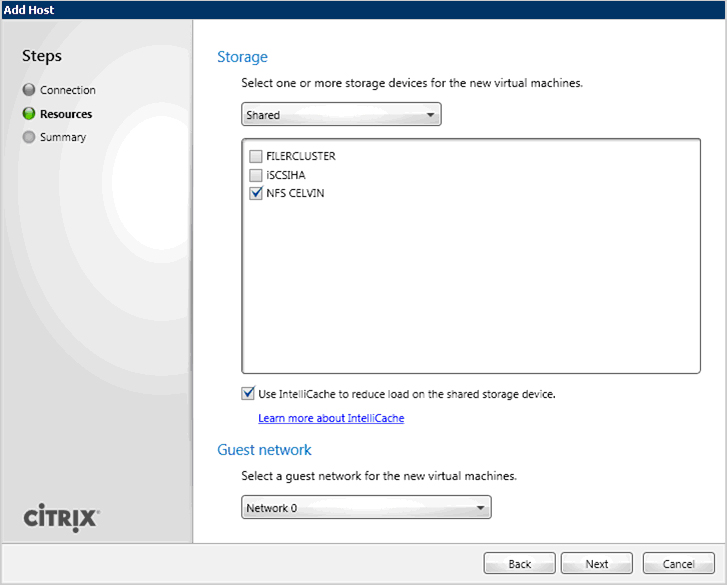
On the XenDesktop side, make sure you are using XenDesktop 5 service pack 1 or newer. You will then need to configure the XenDesktop controller to point to the XenServer host, and during that configuration you will be prompted to select your storage devices. Make your selections and then check the "Use IntelliCache to reduce load on the shared storage device” box (see Fig. 2).
 |
|
Figure 2. Configuring XenDesktop for IntelliCache. (Click image to view larger version.) |
Enabling IntelliCache is fairly straight forward. If you are using XenServer and MCS on the XenDesktop side, then I strongly recommend that you test, validate and then use IntelliCache in your environment.
Posted by Elias Khnaser on 06/20/2012 at 12:49 PM