How To Guy
Using vSphere 6 for VSAN and SSD Conversions
The newest version of VMware's flagship promises easier virtual HDD conversions. James puts that promise to the test.
About six months ago, in a previous Virtualization Review article, I provided a solution for converting a VMware virtual disk into a virtual SSD (Solid State Drive) by means of the VMware ESXi command line (esxicli).
Now VMware has released vSphere 6, which makes converting a physical or virtual disk into an SSD more user friendly and reliable. vSphere 6's conversion process will convert a physical or virtual HDD into an SSD without having to use esxicli. In addition, Vsphere 6's conversion process allows you to reverse the operation by converting a SSD back into an HDD. (The conversion is only available through the vSphere Web client.)
Since I have a Virtual SAN (VSAN) proof-of-concept project, I wanted to test vSphere 6's disk conversion feature in a nested ESXi infrastructure to see if it actually does what it says.
After building out my infrastructure, I began the vSphere 6 VSAN configuration process. Keep in mind that all my HDDs were virtual, but you can use physical HDDs as well. I created a 20GB HDD and 150GB HDD that were converted to SDDs for this project.
The first step in implementing VSAN is to create the VSAN network that the VMs will utilize. You can add a VSAN network using the Add Networking wizard for each ESXi Host.
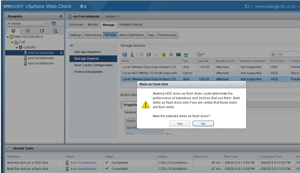
The VSAN network allows the ESXi Hosts to communicate and replicate with each other within its designated cluster. Once the VSAN network was completed, I converted my HDDs into SSDs. Important Note: Please pay special attention to which HDD you convert -- do not convert the local ESXi disk. The warning about disk deterioration should be seriously heeded, as shown in Figure 1.
 [Click on image for larger view.]
Figure 1. Be careful to not convert the local ESXi disk.
Once the critical configuration was completed, I configured a VSAN. Before starting, ensure that you've met VMware's VSAN perquisites.
Configuring VSAN 6:
- Launch and open the vSphere Web client.
- Navigate to the ESXi host clusters' Manage tab.
- Highlight the General menu under the Manage tab and click on the edit button.
- Click the "Turn ON Virtual SAN" check box.
- Choose either a Manual or Automatic disk claiming feature (I chose Manual.)
- Highlight the "Disk Management" menu under the Manage tab.
- Select each individual ESXi host and select the "Create Disk Group" icon (Disk Groups are needed to support VSAN.) A Disk Group must have at least one SSD, and can have up to six HDDs.
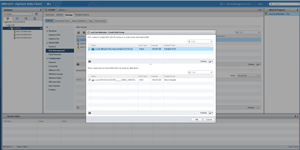
- Follow the wizard, and repeat the procedure for each additional ESXi host, as shown in Figure 2.
 [Click on image for larger view.]
Figure 2. Creating the Disk Group.
- Once you've finished completing the VSAN configuration, highlight the ESXi cluster.
- Highlight the "Related Objects" tab and click on the Datastores menu.
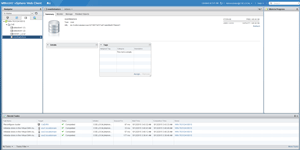
- Your VSAN datastore is available for use (Figure 3). It's important to not utilize the datastore for something else going forward.
 [Click on image for larger view.]
Figure 3. The newly-configured VSAN datastore.
VSAN has a wealth of management, provisioning and hands-on opportunities to implement hypervisor-converged storage for your VMware vSphere infrastructure. If you want to check it out in a non-production environment, consider the VSAN Hands–On Lab.
About the Author
James Brown, vExpert, VCP, MCSE, is a senior virtualization engineer and CEO of Virtuxperts and VMware Users Group Leader in Las Vegas, NV. James' area of expertise includes virtualization, infrastructure and Windows systems.