How-To
Migrating to vCenter Server Appliance 6.5
It can be relatively painless and quick -- with this handy guide to show you the way.
With the release of vSphere 6.5, the vCenter Server Appliance (VCSA) is on par with the Windows vCenter Server, and so I chose to migrate my existing Windows based vCenter Server to it. VCSA has been around for few years and uses Linux as the base operating system to run vCenter Server, which greatly simplifies its maintenance as well as reduces the cost since a Windows license is not required for the base OS. Migrating my existing Windows based vCenter Server to VCSA was a relatively quick and simple process that took less than an hour to complete. Here's my step-by-step process.
Stage 1: Installation
I downloaded the "VMware-VCSA-all-6.5.0-4602587" ISO from VMware, and placed it on the Windows system I was using to run vCenter Server. I mounted it by double-clicking the ISO image.
Next I started the migration assistant by double-clicking "VMware-Migration-Assistant.exe," which can be found on the mounted ISO image in the migration-assistant directory.
A console window then appeared and asked me for the vCenter Server password. Once I entered the password, the system did a few pre-checks and then waited for me to start the VCSA installer.
After seeing the "Waiting for migration to start..." message in the migration assistant console, I started the VCSA Installer. The VCSA installer (installer.exe) can be found in the "vcsa-ui-installer\win32" folder of the ISO image.
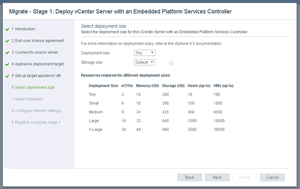
The installer gives four different options for installation: Install, Upgrade, Migrate and Restore. As I was going from a Windows based vCenter server, I choose to migrate. The wizard queried me to accept the EULA, enter the IP address, and provide the authentication credentials of my existing vCenter server. It then queried me for the IP address and authentication credentials of the ESXi host or vCenter Server that would be hosting the VCSA. The wizard then prompted me to provide a name and password for the appliance. The wizard lets you choose between five different sizes of deployments, from Tiny to X-Large (Figure 1). I chose Tiny, as this option would let me manage 10 hosts and 100 virtual machines (VMs).
 [Click on image for larger view.]
Figure 1. vCenter Server Appliance deployment sizes.
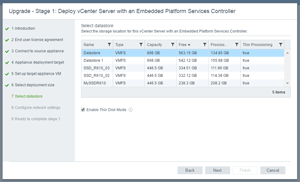
The wizard then allowed me to select the datastore and whether or not to use thin provisioning (Figure 2).
 [Click on image for larger view.]
Figure 2. VCSA datastore selection.
The final information required is the temporary networking settings. After that I pressed "Finished," beginning the process of migrating the vCenter Server from my Windows system to a VCSA.
During the first stage of deployment, a progress bar kept me updated on its progress until it had completed. During the deployment process, a VM gets created, RPMs get installed, and storage gets created. It took about 20 minutes for Stage 1 to complete on my system.
Stage 2: Data Transfer
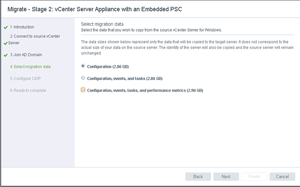
After Stage 1 had completed, I clicked "Continue" and the Stage 2 Wizard initiated. During Stage 2, I needed to provide authentication credentials to my Active Directory domain, select the data I wanted to transfer over (Figure 3), select whether or not I wanted to join the customer experience improvement program, and acknowledge that I backed up the existing vCenter Server.
 [Click on image for larger view.]
Figure 3. Choosing data for migration.
During Stage 2, data gets transferred from the existing vCenter server, the new vCenter Server services get started up, the existing vCenter server gets shut down, and the new VCSA gets the IP address of the old vCenter Server. It took a little more than 40 minutes for Stage 2 to complete. After I clicked "Close," a Web browser appeared that connected me to my VCSA and let me select which client to use to connect to my VCSA.
Two Clients
vSphere 6.5 includes two Web clients: the vSphere Web Client and the vSphere Client. The native or C# client isn't shipped with vSphere 6.5. The new vSphere Client is based on HTML5, and doesn't have all the functions of the older, Flash-based vSphere Web client. VMware has indicated that the vSphere Client will eventually replace the vSphere Web client.
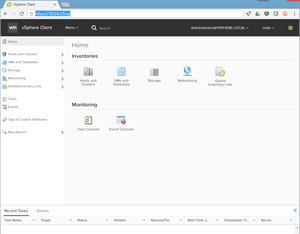
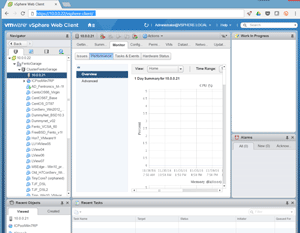
To attach to the new vSphere client (Figure 4), append "ui" to the IP address of a vCenter Server; to use the vSphere Web client, append "vsphere-client" to its IP address (Figure 5).
 [Click on image for larger view.]
Figure 4. The vSphere Client.
 [Click on image for larger view.]
Figure 5. The vSphere Web Client.
The new vSphere Client lacks some features needed for the day-to-day management of a vSphere-based datacenter, but it did seem more responsive and the layout was more intuitive than the old vSphere Web client. The lack of feature completeness in the vSphere client is a temporary drawback, and VMware will make it feature complete over time. A link to the features not supported with the new vSphere client can be found here.
Setting the Timeout Value
As I'll be connecting to my VCSA from a secure location, I decided to change the timeout value of the vSphere Web client. VMware has a KnowledgeBase article on setting the timeout for the VCSA, but it hasn't been updated for VCSA 6.5. Here's what I did to change the timeout value to 240 minutes.
- Use SSH to connect to the VCSA as root. Type in "shell" to get shell access to the VCSA shell.
- Next, edit the "/etc/vmware/vsphere-client/webclient.properties" file and change "session.timeout = 240 (this value is in the number of minutes before timeout, to disable timeout change this value to 0).
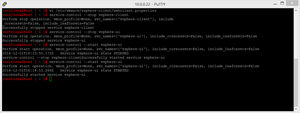
- Restart the Web client service (this is missing from the KB article mentioned earlier) using these commands (Figure 6):
service-control --stop vsphere-client
service-control --stop vsphere-ui
service-control --start vsphere-client
service-control --start vsphere-ui
 [Click on image for larger view.]
Figure 6. Restarting the Web clients.
A Pain-Free, 60-Minute Migration
I've been wanting to get off Windows as my vCenter Server platform for quite some time, to free up its Windows license and ease the maintenance of keeping it up and running. With the migration tool, I was able to migrate to a VCSA in under an hour. The process was painless and my migration went through without a hiccup.
About the Author
Tom Fenton has a wealth of hands-on IT experience gained over the past 30 years in a variety of technologies, with the past 20 years focusing on virtualization and storage. He previously worked as a Technical Marketing Manager for ControlUp. He also previously worked at VMware in Staff and Senior level positions. He has also worked as a Senior Validation Engineer with The Taneja Group, where he headed the Validation Service Lab and was instrumental in starting up its vSphere Virtual Volumes practice. He's on X @vDoppler.