How-To
How To Install and Use PowerShell and PowerCLI on Linux
PowerShell isn't only for Windows anymore.
PowerShell is a scripting language and an automation and configuration management framework built on the Microsoft .NET Framework. PowerShell is installed by default on Windows Server 2016 and Windows 10, and can also be installed on many other Windows platforms. In 2016, Microsoft open-sourced PowerShell by releasing Linux and macOS installers for the scripting language.
PowerCLI is a PowerShell interface developed by VMware. It's designed to manage vSphere. When Microsoft open-sourced PowerShell, the company truly made it a cross-platform scripting language. Moreover, shortly after PowerShell was open-sourced, VMware labs released the PowerCLI Core Fling, which enables PowerCLI scripts to run on Linux and macOS, as well as Windows systems running PowerShell.
In this article, I'll demonstrate how to install and configure PowerShell and PowerCLI by using either GitHub as the repository or apt-get on a Linux system.
The Base Virtual Machine
The system on which I installed PowerShell/PowerCLI was an Ubuntu 16.04 2vCPU, 4GB virtual machine (VM) with a 50GB virtual disk, running on a Dell PowerEdge R610. The only applications installed, other than the basic Ubuntu server package, were openssh-server and Lynx (a command-line browser). These two programs were installed on the Ubuntu by running:
apt-get install lynx

apt-get install  openssh-server
I completed the installation, configuration, and running of PowerShell and PowerCLI in the bash shell as root by running:
sudo bash
Installing from GitHub
Because PowerShell was initially released on GitHub, I'll first walk through how I installed it using the PowerShell GitHub repository.
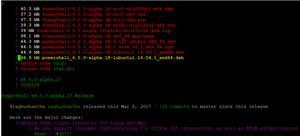
I used Lynx to find and download the package to install PowerShell on Ubuntu 16.04 at the PowerShell for Linux project's page on GitHub (Figure 1). I started Lynx, which was pointed to the PowerShell GitHub repository, by running:
lynx https://github.com/PowerShell/PowerShell/releases/
 [Click on image for larger view.]
Figure 1. Downloading PowerShell from GitHub.
I downloaded the latest PowerShell installation package for Ubuntu 16.04 (powershell_6.0.0-alpha.18-1ubuntu1.16.04.1_amd64.deb). I then installed it, updated the apt-get index, and installed the PowerShell dependences by running these three commands:
dpkg -i powershell_6.0.0-alpha*deb

apt-get update

apt-get install –f
(Note that the first command will produce errors that can be ignored, as the next two commands will automatically take care of the error issues).
Installing and Using apt-get
In February 2017, Microsoft made packages available that allowed PowerShell to be installed from packages. Because many people prefer to use a package management tool such as apt-get for installation, I'll detail the steps I took to install PowerShell on Ubuntu using apt-get.
However, as a precaution, you should use either the GitHub method outlined above or the method below, but not both of them.
First, I imported the public repository GPG keys:
curl  https://packages.microsoft.com/keys/microsoft.asc > MS.key

apt-key add MS.key
Next, I registered the Microsoft repository with apt:
curl https://packages.microsoft.com/config/ubuntu/16.04/prod.list | sudo tee /etc/apt/sources.list.d/microsoft.list
Then I updated apt-get:
sudo apt-get update
Finally, I installed PowerShell:
sudo apt-get install -y powershell
Using the PowerShell Command Line
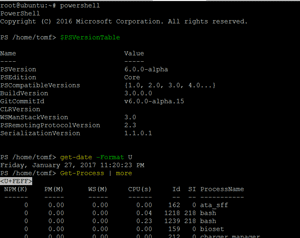
After installing PowerShell, I was able to run PowerShell commands from the command line (
Figure 2). To confirm that PowerShell was operational, I entered some PowerShell commands:
$PSVersionTable

Get-Date –Format U

Update-help

Get-help

Help get-service

Update-help

Get-Process

get-help  Get-Process –examples

get-help Get-Date  -detailed

exit
 [Click on image for larger view.]
Figure 2. The PowerShell command line.
Installing PowerCLI on Linux
After installing PowerShell and verifying that it was working, I installed the PowerCLI Core Fling. I used Lynx to locate and download the correct PowerCLI file for my Linux distribution. I then created the directory into which to install the PowerCLI file, moved the file to that directory, installed unzip, unzipped the file and unzipped two files that were zipped inside the zip file. Here are the commands:
lynx https://labs.vmware.com/flings/powercli-core

mkdir -p ~/.local/share/powershell/Modules

cp PowerCLI_Core.zip  ~/.local/share/powershell/Modules

cd   ~/.local/share/powershell/Modules

apt-get install  unzip

unzip  PowerCLI_Core.zip

unzip  PowerCLI.ViCore.zip

unzip  PowerCLI.Vds.zip
 [Click on image for larger view.]
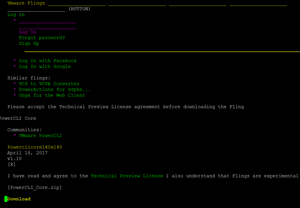
Figure 3. Downloading PowerCLI.
After installing the PowerCLI files (Figure 3), it's necessary for PowerShell to have the PowerCLI modules imported into it. PowerShell also needs to be told to ignore certificate problems from vSphere. Do it like this:
powershell

Get-Module  -ListAvailable PowerCLI* | Import-Module

Set-PowerCLIConfiguration  -InvalidCertificateAction Ignore
I then ran a basic PowerCLI command to ensure that PowerCLI was working, then exited out of PowerShell:
Get-VICommand

Exit
Using PowerCLI
Once I had both PowerShell and PowerCLI installed, I created and ran a simple PowerShell script (PCL_Test.ps1) to test it:
Get-Module  -ListAvailable PowerCLI* | Import-Module

Connect-VIServer  -Server 10.0.0.99

Get-VMHost

Get-VM | Select  Name,VMHost, PowerState, MemoryGB

Get-VM | Select  Name, @{N="IP Address";E={@($_.guest.IPAddress[0])}}

$VMs = Get-VM |  Where-Object { $_.PowerState -ne "PoweredOff" -and  $_.Guest.GuestFamily -ne "WindowsGuest" }

$VMs.guest |  Select-Object VM,OSFullName,IPAddress
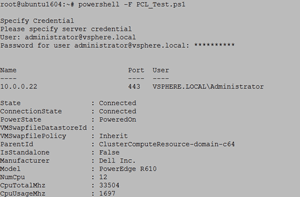
The start of the output of the script PCL_Test.ps1 can be seen in Figure 4.
 [Click on image for larger view.]
Figure 4. PowerCLI output.
Power In Your Hands
PowerCLI is a tool that should be in every vSphere user's toolkit. Now that PowerCLI runs on Linux, even the most Linux-centric users can use PowerCLI to help manage and monitor their vSphere environment.
About the Author
Tom Fenton has a wealth of hands-on IT experience gained over the past 30 years in a variety of technologies, with the past 20 years focusing on virtualization and storage. He previously worked as a Technical Marketing Manager for ControlUp. He also previously worked at VMware in Staff and Senior level positions. He has also worked as a Senior Validation Engineer with The Taneja Group, where he headed the Validation Service Lab and was instrumental in starting up its vSphere Virtual Volumes practice. He's on X @vDoppler.