How-To
Building a Directory Service in AWS, Part 2: Setting Up a Cloud-Native Environment
After explaining the four different types of directory services that you can natively create in AWS, Brien Posey shows you what's involved in setting up a cloud-native Microsoft Active Directory environment.
In the first part of this blog series, I spent a lot of time talking about the four different types of directory services that you can natively create in AWS. Now I want to move forward by showing you what's involved in setting up a cloud-native Microsoft Active Directory environment.
To get started, you will need to choose the Directory Services option from the list of services (it's in the Security, Identity and Compliance section), and then choose the AWS Managed Microsoft AD option shown in Figure 1.
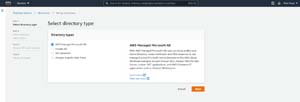 [Click on image for larger view.] Figure 1: Choose the AWS Managed Microsoft AD option.
Click Next, and you will be taken to the Directory information screen, shown in Figure 2. This screen asks you a lot of the same types of questions that you would encounter if you were setting up Active Directory natively on a Windows server. That isn't a coincidence. Amazon is using Windows Server on the back end. However, because the Active Directory is being created as a managed service, the domain controllers do not show up in EC2.
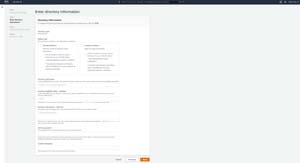 [Click on image for larger view.] Figure 2: This is where you will provide the basic information for your Active Directory environment.
The first thing that you will have to do is choose whether you want to base the Active Directory on Windows Server Standard Edition or on Enterprise Edition. The two are billed at different rates, but support organizations of differing sizes. Standard Edition allows for 1 GB of storage for directory objects, and is optimized for about 30,000 objects. The base price for a Standard Edition deployment is about $86.40 per month, which includes two domain controllers. Additional domain controllers cost about $43.20 per month.
In contrast, Enterprise Edition allows for up to 17 GB of storage and is optimized for 500,000 objects. Like Standard Edition, Enterprise Edition includes two domain controllers. The base price for an Enterprise Edition deployment is about $288 per month, with additional domain controllers costing about $144 per month.
Once you have chosen which Windows Server edition you want to use, the next piece of information that you will need to provide is the fully qualified domain name of the Active Directory domain that you want to create. It is worth noting that this domain name is only resolvable within the confines of a VPC, so you don't actually have to own the domain name that you use.
In addition to entering a fully qualified domain name, you will also have to enter a NetBIOS name. The NetBIOS name is kind of like a shorter version of the fully qualified domain name. Typically the NetBIOS name is the same as the fully qualified domain name, minus the root level domain. If for example, you are creating a domain named PoseyLab.com then PoseyLab.com would be the fully qualified domain name, and the NetBIOS name would simply be PoseyLab.
The next bit of information that you will need to enter is a description of the directory. The description is optional, but as a best practice you should always create a detailed description for any object that you create in the AWS cloud.
Finally, enter and confirm the admin password that you want to use with your new Active Directory domain, and then click Next.
At this point, you will be taken to the screen shown in Figure 3. Here you will need to choose the VPC within which you wish to create the Active Directory environment. Although not technically required, you also have the option of choosing up to two subnets within the VPC. In most cases, you can simply set the Subnet fields to No Preference.
 [Click on image for larger view.] Figure 3: You will need to pick the VPC and subnets that you want to use.
Click Next, and you will be taken to the Review and Create screen, which you can see in Figure 4. It's important to take a moment and review your settings before continuing because you won't have the option of changing these settings later on. If you later discover that some of these settings need to be changed, you will need to delete and recreate the directory.
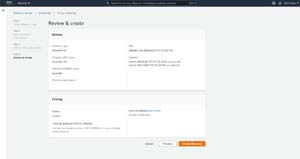 [Click on image for larger view.] Figure 4: Be sure to review your settings before creating the new directory service.
Once you have verified all of your Active Directory settings, click the Create Directory button. When the process completes, you will see your newly created directory service listed on the Directory Service dashboard, as shown in Figure 5.
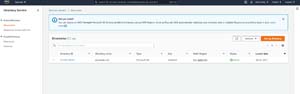 [Click on image for larger view.] Figure 5: The new Active Directory environment has been created.
About the Author
Brien Posey is a 22-time Microsoft MVP with decades of IT experience. As a freelance writer, Posey has written thousands of articles and contributed to several dozen books on a wide variety of IT topics. Prior to going freelance, Posey was a CIO for a national chain of hospitals and health care facilities. He has also served as a network administrator for some of the country's largest insurance companies and for the Department of Defense at Fort Knox. In addition to his continued work in IT, Posey has spent the last several years actively training as a commercial scientist-astronaut candidate in preparation to fly on a mission to study polar mesospheric clouds from space. You can follow his spaceflight training on his Web site.