How-To
Using Oracle Cloud, Part 1: The 'Always Free' Offering
To get a feel for the Oracle Cloud, Tom Fenton shows how easy it is to sign up for and create a web site on an x86 VM and a desktop on an Arm VM, here using the "Always Free" option.
Despite the fact that Oracle isn't the most well-known public cloud provider, a fair number of Fortune 500 companies and government agencies depend on Oracle Cloud to run their day-to-day operations. Some of Oracle's notable accounts include Mazda, Zoom and even the famed Slurpee slinger, 7-Eleven. A few months ago, Oracle came onto my radar with their release of ARM-based virtual machines (VMs).
Oracle Cloud supports both large cloud environments for enterprises and much smaller cloud environments for individuals or businesses that only need a few VMs. They offer many of the services as the big three cloud providers (AWS, Azure and GCP), with the addition of many Oracles-specific services -- including databases, observability & management products, load balancers, virtual cloud network (VCN) flow logs, as well as VMs -- and at a cost that Oracle claims to be competitive with these other providers.
To show off their cloud services and entice developers and students, Oracle has an "Always Free" tier of service. Yes, you will need a credit card to sign up for this service, but the company promises that it will never be charged.
For this series of articles, I will look at how easy it is to sign up for and create VMs on, Oracle Cloud. To do this, I will attempt to create a web site on an x86 VM and a desktop on an Arm VM, which will give me an opportunity get a feel for the cloud.
Below is a list of some of the services that are offered on the Oracle Cloud Always Free tier:
- 2 AMD-based Compute VMs with 1/8 OCPU and 1 GB memory each
- An OCPU = 2 vCPUs
- 4 Arm-based Ampere A1 cores and 24 GB of memory usable as one VM or up to 4 VMs
- Ampere A1 Compute instances are disabled when your trial ends and then deleted (terminated) after 30 days, unless you upgrade to a paid account. To continue using Always Free Arm-based compute instances as an Always Free user, you must delete your existing Ampere A1 Compute instances and create new Ampere A1 Compute instances.
- 2 Block Volumes Storage (200 GB total)
- 10 GB Object Storage
- 10 GB Archive Storage
- Outbound Data Transfer: 10 TB per month
- Unlimited Inbound Data Transfers
- Site-to-Site VPN: 50 IPsec connections
Signing Up for Oracle's "Always Free" Service
As mentioned, despite being free, you will still need to provide Oracle with a credit card number when signing up for the Always Free service. This only makes sense as it prevents people from abusing the service.
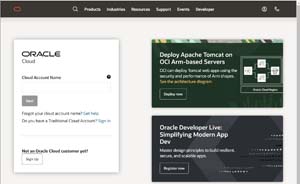
The first thing I needed to do was to create an Oracle Cloud account. To do this, I went to https://cloud.oracle.com/free and clicked Sign Up.
 [Click on image for larger view.]
This brought me to a panel where I needed to provide my country, name and email address. I was then sent an email link to verify my email address. Within a minute, I received the email and followed the verification link. This asked me to set a password, provide a company name and select a home region. I chose US West (San Jose) as I wanted to create an Arm-based VM and I was warned that due to high demand, not all regions had Arm compute capacity.
 [Click on image for larger view.]
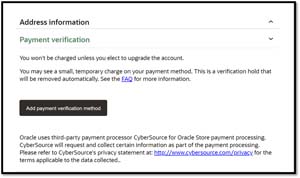
I was then asked for my address, phone number and credit card information. I was informed that the card would NOT be charged unless I upgraded my account.
 [Click on image for larger view.]
Once the card was verified and I agreed to Oracle's terms of service, my free trial was activated. It took less than three minutes to set up my account and start my free trial.
Creating a VM
The first VM I created was a web page using an AMD x86 instance.
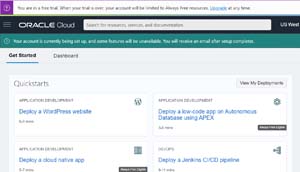
Once I had my account set up, I was redirected to a page that had QuickStart templates. At the top of this page, it states, "When your trial is over, your account will be limited to Always Free resources," and "Your account is currently being set up and some features will be unavailable. You will receive an email after setup completes." Some of the templates were tagged as "Always Free Engine."
 [Click on image for larger view.]
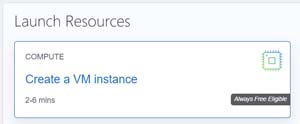
After scrolling down the page, I clicked Create a VM instance.
 [Click on image for larger view.]
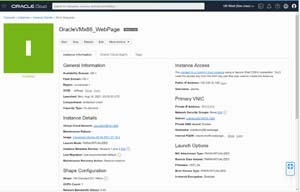
I gave the instance a name (OracleVMx86_WebPage). The default OS was Oracle Linux, but I opted to use Ubuntu 18.04.
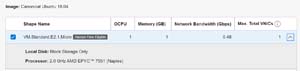
I selected a E2.1.Micro instance shape as it was the only one tagged as Always Free. It came with 1 OCPU, 1 GB of RAM, 0.48Gbps of bandwidth and 1 NIC.
 [Click on image for larger view.]
I opted to have a public IP address assigned to it as I wanted to be able to access the VM externally.
 [Click on image for larger view.]
An SSH key pair was generated and I saved the private key as it is needed to SSH into the VM. If you lose this key, you will NOT be able to access your VM.
I clicked Create and within one minute, the VM was created and running.
 [Click on image for larger view.]
Connecting to the VM
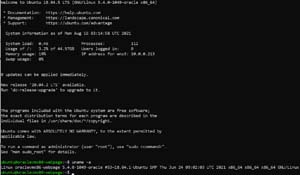
I used Windows 10's built-in SSH client to connect to the VM. I used the default username ubuntu which doesn't have a password as SSH passkey is needed to connect to VM.
I entered ssh [email protected] -i <file with the public key> from my Windows 10 shell.
 [Click on image for larger view.]
From the command line, I entered uname -a to see what version of Ubuntu was running and df -h . to see the size of the root disk. It had a 45G root disk and was using 1.5GB of it.
 [Click on image for larger view.]
Monitoring the VM
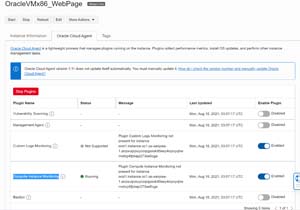
According to the OCS web page, the VM had the option to be monitored using Compute Instance Monitoring, a feature which is enabled by default.
 [Click on image for larger view.]
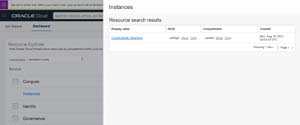
To view the metrics that were collected, I clicked Oracle Cloud in the upper left, then clicked Dashboard -> Instances and selected my instance.
 [Click on image for larger view.]
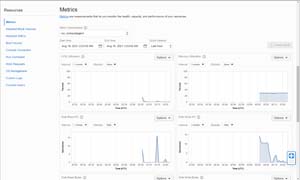
On the web page that was displayed, I scrolled down to the section labeled Metrics and viewed the instance's CPU, disk and network activity.
 [Click on image for larger view.]
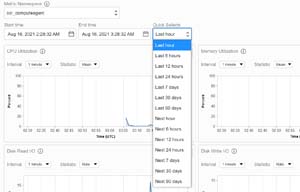
Based on what I could see from the date range drop-down menu, it looks likes the metrics are saved for 90 days.
 [Click on image for larger view.]
Installing a Third-Party Monitoring Tool
The Compute Instance Monitoring report contains information about the VM from the hypervisor's point of view -- not from the running VM's -- so it does not have insight into things like the processes running on the VM.
I was curious to see how hard it would be to install a third-party monitoring tool on a VM running in the Oracle Cloud. As a ControlUp employee, I use Edge DX to get insight about the VMs in my lab and thought it would be interesting to see if it would work in this environment.
Although Edge DX was designed for end-point devices, like VDI clients and laptops and not VMs, I thought this VM would be a good use-case as it does not require the system that it is monitoring to be a member of an Active Directory (AD), or on the corporate network and all of its communication is done over standard outgoing http ports.
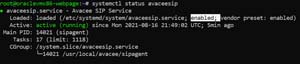
To install Edge DX, I downloaded its install script on the VM using wget and then ran it. It installed without any issues. I verified that the service was installed and would start on reboot by entering systemctl status avaceesip. The enabled field indicated that the service would restart after the system rebooted.
 [Click on image for larger view.]
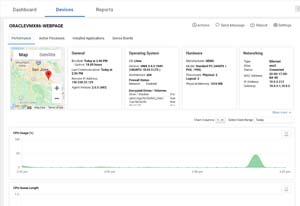
My Edge DX console showed the resource usage (i.e., CPU, memory, etc.) from the view of the VM, not the hypervisor. It also showed that the VM was being hosted a little bit east of San Jose.
 [Click on image for larger view.]
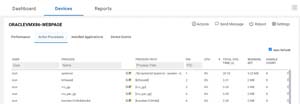
I could see the processes and applications that were running on the VM. This will be handy as I will not need to continually use SSH to connect to the machine to monitor it.
 [Click on image for larger view.]
Summary
I was pleasantly surprised how easy it was to sign up for, create and use an "Always Free" VM on Oracle Cloud -- it took less than 10 minutes to create an account and instantiate a VM. With my limited testing, it looks like the VM is, in fact, a standard Ubuntu VM and I could download and install a proprietary third-party product on it without any issues. In my next article, I will install a web site on the VM.