How-To
Thinking About Migrating Workloads to AWS? Do These Two Things First
The AWS Migration Hub is easily one of the best tools for migrating workloads that are running on premises to the Amazon cloud. The Migration Hub is a collection of tools. You can use these tools to plan your migration and there are also various templates included that you can use to orchestrate the migration process.
As useful as the Migration Hub may be however, it is not without its quirks. In fact, there are two important tasks that I recommend doing before you even begin to experiment with the Migration Hub.
Set Your Home Region
The first of these tasks involves setting your home region. Admittedly, this one sounds a little bit strange, but there is a reason why I am mentioning it.
When you first create an AWS account, you are asked to choose your preferred region. Based on my experience, your selection normally has little to no impact on what you can do within the AWS cloud. When using the Migration Hub however, your home region matters.
Let me give you a personal example of why this matters. Many years ago, not long after AWS was first brought online, an editor that I worked with on a regular basis called me and explained that they had asked another author to write an article on AWS, but the author had failed to deliver. The piece was meant for a printed publication and the print deadline was the next day. Given the urgency of the situation, I hastily set up an AWS account and wrote the requested content. This is actually the same account that I am using today (about 15 years later).
The problem was that on the day when I received the phone call from the panicked editor, I was in Redmond, Wash., attending a Microsoft event. As such, when I set up my AWS account, it defaulted to one of the west coast regions (at least, I think that's what happened). However, I actually live on the East Coast.
Normally, this discrepancy doesn't matter. You can create AWS resources within any region that you like. It doesn't matter what your home region is set to. If you are going to be performing a migration however, your home region does matter -- a lot.
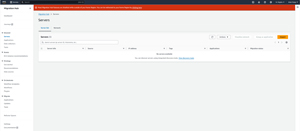
When you attempt to perform certain actions within the Migration Hub (such as migrating a VMware virtual machine), you will see a prompt asking you to switch to your home region, unless of course you are already in your home region. You can see what this prompt looks like in Figure 1. If you choose to ignore this prompt, you will receive an error message like the one shown in Figure 2, telling you that most Migration Hub features are disabled outside of your home region.
 [Click on image for larger view.] Figure 1: AWS prompts you to switch to your home region.
 [Click on image for larger view.] Figure 2: Most migration hub features are disabled when you are working outside of your home region.
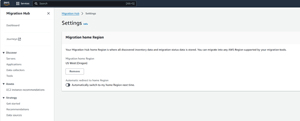
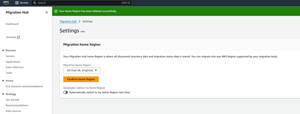
You can change your home region from within the Migration Hub. To do so, click on Settings and then click the Remove button, shown in Figure 3, to remove the current home region. When prompted, be sure to confirm the removal. Now, just select and confirm a new home region, as shown in Figure 4.
 [Click on image for larger view.] Figure 3: Click Remove to remove your home region.
 [Click on image for larger view.] Figure 4: Select and confirm a new home region.
Create a Builder ID
The other task that I recommend performing prior to doing any work within the Migration Hub is to create a Builder ID. A Builder ID is separate from your normal AWS account. As its name suggests, a Builder ID is a special purpose account that is generally used for development projects. Services such as Amazon CodeCatalyst and Amazon Q Developer make use of a Builder ID. This Builder ID does not replace your AWS account, but rather acts as a complement to that account.
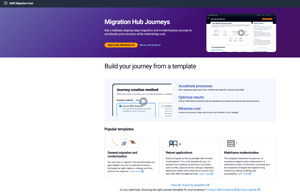
At any rate, the AWS Migration Hub features an area called Migration Hub Journeys. A Migration Hub Journey is essentially just an area that is dedicated to a particular migration project. This is where you can access various journey templates and formulate a step by step guide to completing your migration project. As you can see in Figure 5 however, you cannot use Migration Hub Journeys unless you first sign in with a Builder ID.
 [Click on image for larger view.] Figure 5: You will need to sign in with a Builder ID before you will be able to access the Migration Hub Journeys.
Creating a Builder ID is free, just as setting up an AWS account is free. You are only charged for the resources that you consume. To create an AWS Builder ID, go here and click on the AWS Builder ID Profile link. From there, you will be prompted to enter your email address, followed by your name. Once you have done that, you will receive a confirmation email message. Complete the confirmation process and then provide a password. At that point, the new Builder ID is ready to use.
About the Author
Brien Posey is a 22-time Microsoft MVP with decades of IT experience. As a freelance writer, Posey has written thousands of articles and contributed to several dozen books on a wide variety of IT topics. Prior to going freelance, Posey was a CIO for a national chain of hospitals and health care facilities. He has also served as a network administrator for some of the country's largest insurance companies and for the Department of Defense at Fort Knox. In addition to his continued work in IT, Posey has spent the last several years actively training as a commercial scientist-astronaut candidate in preparation to fly on a mission to study polar mesospheric clouds from space. You can follow his spaceflight training on his Web site.