How-To
How To Create a Linux Instant Clone for VMware Horizon
Tom Fenton walks through upgrading a VMware Horizon environment, installing a Linux desktop, configuring a Linux guest for instant clones and deploying instant clone desktops.
The latest release of VMware Horizon (7.4) supports instant clone technology for Linux desktops. This is significant progress, because although VMware Horizon has supported instant clone technology for a few years now, its compatibility has been limited to Windows 7 and Windows 10 desktops -- until now. There are many benefits to using instant clone technology on Linux desktops, including faster deployments, ease of scalability, and more efficient system maintenance. For more information on the power of instant clone technology, be sure to read my previous articles here, here and here.
In this article, I'll walk you through upgrading a VMware Horizon 7.3 environment to VMware Horizon 7.4, installing a Linux desktop, configuring a Linux guest for instant clones and deploying instant clone desktops.
Requirements for Linux Instant Clone Desktops
The release notes for VMware Horizon 7.4 lays out the following requirements for Linux instant clones:
- View 7.4 Connection Server
- VMware Horizon 7.4 Agent for Linux
- Ubuntu 14.04 or 16.04 Desktop
- PowerBroker Identity Services Open (PBISO) v8.5.6 or later for Active Directory integration
Overview
Here's a high-level view of the steps I'll be taking to create a Linux-based instant clone desktop:
- Update VMware Horizon from 7.3 to 7.4
- Create Ubuntu 16.04 desktop
- Configure Linux desktop
a) Install VMware Tools (OVT) and package dependences
b) Install VMware Horizon Linux 7.4 Agent
- Add Linux desktop to Active Directory domain
a) Install PBIS Open 8.5 or later
b) Add desktop to domain
- Create instant clone master image
- Create Linux desktop instant clone pool with the following attributes:
a) Automated desktop pool
b) Floating user assignment
Upgrading to VMware Horizon 7.4 from VMware Horizon 7.3
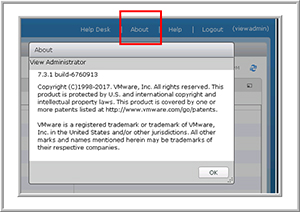
Upgrading a VMware Horizon View Connection Server from version 7.3 to 7.4 can be accomplished within the Connection Server itself. Before updating to version 7.4, I first verified the version of my existing Connection Server by going to the Horizon Administrator and clicking About, which confirmed that I was indeed currently running a 7.3 Connection Server (Figure 1).
 [Click on image for larger view.]
Figure 1. Using the VMware Horizon Administrator to verify the version of my existing Connection Server.
[Click on image for larger view.]
Figure 1. Using the VMware Horizon Administrator to verify the version of my existing Connection Server.
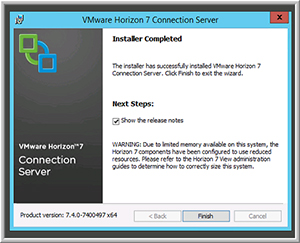
Next, I downloaded the VMware Horizon 7.4 View Connection Server installation file from VMware to my Connection Server. I double-clicked the installation file, accepted all the license agreements and, in less than two minutes, I was presented with a panel that indicated VMware Horizon 7.4 was successfully installed (Figure 2). When I went back to the VMware Horizon Administrator and clicked About, it indicated that I was now running VMware Horizon 7.4.
 [Click on image for larger view.]
Figure 2. Installing VMware Horizon 7.4.
[Click on image for larger view.]
Figure 2. Installing VMware Horizon 7.4.
Creating a Linux Horizon Desktop
Installing Ubuntu 16.04 as a virtual machine (VM) on ESXi is a relatively simple process, but it does have a few gotchas. I'll be modifying the Ubuntu 16.4.3 VM that I built in a previous article for the Linux Horizon desktop system in this article.
Linux Instant Clones: Updating and Installing Dependencies
I updated my Linux software and installed vm-tools and gnome using the following commands:
apt upgrade
apt install libglade2-0 openssh-server python-dbus python-gobject open-vm-tools-desktop gnome-session-flashback
I then I rebooted the system and logged back in.
Linux Instant Clones: Installing VMware Horizon Agent
I downloaded the VMware Horizon 7.4 Linux agent to the Linux Desktop, moved to it to the /tmp directory, and extracted and installed it using the following commands:
mv VMware-horizonagent-linux-x86_64-7.4.0-*.tar.gz to /tmp
cd /tmp
tar – xvf  VMware-horizonagent-linux-x86_64-7.4.0-*.tar.gz
cd VMware-horizonagent-linux-x86_64-7.4.0*
./install_viewagent.sh -A yes
Once again, I rebooted the system and logged back in.
Linux Instant Clones: Installing and Configuring PBIS
After the Horizon Linux agent was installed, I then installed the PBIS and configured my Linux desktop to be part of my domain (fentronics.local) by entering the following:
wget https://github.com/BeyondTrust/pbis-open/releases/download/8.5.7/pbis-open-8.5.7.385.linux.x86_64.deb.sh
chmod 777 pbis-open-8.5.7.385.linux.x86_64.deb.sh
./pbis-open-8.5.7.385.linux.x86_64.deb.sh
Next, I installed and configured PBIS to access my Active Directory by inputting:
/opt/pbis/bin/domainjoin-cli join fentronics.local administrator
/opt/pbis/bin/config UserDomainPrefix fentronics
/opt/pbis/bin/config AssumeDefaultDomain true
/opt/pbis/bin/config LoginShellTemplate /bin/bash
/opt/pbis/bin/config HomeDirTemplate %H/%U
I also needed to edit the following files to change some variables within them:
/etc/pam.d/common-session
  session [success=ok default=ignore]     pam_lsass.so
/usr/share/lightdm/lightdm.conf.d/50-unity-greeter.conf
  allow-guest=false
  greeter-show-manual-login=true
/etc/vmware/viewagent-custom.conf
  SSODesktopType=UseGnomeFlashback
After rebooting the system and logging back in again, I verified that the PBIS was configured correctly by issuing the following commands:
pbis status
/opt/pbis/bin/lwsm list
Once I was satisfied that PBIS was working correctly, I checked to see if I could log in to my Linux desktop as an active directory user by entering the following command:
su ViewUserA@fentronics
I was able to log in and PBIS created a home directory for the user in /home/fentronics/viewusera. After I was satisfied that PBIS was able to log in an AD user to the Linux desktop, I shut down the Linux desktop.
Creating a Manual Desktop Pool for a Linux Desktop
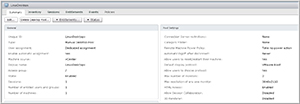
I used the vSphere client to clone the Linux desktop to a VM called MPLD01. After the desktop was cloned, I powered it on and created a manual pool called LinuxDesktops (Figure 3).
 [Click on image for larger view.]
Figure 3. Linux manual desktop pool.
[Click on image for larger view.]
Figure 3. Linux manual desktop pool.
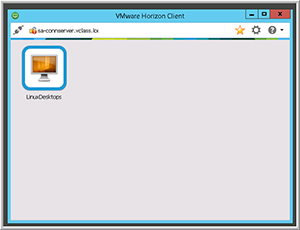
Once the pool was created, I was able to use the VMware Horizon client (Figure 4) to access the desktop.
 [Click on image for larger view.]
Figure 4. Using the VMware Horizon client to access the Linux desktop.
[Click on image for larger view.]
Figure 4. Using the VMware Horizon client to access the Linux desktop.
Creating a Linux Instant Clone Pool
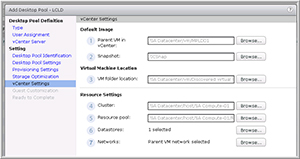
After I created a manual desktop pool, I cloned another Linux desktop called MPLD01 and took a snapshot of it called ICSnap. Once the snapshot was finished, I used the VMware Horizon Administrator to create an automated, floating instant clone pool that used my Linux desktop as the parent VM (Figure 5).
 [Click on image for larger view.]
Figure 5. The Linux instant clone parent virtual machine.
[Click on image for larger view.]
Figure 5. The Linux instant clone parent virtual machine.
It took about 10 minutes for VMware Horizon to configure and create my first pool of Linux instant clones before I could use the VMware Horizon client to connect to a desktop within the pool (Figure 6).
 [Click on image for larger view.]
Figure 6. The instant clone Linux desktop pool.
[Click on image for larger view.]
Figure 6. The instant clone Linux desktop pool.
After VMware Horizon had finished building this first pool of initial instant clones, however, it took just a matter of seconds for it to create additional instant clone desktops.
Wrapping Up
Although it took me a little time to figure out how to create a Linux desktop that would work with instant clones, the desktop I created worked as expected and I could spawn additional desktops in a matter of seconds.
Linux desktops do have a place in the workplace; in fact, I wrote an article about it. Furthermore, with the advent of the instant clone technology capability, I strongly believe they will continue becoming more prevalent in the future.
About the Author
Tom Fenton has a wealth of hands-on IT experience gained over the past 30 years in a variety of technologies, with the past 20 years focusing on virtualization and storage. He previously worked as a Technical Marketing Manager for ControlUp. He also previously worked at VMware in Staff and Senior level positions. He has also worked as a Senior Validation Engineer with The Taneja Group, where he headed the Validation Service Lab and was instrumental in starting up its vSphere Virtual Volumes practice. He's on X @vDoppler.