How-To
How Do Amazon Speech Recognition Capabilities Stack Up?
Amazon Transcribe is used to create a written transcript of audio or video files that you upload.
As someone who's been writing professionally since the mid-90s, I've spent quite a bit of time using speech recognition software. I first became interested in speech recognition more than 20 years ago, when an injury made it difficult to type. As you can imagine, the speech recognition software that was available back then left a lot to be desired. Today, however, I use Dragon Naturally Speaking on a regular basis (and have for many years), and tend to get really good results with it.
For a long time, Dragon was the only realistic option for computer-based speech recognition. More recently, however, other vendors have jumped into the speech recognition game. Microsoft, for example, includes a Dictate icon on the Word 2016 toolbar. Amazon has also gotten into the speech recognition business, and offers a service called Amazon Transcribe that's available through Amazon Web Services (AWS).
Now before I go on, I need to point out that Amazon Transcribe isn't designed to be used as a dictation tool. For example, I'm not using Amazon Transcribe to write this article. Instead, Amazon Transcribe is used to create a written transcript of audio or video files that you upload. Amazon envisions this service being used to create closed captioning for video files, or as a tool for making audio and video assets more easily searchable.
Like most of the other services that are available through AWS, Amazon charges for the service based on your usage. But what makes the billing for Amazon Transcribe somewhat unique is that Amazon uses per-second billing, with a 15-second minimum (although the first hour of transcription in each monthly cycle is free for the first year). The current rate is $0.0004 per second, which works out to $1.44 per hour.
To use Amazon Transcribe, you need to create a transcription job. Thankfully, this is a really simple process. The first step in doing so is to enter a name for the job that you're creating, as shown in Figure 1. This name can be anything (up to 200 characters long). It serves only to help you identify the job.
 [Click on image for larger view.]
Figure 1. You begin by entering a job name.
[Click on image for larger view.]
Figure 1. You begin by entering a job name.
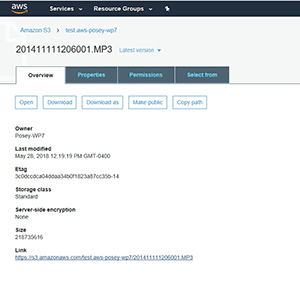
The next thing that you have to do is provide a path to the audio or video file that you want to transcribe. Because you can't specify a local path, the file will have to exist somewhere on the Internet. In most cases, you'll probably want to upload the file to Amazon S3 before you get started with creating the transcription job. As you can see in Figure 2, there's a URL (listed in the Link section) that's associated with files that you upload to Amazon S3.
 [Click on image for larger view.]
Figure 2. Take note of the URL associated with the file that you plan to transcribe.
[Click on image for larger view.]
Figure 2. Take note of the URL associated with the file that you plan to transcribe.
After that, you'll need to specify the language of the recording that you're transcribing, and the audio file format. You can also enter the audio sampling rate if you know it, but the sampling rate isn't required.
A couple of the more unique capabilities found in Amazon Transcribe include the ability to use a custom vocabulary, and the ability to identify individual speakers. Providing a custom vocabulary is useful if the recording contains a lot of words that are unlikely to be in the dictionary. Speaker identification can be useful if several different people are talking in the recording.
When you complete the form, click on the Create button to create the transcription job.
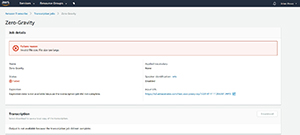
For the purposes of this article, I uploaded an audio recording from a microgravity flight on the "Vomit Comet." The recording was high fidelity, but contained audio from several people, as well as a little bit of aircraft noise, so I was curious to see how Amazon Transcribe would do. Unfortunately, this particular transcription job failed, as you can see in Figure 3. The reason for the failure was that my MP3 file was too large (it was about 208MB).
 [Click on image for larger view.]
Figure 3. The job failed because my file was too large.
[Click on image for larger view.]
Figure 3. The job failed because my file was too large.
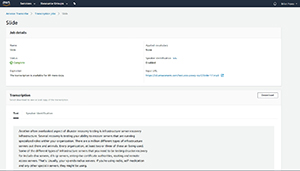
Because my first job failed, I decided to try the process again, using a much smaller file. This time, the job completed successfully, but I'll let you decide for yourself what to make of the results. You can see the output in Figure 4.
 [Click on image for larger view.]
Figure 4. The transcription output from Amazon Transcribe.
[Click on image for larger view.]
Figure 4. The transcription output from Amazon Transcribe.
About the Author
Brien Posey is a 22-time Microsoft MVP with decades of IT experience. As a freelance writer, Posey has written thousands of articles and contributed to several dozen books on a wide variety of IT topics. Prior to going freelance, Posey was a CIO for a national chain of hospitals and health care facilities. He has also served as a network administrator for some of the country's largest insurance companies and for the Department of Defense at Fort Knox. In addition to his continued work in IT, Posey has spent the last several years actively training as a commercial scientist-astronaut candidate in preparation to fly on a mission to study polar mesospheric clouds from space. You can follow his spaceflight training on his Web site.