How-To
Hard Drive Performance Testing: NVMe vs. SATA SSD
Tom Fenton uses various Linux tools to test the performance of NVMe and SATA SSD hard drives.
NVMe drives are no longer considered exotic hardware; they are now a given in any production environment in which virtualization or container technology is used, and their price has dropped dramatically over the last year. I thought it would be interesting to show you some of the tools I have used on my Linux systems to examine, manage, and test the performance of NVMe and a SATA SSD drives. Although the system that I used for demonstration in this article is a small node in my home lab running Ubuntu, the tools and procedures that I describe below will work on other versions of Linux and on other hardware.
The System
The system that I used for this article is an Intel NUC 8i7BEH, a mid-priced, small form factor kit system that does not come with any storage, RAM, or an operating system. Similar to other NUC computers, the 8i7BEH is very small (4.5" x 4.5" x 2"). This system is powered by a quad-core Intel Core i7-8559U processor and has an integrated Iris Plus Graphics 655 GPU. Its connectivity is very good as it has six USB ports, built-in WiFi, and an RJ45 port -- but most importantly, it has a slot for a 2.5 SATA SSD and an M.2 NVMe drive.
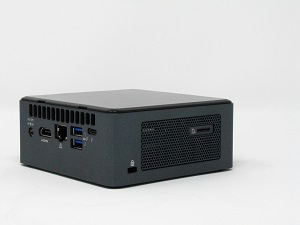 [Click on image for larger view.] Figure 1: 8i7BEH NUC
After checking the Intel Product Compatibility Tool, I populated the system with two 16-GB SO-DIMMs for a total of 32GB of RAM (Corsair 32GB Kit 16GBx2 DDR4 2400 MT/S), and installed a 1.8 TB SATA SSD (KIOXIA KHK61RSE) and a 256 GB NVMe device (KXG50ZNV256G Toshiba 256gb M.2 2280 Pci Express 3.0 X4 NVMe). The drives are pictured here:
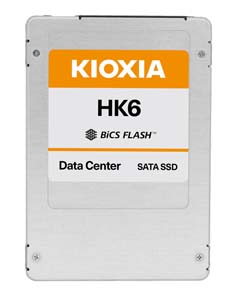 [Click on image for larger view.] KIOXIA KHK61RSE
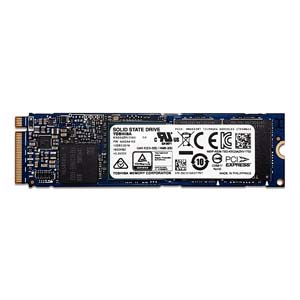 [Click on image for larger view.] KXG50ZNV256G Toshiba 256gb M.2 2280 Pci Express 3.0 X4 NVMe
Though you may not be familiar with the name KIOXIA, their devices will be familiar to you as they were previously under the name Toshiba Memory until October of 2019 when Toshiba made the announcement for the name change. The name KIOXIA is a combination of the Japanese word kioku meaning "memory" and the Greek word axia meaning "value." Merging "memory" with "value," KIOXIA represents the company's mission to uplift the world with "memory," which forms the foundation of the company's vision.
A block diagram of device shows how the devices are attached to the CPU (Figure 2).
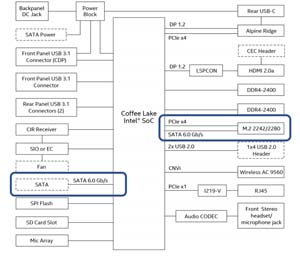 [Click on image for larger view.] Figure 2: Block Diagram
NVMe and SATA SSD Specs
The NVMe drive that I used was a relatively inexpensive consumer device, and the SATA SSD drive was a data center capable device; these devices are indicative of the range and capabilities of what a user might choose to purchase. I purchased the NVMe device online for under $50, while KIOXIA lent me the SATA SSD. Below is a table of specifications for the drives.
|
TYPE
|
SATA SSD
|
NVMe
|
|
Manufacture
|
KIOXIA
|
KIOXIA (Toshiba)
|
|
Model
|
KHK61RSE
|
KXG50ZNV256G
|
|
Form Factor
|
2.5
|
M.2
|
|
Interface
|
SATA III
|
NVMe PCIe
|
|
Capacity
|
1.8 TB
|
256 GB
|
|
Max
Sequential Read
|
550
MB/s
|
2,700 MB/s
|
|
Max
Sequential Write
|
530
MB/s
|
1,050 MB/s
|
Bootup
As I wanted to use the entire SATA SSD and NVMe drives, I created a live (bootable) Ubuntu 19.04 image.
After booting Ubuntu, I noticed that all the tools I wanted to use for this article were not already installed. Because I couldn't install them from the default repositories, I added a secondary repository by entering add-apt-repository http://mirrors.cat.pdx.edu/ubuntu.
I then installed the following packages:
- Net-tools – ifconfig and other networking tools
- Fio – flexible io tester; used to test the performance of the flash devices
- Smartmontools – package that has smartctl and smartd which are used to read and manage the SMART information on devices
- nvme-cli – command-line tools for NVMe devices
I installed these packages by entering apt install <package name>.
Locating Flash Devices
I entered fdisk -l to list the disk on my system; from this list, I located my NVMe device (/dev/nvme0n1) and my SATA SSD (/dev/sda) (Figure 3). The astute observer will notice that these devices have a VMware VMFS partition on them, and this is because they were previously used on an ESXi server and are still being reported as Toshiba rather than KIOXIA.
 [Click on image for larger view.] Figure 3: Device List
I entered hdparm -i /dev/sda to get more information about the SATA SSD (Figure 4).
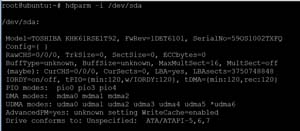 [Click on image for larger view.] Figure 4: SATA SSD Information
I entered nvme list to get information about the NVMe device (Figure 5).
 [Click on image for larger view.] Figure 5: NVMe Device Name
Using SMART Tools
SATA SSD and NVMe have SMART (Self-Monitoring, Analysis and Reporting Technology) capabilities. SMART is a monitoring system used to detect and report various indicators of drive reliability that you can use to anticipate drive failures.
The smartmontools package that I installed previously had two programs that I will be using in my examples below: smartctl and smartd.
I retrieved my NVMe device's log by entering nvme smart-log /dev/nvme0 (Figure 6). This showed me, among other information, that it did not have any critical warnings, that it was not overheating, that it only had three shutdowns, and that it didn't have any media errors.
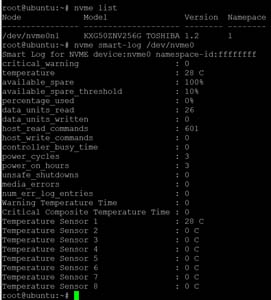 [Click on image for larger view.] Figure 6: NVMe SMART Log
I then retrieved the SMART information on the NVMe and the SATA SSD devices by entering smartctl –info /dev/nvme0 and smartctl –info /dev/sda (Figure 7). This told me the name, model number, and capacity of these drives.
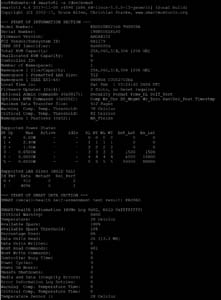 [Click on image for larger view.] Figure 7: SMART Information
To retrieve a list of which SMART capabilities the devices possessed, I entered smartctl --capabilities /dev/sda and smartctl --capabilities /dev/nvme0 (Figure 8).
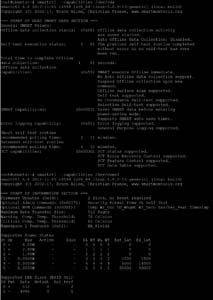 [Click on image for larger view.] Figure 8: SMART Capabilities
You can also see what attributes are available by entering smartctl --attributes /dev/sda and smartctl --attributes /dev/nvme0. As each device has different attributes, you would need to do some interesting coding and parsing to extract that information to use it (Figure 9).
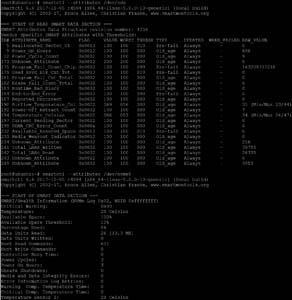 [Click on image for larger view.] Figure 9: SMART Attributes
Conclusion
As our workloads become more and more virtualized and containerized, they will continue to stress our storage resources to unprecedented levels. As such, we need to be able to make sure that our workloads are not hamstrung by poor storage performance, that they are getting the resources that they need, and that those resources are performing to our expectations.
In this article, I showed you some of the tools that I have used to examine SATA SSD and NVMe storage devices. Although these devices are on different ends of the spectrum, with the NVMe device being an inexpensive commodity and the SSD device being designed for the datacenter, both of them reported important information using the same tools and techniques.