How-To
How to Capture HDMI Video Output
Tom Fenton tries out an inexpensive HDMI video capture device that lets him take screenshots regardless of the OS.
I have found screen captures to be essential to the articles that I write, whether I'm describing something complicated or explaining how to do an activity, they allow readers to more easily follow along with what I am describing or seeing on my end.
One of the challenges I've faced, however, is that I am not always able to to capture the screen. For example, getting a screen capture when installing an OS or running a command-line-based system like ESXi or Microsoft's Server Core is difficult. I have tried to take manual photos of screens when screen captures are not possible, but my results are mediocre at best.
Recently I have being using a Dododuck 1080P Capture Card, an inexpensive HDMI video capture device which allows me to take screenshots regardless of the OS. In this article, I will look at this capture device, explain how I set it up, and discuss how it has been working out for me.
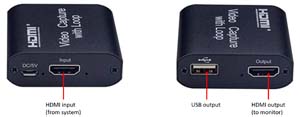
Over the last couple years, I have noticed a plethora of HDMI-to-USB devices entering the market, many of which have been at an attractive price point (many are under $20). These devices have an HDMI input and a USB output. You connect the device via the HDMI port to the physical system that you want to capture and plug a USB cord from the device to another system where you want to view the HDMI output. Although these inexpensive devices do not come with any software, there are a number of free software options available with which to display the HDMI output.
The Dododuck 1080P Capture Card also has an HDMI output port and basically passes the HDMI to a physical monitor as well as the USB port. At $25 on Amazon, it was priced slightly higher than a basic HDMI capture device, but I wanted the ability to use a physical monitor with it at the same time. It also has a DC/5V port but does not specify what it is used for.
 [Click on image for larger view.]
At the time I purchased it, this device had 96 ratings on Amazon with an average rating of 3.5 stars. The company advertises the device as being compatible with Windows and MacOS, and states that it "works with most video capture software, such as for VLC, OBS, Amcap, etc. Wii U, PS4, PS3, Xbox One, Xbox 360, Wii, Nintendo Switch, DVD, camera, ZOSI security." It has a maximum output resolution of 1920x1080@30Hz, and video-output modes of YUV and JPEG.
There were many other devices on Amazon that looked identical to this device and ranged from $22 to $30. I chose this one as it had free next-day delivery with Prime.
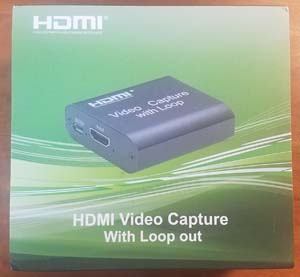
The device came in a 5" x 5" x 2" cardboard box.
 [Click on image for larger view.]
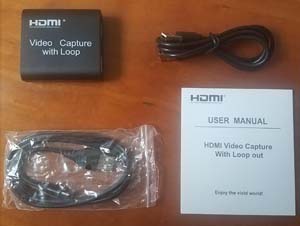
The box contained the device a user's manual and two USB cords. Neither the device nor the box had the manufacturer's name (Dododuck) printed on it.
 [Click on image for larger view.]
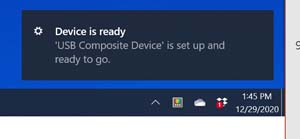
I connected an Intel NUC that was running Windows 10 into the device's HDMI input port, the USB output to my Dell laptop (also running Windows 10), and the HDMI output to a generic 1080P monitor. My laptop automatically detected the device as a "USB Composite Device," and installed the driver for it.
 [Click on image for larger view.]
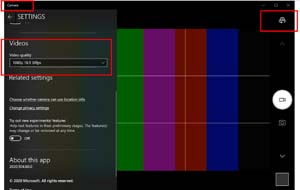
The device is advertised as being compatible with many different software packages. As Windows Camera was already installed on my laptop, I brought it up and cycled through the video sources (by clicking the camera icon in the upper right) until a test pattern appeared. In the app's settings, I noticed that the video quality was set to 1080p 16.9 30fps. I left the 3 x 3 grid enabled to distinguish it from an actual screen.
 [Click on image for larger view.]
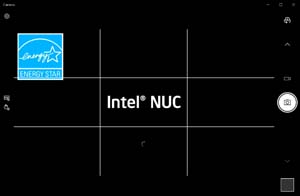
When I booted up the Intel NUC, the bootup screen was displayed.
 [Click on image for larger view.]
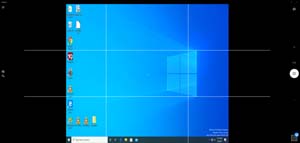
After the system booted, I logged on to Windows.
 [Click on image for larger view.]
The display was viewable but slightly fuzzy.
 [Click on image for larger view.]
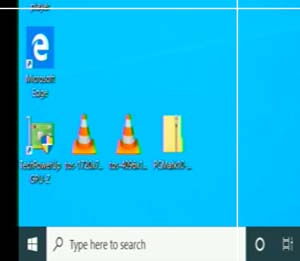
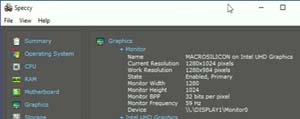
I changed the display to 4K and 1280 x 1024, but the display was still fuzzy. Speccy showed that the monitor was a "MACROSILICON on Intel UHD Graphics."
 [Click on image for larger view.]
I rebooted the system again and began video recording in Windows Camera. While it was booting, when the "Press F2 to Enter BIOS Setup" screen should appear, a test screen was shown instead. I then rebooted the system again, this time continually pressing F2, and was then presented with a very clear BIOS screen.
 [Click on image for larger view.]
I will investigate if there is a way to tweak it to be less fuzzy, but for now this Capture Card will work with what I am using it for: a low-cost way of capturing screens of installs and command-line systems for my articles.
NOTE: Part 2 is now available here.
About the Author
Tom Fenton has a wealth of hands-on IT experience gained over the past 30 years in a variety of technologies, with the past 20 years focusing on virtualization and storage. He previously worked as a Technical Marketing Manager for ControlUp. He also previously worked at VMware in Staff and Senior level positions. He has also worked as a Senior Validation Engineer with The Taneja Group, where he headed the Validation Service Lab and was instrumental in starting up its vSphere Virtual Volumes practice. He's on X @vDoppler.