How-To
How to Capture HDMI Video Output, Part 2: Getting Sharper Images
After some previous experiments, Tom Fenton uses a Newest HDMI Video Capture Card and different software to display the output to see if he can get sharper images.
In a previous article, I discussed how I used an inexpensive ($25) video capture card to capture HDMI output from a physical system (an Intel NUC) and stream it via USB to another system (my laptop). By doing this, I could get screen captures while completing system installs or using systems that do not have a screen capture function (i.e., those that only have command-line output).
The inexpensive device, a Dododuck 1080P Capture Card, worked well for these use cases, but when I tried to use it with graphic output (Windows 10), the display was fuzzy. In this article, I will demonstrate how I used a Newest HDMI Video Capture Card and different software to display the output to see if I can get a sharper image.
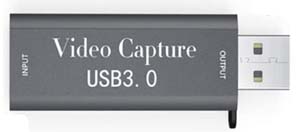
The Dododuck 1080P Capture Card from my previous article not only has an HDMI input and USB output, but also an HDMI output so you can see the output on a physical monitor as well as a virtual device. The Newest HDMI Video Capture Card (sold by Tantrum Tow Ropes) that I will be using in this article does not have HDMI output. Like the other device, it supports multiple OSes, supports an HDMI input max-resolution of 3840x2160@60Hz, and an output max-resolution of 1920x1080@30Hz. The device was $20 on Amazon, and there were similar items listed that appeared to be identical.
The device came in a 5" x 3" x 3/4" cardboard box with user instructions on the back of the package.
The box contained the device and a USB cord. Neither the device nor the box had the manufacturer's name printed on it.
 [Click on image for larger view.]
For my first test, as I did in my previous device, I connected an Intel NUC that was running Windows 10 into the device's HDMI input, and the USB output to my Dell laptop which was also running Windows 10. Unlike the other device, when I plugged in this device, I didn't get a notification on my laptop indicating that the drivers for the device were being installed, which indicted to me that it would use a driver that was already installed.
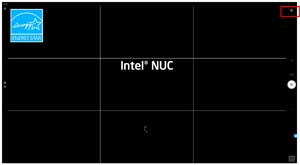
I brought up Windows Camera and cycled through the video sources (by clicking the camera icon in upper right) until the USB video device was shown. I left the 3 x 3 grid on the app to distinguish it from an actual screen. This screen was sharper and clearer.
 [Click on image for larger view.]
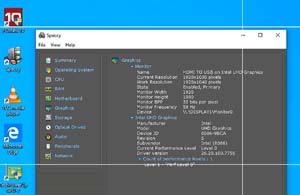
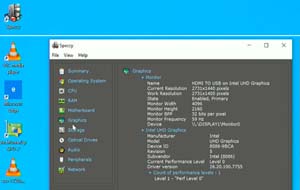
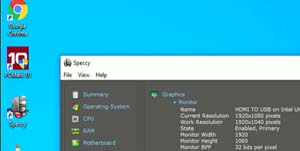
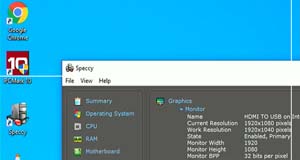
The Windows 10 login screen was far clearer than it was when I used the previous device. After logging in, I also noticed that the fuzziness that I had with the other device was gone. Speccy showed that monitor was an "HDMI TO USB on Intel UHD Graphics," and the resolution was 1920 x 1080.
 [Click on image for larger view.]
When I switched the screen resolution to 4K, the display was a little fuzzy.
 [Click on image for larger view.]
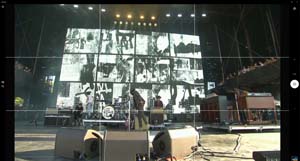
I switched it back to 1920 x 1080 and streamed a YouTube video at 1080P in full-screen mode. The video was clear and displayed without any flicker.
 [Click on image for larger view.]
When I rebooted the system, the screen displayed throughout the reboot without the test pattern showing up like it did with the other device.
Once I had a fuzzy-free display using the Camera app, I wanted to try and use it with other programs.
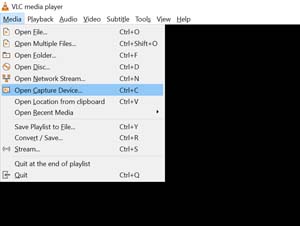
I launched VLC (Version 3.0.11), and selected Open Capture Device from the Media drop-down menu.
 [Click on image for larger view.]
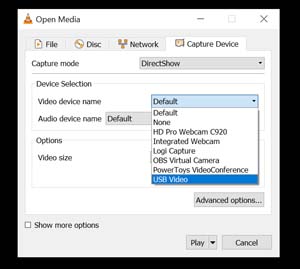
In the Open Media dialog, I selected USB Video from the Video device name drop-down menu, and clicked Play.
 [Click on image for larger view.]
The screen was illegible, and the mouse movements were very jerky.
 [Click on image for larger view.]
I rebooted the system, and the graphics were slightly better, but still unusable. I am a big fan of VLC but didn't want to spend time figuring out why it was displaying a fuzzy screen.
Open Broadcaster Software (OBS) is a free and open-source cross-platform streaming and recording program. It is truly a multiplatform software -- there are currently versions of OBS Studio available for Microsoft Windows, macOS and Linux. OBS supports video capture cards.
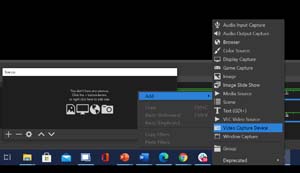
After installing OBS on my laptop, I launched it. I right-clicked in the source area and selected Video Capture Device from the Add drop-down menu.
 [Click on image for larger view.]
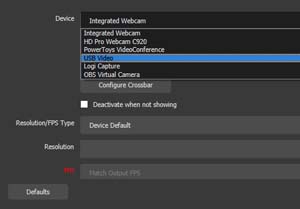
From the Properties dialog, I opened the Device drop-down menu and selected USB Video.
 [Click on image for larger view.]
The output was a bit fuzzy, but still very usable.
 [Click on image for larger view.]
I changed the settings for the video by double-clicking Video Capture Device in the sources area.
 [Click on image for larger view.]
From the Properties dialog, I selected 1920 x 1080 under the Resolution drop-down and 30 under the FPS drop-down, and then clicked OK.
 [Click on image for larger view.]
This made the screen less fuzzy, but still not as clear as when using the Camera app.
 [Click on image for larger view.]
To double-check what I was seeing, I closed OBS and re-opened Camera, where I noticed the display was much sharper.
 [Click on image for larger view.]
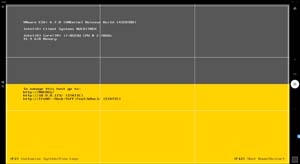
After proving that the device worked with a system running Windows I wanted see if it would work with ESXi systems. I plugged the HDMI cable into an Intel NUC 8 running ESXi 6.7 and then booted up the system. During the boot-up process, the device displayed the screen flawlessly.
 [Click on image for larger view.]
After it booted, the screen was sharp and clear.
 [Click on image for larger view.]
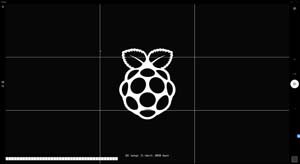
After proving that the device worked with x86 systems, the last test I preformed was using the device with a Raspberry Pi 4. I plugged the HDMI cable into it, and it displayed the splash screen upon boot-up without any issues.
 [Click on image for larger view.]
Once it was fully booted, I saw the ESXi on Arm screen.
 [Click on image for larger view.]
Conclusion
After using two different video capture devices, two different architectures (x86 and Arm), and three different programs (Camera, VLC and OBS), I found that I could display both graphic and command-line displays via HDMI to USB to do screen captures. So far, the best setup I found was the less-expensive capture card (Newest) with the Windows Camera app at 1920 x 1080 30FPS. With a little tinkering, I believe that I should be able to get VLC and OBS to work, which would be good as both programs are multi-platform, whereas Camera is a Windows-only app.
p>
Note: Part 3 has been published
here.