How-To
Running Apps in Docker, Part 4: Deploy Different App Versions with Docker Compose
Tom explains that most multi-tiered apps are dynamic and deployed in multiple locations so their components also will need to be updated.
This is the fourth article in a series on running applications in Docker. In my last article, I used Docker Compose to deploy an application that consisted of a database (PostgreSQL) and a GUI database management interface (pgAdmin). I accomplished this by running a single Docker Compose command against a YAML file. Likewise, I was able to stop the application and remove it using another single Docker command.
Most multi-tiered applications are dynamic and need to be deployed in multiple locations and/or the components of the applications that they are built with will need to be updated. The updates may entail supplying either a patched or new version of the application. In this article, I will walk you through a scenario to show how this is done. No new Docker or PostgreSQL concepts will be introduced, but it will confirm how easy it is to do this.
Deploying Newer Applications
This article is based on the YAML file I created in my last article, but I will be modifying it in this current walkthrough. In the example below, I highlighted in bold the changes that I made to that file.
When I ran the original YAML file, I received a message stating that I was not running the latest version of pgAdmin.
 [Click on image for larger view.]
I ran an older version of it as I knew that it worked without any issues. Below is the YAML file that I used to deploy PostgreSQL and pgAdmin. In this version, I changed image: dpage/pgadmin4:4.18 to image: dpage/pgadmin4:latest.
  version: "3.7"

  services:
    postgresdb:
      image: postgres:12.2
      container_name:  PostgreSQL
      restart: always
      environment:
        POSTGRES_DB: postgres
        POSTGRES_USER: admin
        POSTGRES_PASSWORD: MyPassword
        PGDATA: /var/lib/postgresql/data
      volumes:
        - pgsql-data:/var/lib/postgresql/data
      ports:
        - 5010:5432

    pgadmin:
      image: dpage/pgadmin4:4.18
      container_name:  pgAdmin
      restart: always
      environment:
        PGADMIN_DEFAULT_EMAIL: [email protected]
        PGADMIN_DEFAULT_PASSWORD: MyPassword
        PGADMIN_LISTEN_PORT: 80
      ports:
        - 5011:80
      volumes:
        - pgadmin-data:/var/lib/pgadmin
      links:
        - postgresdb:pgsql-server

  volumes:
    pgsql-data:
    pgadmin-data:
I created a new directory, copied the old docker-compose.yml file to it, edited the file and executed it by entering:
  mkdir pgAdminLatestPostgres122
  mv docker-compose.yml pgAdminLatestPostgres122
  cd pgAdminLatestPostgres122
  docker-compose up -d
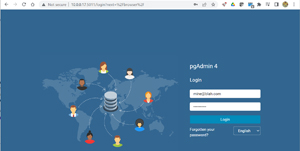
I waited a few minutes to allow the applications to start up and then attached to the GUI interface by entering http://10.0.0.17:5011/ in a web browser. In the login screen, I entered [email protected] and MyPassword. These values are described in the YAML file
 [Click on image for larger view.]
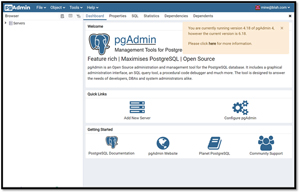
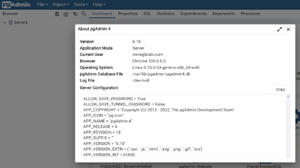
In the next page, I was no longer informed that I was not running the latest version of pgAdmin. I clicked Help > About, which verified that I was now running version 6.18 of the database.
 [Click on image for larger view.]
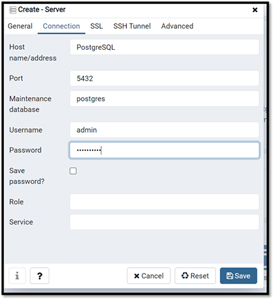
I closed the About screen, clicked the Add New Server icon, and entered the name of my PostgreSQL instance (PostgreSQL), the username (admin), and password (MyPassword).
 [Click on image for larger view.]
I was then presented with a connection to PostgreSQL from pgAdmin GUI. I was able to connect to and work with PostgreSQL without any issues.
Changing the Database
Occasionally, different components in a multi-tiered application need to be changed. By modifying the YAML file, this can be done quickly and efficiently.
I created a new directory and placed this information in the YAML file.
    version: "3.8"

    services:
      mysql:
        image: mysql:8.0
        container_name: MySQL
        restart: always
        cap_add:
          - SYS_NICE
        environment:
          - MYSQL_DATABASE=quotes
          - MYSQL_USER=user01
          - MYSQL_PASSWORD=MyPassword1!
          - MYSQL_ROOT_PASSWORD=MyPassword1!
        volumes:
          - mysql-data:/var/lib/mysql
        ports:
          - 5012:3306

      phpmyadmin:
        image: phpmyadmin:5.2.0
        container_name: PhpMyAdmin
        restart: always
        ports:
          - 5013:80
        environment:
          - PMA_ARBITRARY=1

      volumes:
        mysql-data:
I was able to connect to MySQL using phpMyAdmin with ease.
Docker GUI Interface - Portainer
Portainer is popular GUI application that is used to interact with and manage Docker. It uses a browser as its GUI front-end which allows local and remote users to interact with it. It has different modes that you can use to connect with your Docker environment. It comes in two editions: Community and Business. The Community Edition is free, and the Business Edition, while paid and requires a license key to install it, has more features like role-based access control.
Deploying Portainer
Below is the YAML file that I used to deploy Portainer:
  # docker-compose.yml
  version: '3.9'

  services:
    portainer:
      image: portainer/portainer-ce:latest
      container_name: portainer
      restart: unless-stopped
      security_opt:
        - no-new-privileges:true
      volumes:
        - /etc/localtime:/etc/localtime:ro
        - /var/run/docker.sock:/var/run/docker.sock:ro
        - ./portainer-data:/data
      ports:
        - 9000:9000
I powered up the container with the docker-compose up command by entering:
docker-compose -f docker-composer.yml up -d
I then entered http://10.0.0.17:9000 in my browser and logged in to Portainer.
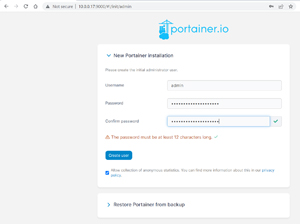 [Click on image for larger view.]
I configured it to use my Docker host machine.
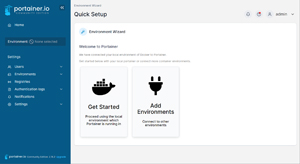 [Click on image for larger view.]
From the GUI, I could see and manage which containers were running.
 [Click on image for larger view.]
I could also find which Docker Compose stacks were running.
 [Click on image for larger view.]
I was likewise able to verify information and manage my images, networks, volumes and so on.
Conclusion
To make changes to a multi-tiered application without the use of Docker would be a multi-step process that would involve setting up multiple physical or virtual machines (VMs) and installing an OS along with the applications on it. By using Docker containers, on the other hand, the process only involves running a couple different commands. With Docker Compose, the environment can be set up executing a single command. Furthermore, a single YAML file can be copied to other environments in other locations and executed to make the exact same environment. This can be used to move a test or development environment to production, deploy additional production environments or to scale out an application.
Over this series of articles, I have walked you through the basics of deploying single and multi-tiered applications using Docker Compose, as well as showed you how to install GUI-based management tools for PostgreSQL and Docker. It is easy to see why Docker has become an integral tool in main production, testing, and development environments. If you have yet to work with it, I strongly suggest that you do so.
About the Author
Tom Fenton has a wealth of hands-on IT experience gained over the past 30 years in a variety of technologies, with the past 20 years focusing on virtualization and storage. He previously worked as a Technical Marketing Manager for ControlUp. He also previously worked at VMware in Staff and Senior level positions. He has also worked as a Senior Validation Engineer with The Taneja Group, where he headed the Validation Service Lab and was instrumental in starting up its vSphere Virtual Volumes practice. He's on X @vDoppler.