Upgrading Free ESXi4 to ESXi5
Upgrading from ESXi 4 to ESXi 5 can be challenging, especially if you're using the free version of the hypervisor. That's because for the free hypervisor, we don't have the access to the more robust vSphere Update Manager (which makes upgrading very easy).
There are a few options to upgrade a free ESXi 4 hypervisor to ESXi 5. These options are spelled out in the vSphere Upgrade Guide. In this post, I'll show one method and I'll mention the other mechanisms. Basically, the options include using vSphere Update Manager (which is available only with vSphere Essentials and higher), performing a scripted upgrade, using vSphere Auto Deploy, using esxicli or using the ESXi 5 CD.
For those who use the free hypervisor, by far the easiest option is the CD one. This is not very scalable, but it is very simple.
What happens is that the install media for ESXi is used to perform an upgrade of the installation and preserve VMFS volumes. While I like the option to preserve the datastores during an installation, I still think it would be a good idea to remove access to any volumes during an upgrade. In the case of a fibre channel SAN, simply disconnect the HBAs. If the storage is iSCSI or NFS, maybe remove the network path during the installation.
Direct Attached Storage can be a bit trickier, especially if the VMFS volume is on the same disk as the ESXi partition scheme.
It goes without saying (but I'm gonna say it anyways) that a good backup of the virtual machines is a good idea, especially if those VMs are on local storage!
Now, the first step is to download ESXi5 and write it to a CD-ROM disk. When booting from the media, the ESXi installation screen will appear. You may have to change the boot options on the system to start with the optical drive, since the local disk may already have a partition on it. The installation wizard for ESXi starts as shown in Fig. 1.
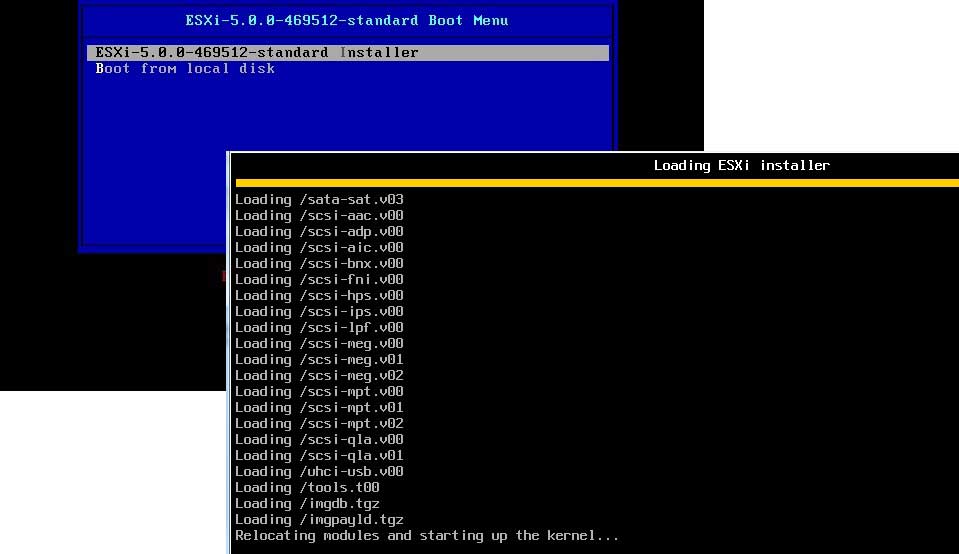 |
Figure 1. The ESXi 5 installation wizard will start from the boot media. (Click image to view larger version.) |
The installation proceeds much like a normal installation, except you'll encounter questions about an existing ESXi installation and VMFS volume. You have the option to migrate the ESXi installation to version 5 and preserve the VMFS datastore (the default), which I recommend.
If you have fully evacuated the host, a clean install just becomes a better idea at that point anyways and the datastore will be rebuilt as VMFS-5. The critical options for upgrading the ESXi host are shown in Fig. 2.
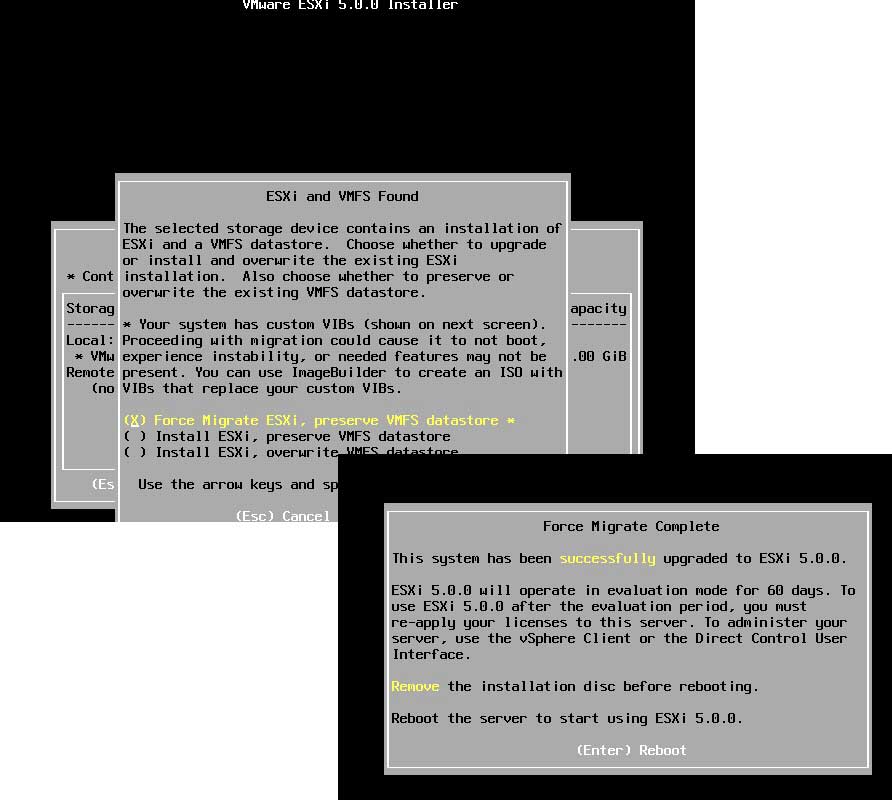 |
Figure 2. Upgrade-specific options are presented during the upgrade process. (Click image to view larger version.) |
It is important to note that rolling back via this method is not supported. This warning is presented during the upgrade process, so make sure that upgrading is the desired action. The upgrade will then proceed on the ESXi 4 host, and make it an ESXi 5 host. You may want to download the vSphere 5 client ahead of time for easy connectivity once the upgrade is completed.
With ESXi 4.1, we lost the ability to do the upgrades via the Windows Host Update Utility, but this process is pretty straightforward for the major updates from ESXi 4 to ESXi 5.
For the free ESXi hypervisor, what tricks have you employed in upgrading? Share your comments here.
Posted by Rick Vanover on 11/07/2011 at 12:48 PM