How To Guy
How To Use Windows 2008 Services for NFS for Your vSphere Lab Shared Storage
Handy solution for consolidating connections to shared storage in a virtualized lab environment.
For a recent project, I built a completely virtualized vSphere lab. I already had to have a Windows 2008 R2 server in the lab for DNS/AD and I was trying to minimize the number of virtual machines in the lab.
When I got to the point of testing vMotion (and then DRS and HA), I added a second ESXi host and required the use of shared storage. I have used numerous shared storage appliances in the past, such as OpenFiler, FreeNAS, Lefthand (now from HP) VSA. I've even used the new VMware VSA. However, all of those solutions require a separate virtual machine, as they are primarily based on Linux and won't run on my Windows 2008 VM. I was reminded of Windows Services for Unix, which includes Services for NFS as a potential solution.
Services for NFS, as the name suggests, is used to integrate Unix and Linux hosts with Windows Servers, allowing those hosts to share files. It can connect the Windows Server to an NFS share (could be another server or a NAS) as a client, but Services for NFS can also make the Windows Server into an NFS server. In other words, it can turn your Windows Server into a NFS Network Attached Storage NAS device.
And what is it that you need for your vSphere lab to try out advanced features like vMotion, DRS, and HA? Answer: a NAS NFS host.
Services for NFS is easily enabled inside Windows Server by adding the File Services Role. Here are the steps to do it
- From your Windows host, run Server Manager.
- Click on Roles and then on Add Role.
- Click to add the File Services Role.
- Under Role Services click to add Services for Network File System. Click Next and Install.
Once installed, there is no need to reboot and you can start sharing folders to VMware ESXi hosts immediately (see Fig. 1).
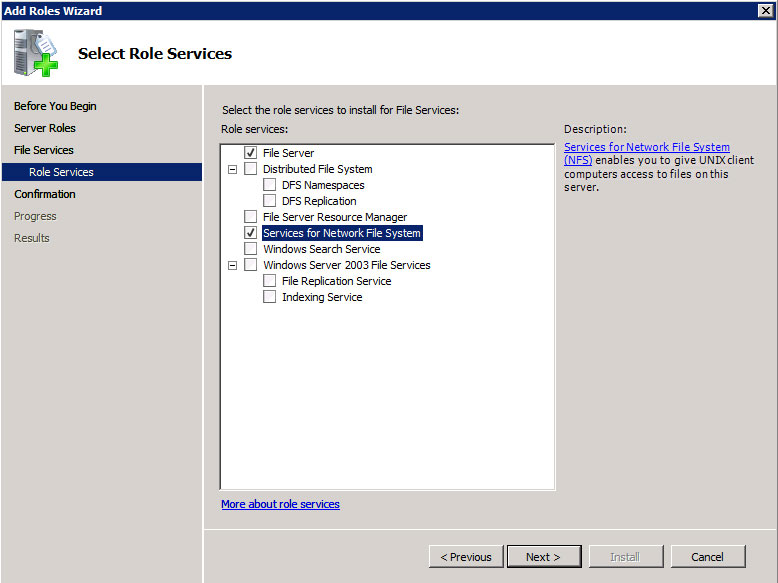 |
Figure 1. Services for NFS is easily enabled inside Windows Server. (Click image to view larger version.) |
You'll want to create a new Windows folder (let's call it "nfs1") and share it using NFS (which has different permissions than Windows). Right-click on that folder and click on Properties. You'll see a new tab called NFS Sharing.
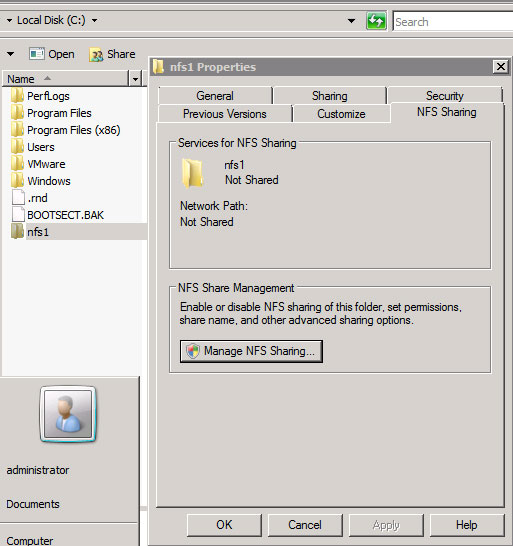 |
Figure 2. NFS Sharing tab. (Click image to view larger version.) |
By default, you'll see that the folder is not shared. To share it, click on Manage NFS Sharing. Check the box to Share this folder (see Fig. 3).
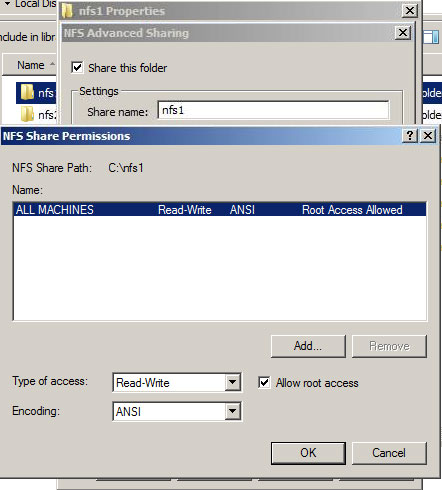 |
Figure 3. Folder isn't shared by default, so you'll have to click on Manage NFS Sharing. (Click image to view larger version.) |
Click on the NFS Share Permissions button and, for the purposes of a lab environment I checked to allow all machines Read-Write and root access. I also checked to "enable unmapped user access." From there, click OK and OK. Then, still on the properties for the folder, give everyone full control in the NTFS permissions.
Note that this virtual NFS NAS is wide-open in terms of security -- in production, this would be a "no-no" but again, you don't want to use this on a production network. I'm sure that you could play with this to lock down security more but, at this point in my testing, I am on a secure network and just want this to work in my lab.
Now, you should be ready to connect your host and put some VMs in the new NFS NAS.
Note that full Services for NFS setup instructions including command-line tools are available from Windows 2008 Services for NFS Step-by-Step Guide.
Side note: I did have trouble getting this to work originally in Windows 2008 Server but there are slightly different options in Windows 2008 Server R2 and it worked fine. So, for this solution to work, I recommend you upgrade to R2.
I won't go into extensive detail on connecting vSphere to a NFS NAS because I am sure that is covered already out on the Web. The simple steps are:
- In the vSphere Client, go to the ESXi host you want to connect and to the Configuration tab, then to Storage.
- Click to Add Storage and add a Network File System.
- Enter the Server name (via IP or DNS name), NFS Share name (on the Properties window of the NFS host, NFS Sharing tab, called "Network Path"), and a new name that you specify for the new NFS datastore.
Fig. 4 shows what it looked like when I added it.
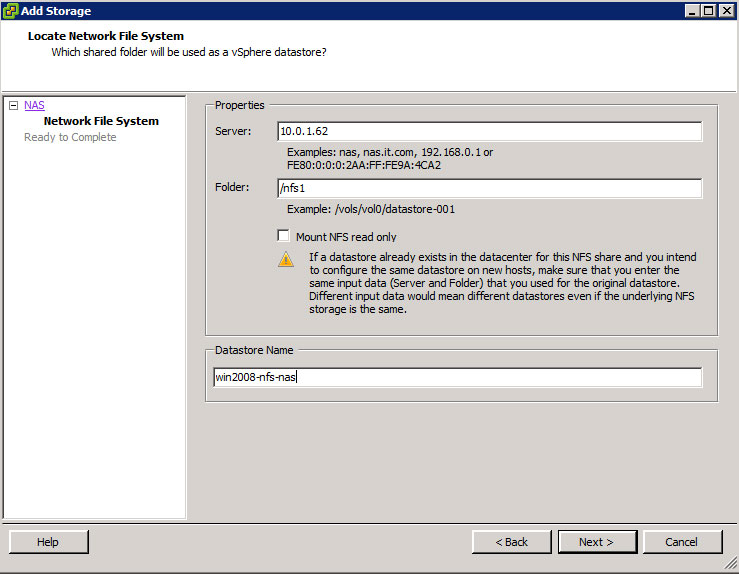 |
Figure 4. Connecting vSphere to NFS NAS. (Click image to view larger version.) |
Once added, I created a couple of other "virtual NFS NAS's" called nfs2 and nfs3. As you can see in Fig. 4, I created a new VM and its now running on one of these virtual NFS datastores, on top of my existing Windows 2008 R2 server. Yes, I did this without ever having to use a virtual storage appliance or buy a hardware-based NAS!
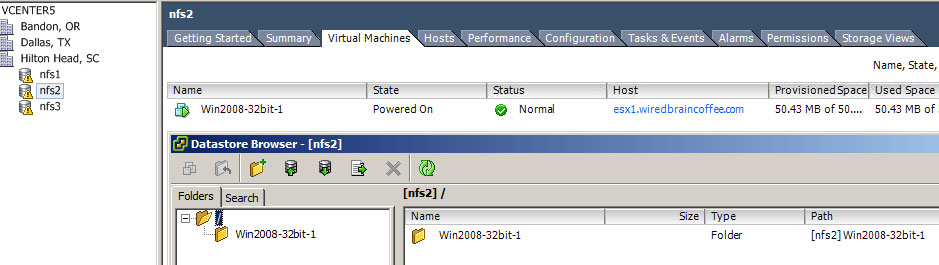 |
Figure 5. Up and running with virtual NFS NAS. (Click image to view larger version.) |
Have you tried this? Or do you have other creative lab solutions? E-mail me at david ((AT)) trainsignal.com and I'd love to hear about them. And thanks for reading!
About the Author
David Davis is a well-known virtualization and cloud computing expert, author, speaker, and analyst. David’s library of popular video training courses can be found at Pluralsight.com. To contact David about his speaking schedule and his latest project, go to VirtualizationSoftware.com.