How-To
Backing Up AWS Resources, Part 2
In order for your backup plan to protect your AWS resources, you have to add those resources to the plan.
In the first article in this series, I showed you how to use Amazon Web Services (AWS) to create a backup plan. Although the backup plan establishes a backup schedule, retention rules and that sort of thing, it doesn't actually protect any of your AWS resources -- at least not yet. In order for your backup plan to protect your AWS resources, you'll have to add those resources to the plan.
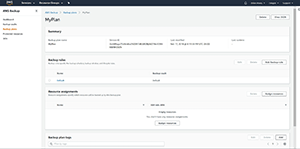
If you look at Figure 1, you can see that I've created an AWS backup plan. It may be a bit unimaginative, but I called the plan MyPlan. Typically in real life, you would create multiple backup plans because your resources likely have differing protective needs. While you could conceivably create a single plan that backs up all of your resources on a frequent basis, such an approach would probably end up being more expensive than creating separate backup plans that are custom tailored to each workload's data protection requirements. For the sake of demonstration, however, a single backup plan will suffice.
 [Click on image for larger view.]
Figure 1. I've created a backup plan named MyPlan.
[Click on image for larger view.]
Figure 1. I've created a backup plan named MyPlan.
As you look at Figure 1, you'll notice the Resource Assignments section. This is where you go to specify which resources should be protected by the backup plan.
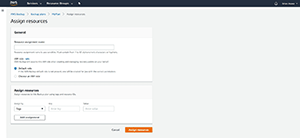
To add a resource to the backup plan, click on the Assign Resources button. When you do, you'll be taken to a screen like the one that's shown in Figure 2.
 [Click on image for larger view.]
Figure 2. This is what the Assign Resources screen looks like.
[Click on image for larger view.]
Figure 2. This is what the Assign Resources screen looks like.
If you have experience working with on-premises backup applications, then you might find that this screen looks completely different from what you were expecting. Normally when you add resources to a backup job, the process involves selecting the individual resources that you want to add. You might, for example, pick the drives, virtual machines or host servers that you wish to include in the backup. This is not at all how AWS Backup works.
The reason why AWS has taken a somewhat unconventional approach to the backup process is presumably because the AWS cloud offers so many different services that could potentially need to be protected. Can you imagine how cluttered the Add Resources screen would be if it listed every AWS service, and every one of your resources within those services? Selecting resources in that way would probably be wildly impractical. Instead, Amazon has based its data protection service around the use of tags.
Tags are more or less ubiquitous across AWS. Most, if not all, of the AWS services support tagging. Therefore, tags provide a widely supported mechanism for identifying which items need to be backed up.
For those who might not be familiar with tagging, tags are really simple to use. Each tag consists of a key/value pair. You can think of the key as being like an attribute category and a value as being the actual attribute. For example, if you were to create a key called Color, then some possible values might be Red, Green or Blue.
When it comes to including resources in your backup plan, you can leverage any of your existing tags, or you can create new tags. You're free to use whatever method works best for your own situation. If you decide to create new tags, then you might consider using a key with a name such as BackupPlan. You could then populate the value with the name of the backup plan you wish to protect for that particular resource.
To put this into prospective, let's pretend that I have an Amazon Elastic Compute Cloud (EC2) virtual machine (VM) instance that I want to protect using the backup plan that I called MyPlan. Protecting that instance is a two-step process. The first step is to assign tags to the VM. I might create a key called BackupPlan and assign it a value of MyPlan. Remember, this first step only tags the VM instance. It doesn't cause the instance to be backed up. To back up the instance, I'd need to go into my AWS Backup Plan (MyPlan) and add the BackupPlan tag and the MyPlan value to the list of resources.
In case you're wondering, tags aren't the only mechanism for controlling what gets backed up. If you look back at Figure 2, you'll notice that the word Tags appears on a dropdown list. The other item that appears on the dropdown is Resource ID. In the AWS cloud, any resource that you create is assigned a Resource ID. Therefore you can backup a specific item by specifying its resource ID. Even so, Resource IDs are long and tedious to type, and using tagging is usually easier.
About the Author
Brien Posey is a 22-time Microsoft MVP with decades of IT experience. As a freelance writer, Posey has written thousands of articles and contributed to several dozen books on a wide variety of IT topics. Prior to going freelance, Posey was a CIO for a national chain of hospitals and health care facilities. He has also served as a network administrator for some of the country's largest insurance companies and for the Department of Defense at Fort Knox. In addition to his continued work in IT, Posey has spent the last several years actively training as a commercial scientist-astronaut candidate in preparation to fly on a mission to study polar mesospheric clouds from space. You can follow his spaceflight training on his Web site.