How-To
Working with Amazon EC2 Launch Templates
One of the things that differentiates cloud-based virtual machines from those running on-premises is that cloud-based VMs often have shorter lifespans. While some cloud-based VMs are inevitably created for long-term use, others exist for only as long as they are needed, and are then quickly deleted in an effort to avoid ongoing costs. This means that admins may find themselves creating new VMs on a very frequent basis.
Amazon provides launch templates as a tool for reducing the administrative effort involved in creating new EC2 instances. These templates allow admins to generate new instances that conform to pre-defined specifications. This not only reduces the workload associated with bulk instance creation, it can also be helpful if an admin needs to ensure that new instances are configured in a consistent way.
To create a launch template, go to the EC2 console, and then click the Launch Templates tab, shown in Figure 1. From there, click the Create Launch Template button. This will take you to the screen shown in Figure 2.
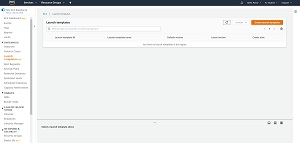 [Click on image for larger view.] Figure 1: This is where you go to create a launch template.
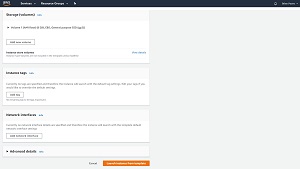
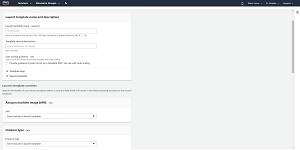 [Click on image for larger view.] Figure 2: These are the fields used to create a launch template.
Creating a launch template is a relatively simple process that has a lot of similarities to the process of creating an EC2 instance. The first thing that you will need to do when creating a template is to provide a name and a description for the template. Although the description is optional, it's always a good idea to document the template's purpose by entering a short description.
After entering the new template's name and description, you will need to select the Amazon Machine Image (AMI) that you want to include in the template, and the instance size that you want to use. For those who may be new to EC2, selecting the AMI is essentially the same as selecting the operating system to install on instances created from the template (although some AMIs include more than just an operating system). The Instance Type lets you choose the instance's hardware allocation.
You can complete the process by populating details such as the key pair and network settings that you want to use. You also have the option of attaching additional network interfaces and storage volumes, as well as applying tags to the instance. When you are done, click the Create Launch Template button at the bottom of the screen to build the launch template. Remember, the launch template is just a template, not an instance. As such, it only takes a second or two to create the template.
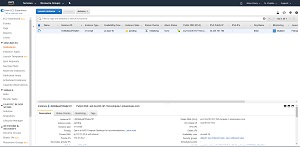
Once the new launch template has been created, it will appear on the Launch Templates tab, as shown in Figure 3.
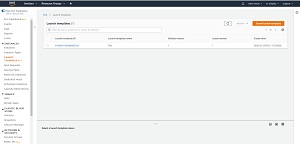 [Click on image for larger view.] Figure 3: The new launch template has been created.
If you want to create an instance from a launch template, click on the template. This will take you into a screen that displays the template's details. Now, simply choose the Launch Instance From Template command from the Actions drop down menu, shown in Figure 4.
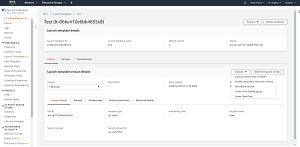 [Click on image for larger view.] Figure 4: Choose the menu option to launch an instance from the template.
At this point, you will be taken to a screen that looks a lot like the one that you used to create the template in the first place. For the most part, you would use this screen to review the new instance's settings. However, there are some configuration options exposed on this screen. For example, you can specify the number of instances that you want to create, add tags to the instances, or attach additional storage volumes. Once you are satisfied with the various configuration options, click on the Launch Instance From Template button, found at the bottom of the screen. You can see this button in Figure 5.
 [Click on image for larger view.] Figure 5: After verifying the instance settings, click the Launch Instance From Template button.
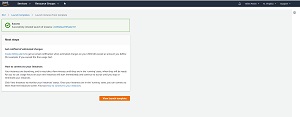
Upon clicking the button, you should see a message like the one shown in Figure 6, indicating that the instance is being launched. Now, just go to the EC2 console's Instances tab, and you should see your instance being provisioned, as shown in Figure 7.
 [Click on image for larger view.] Figure 6: The instance is being created from a template.
 [Click on image for larger view.] Figure 7: The new instance is being provisioned.
If you only set up new EC2 instances on an occasional basis, then it is probably going to be quicker and easier to set those instances up in the usual way, without the aid of a template. However, if you frequently create new instances, or if you require a high degree of consistency among your instances, then taking a little bit of time up front to create a template will likely save you a considerable amount of time in the long run.
About the Author
Brien Posey is a 22-time Microsoft MVP with decades of IT experience. As a freelance writer, Posey has written thousands of articles and contributed to several dozen books on a wide variety of IT topics. Prior to going freelance, Posey was a CIO for a national chain of hospitals and health care facilities. He has also served as a network administrator for some of the country's largest insurance companies and for the Department of Defense at Fort Knox. In addition to his continued work in IT, Posey has spent the last several years actively training as a commercial scientist-astronaut candidate in preparation to fly on a mission to study polar mesospheric clouds from space. You can follow his spaceflight training on his Web site.