How-To
Installing FreeNAS on a vSphere VM to Provide NFS Storage
FreeNAS is one one of the most popular software-defined storage products available and in this article Tom Fenton shows you how he installed it on a virtual machine to provide an NFS Share.
Network storage in all its forms, whether it be a network-attached storage (NAS) product like NFS or a storage area network (SAN) technology like iSCSI, has become de rigueur in the modern datacenter. One of the early pioneers in software-defined storage (SDS) is FreeNAS (soon to be TrueNAS). As the name implies, FreeNAS is free, though it does have paid support services available; also, iXsystems (the folks behind FreeNAS), offers FreeNAS appliances for purchase as an alternative to installing it on your own hardware.
There are many different reasons why you may want to install FreeNAS. For enterprises, FreeNAS has proven to be rock-solid over its 15 years of existence, and delivers major storage protocols such as iSCSI, NFS, SMB, and Apple AFP. For individual users who want to learn about storage, FreeNAS can be installed in a home lab setting as a storage solution. Moreover, for home users, FreeNAS can serve as a media repository or a source for many useful plugins for media serving (Plex), backups (Asigra), bit torrent sharing, or a plethora of other uses. In this article, I will show you how to install FreeNAS, configure it for NFS, and use an NFS share on vSphere. In the next article in this series, I will go a step further and show you how to configure FreeNAS for iSCSI storage and use an iSCSI target with vSphere.
I will be installing FreeNAS on a virtual machine (VM) being hosted on an ESXi server; as a precaution, however, there is a statement from within the FreeNAS documentation that is worth noting:
For performance reasons, iSCSI is preferred to NFS shares when FreeNAS is installed on ESXi. When considering creating NFS shares on ESXi, read through the performance analysis presented in Running ZFS over NFS as a VMware Store (https://tinyurl.com/archive-zfs-over-nfs-vmware).
Installing FreeNAS
I will be installing FreeNAS 11.3 on my vSphere 6.7 lab in a VM. If you are installing it on bare metal, you should follow the same procedures -- but only after checking The Official FreeNAS Hardware Guide to see if your hardware is supported. If your hardware isn’t listed on in the guide, that doesn’t necessarily mean that it will not work, but I would suggest searching the online community for accounts from other users, whether they are success stories or, more importantly, issues reported with your hardware.
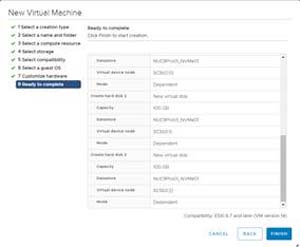
I downloaded FreeNAS 11.3-u3.2 iso from here, and then moved it to a datastore of the ESXi server that I was going to run it on with SCP. I then created a VM named FreeNAS113_A with two CPUs, 8 GB of RAM, an 8 GB and two 100 GB virtual hard drives. All the virtual hard drives were thin provisioned. For the guest OS, I selected Other from the Guest OS Family drop-down menu, and FreeBSD 12 or later version(64-bit) from the Guest OS Version drop-down menu. I attached the FreeNAS ISO to the VM and configured it to connect when powered on.
 [Click on image for larger view.]
 [Click on image for larger view.]
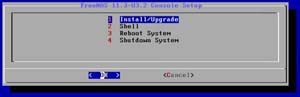
I powered on the VM and used Web Console to attach to it. From the installation wizard, I selected Install/Upgrade.
 [Click on image for larger view.]
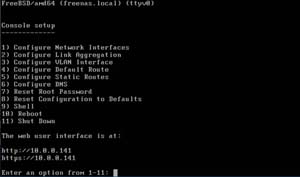
I selected the DA0 (8 GiB) virtual disk to install FreeNAS on and to boot via BIOS. I installed the OS without any issues, and then allowed the system to reboot when prompted. After the system rebooted, I was presented with a screen that had the IP address for the FreeNAS web interface.
 [Click on image for larger view.]
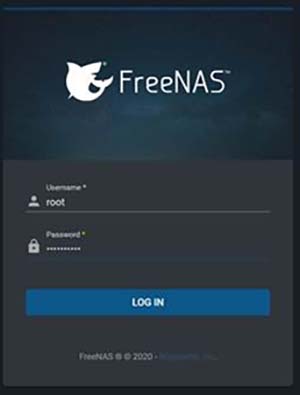
From my Chrome Browser, I entered the IP address and was greeted with a login screen. I entered root as the username, and then entered my password.
 [Click on image for larger view.]
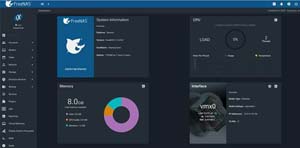
The GUI provided an overview of the system.
 [Click on image for larger view.]
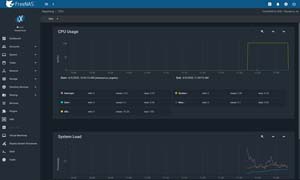
By clicking Reporting, I was able to see the CPU usage and system load.
 [Click on image for larger view.]
Creating and Using a FreeNAS NFS Share
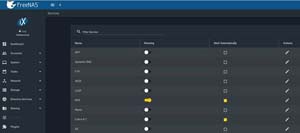
From the FreeNAS console, I selected the Services tab, started the NFS SERVICE, and selected Start Automatically.
 [Click on image for larger view.]
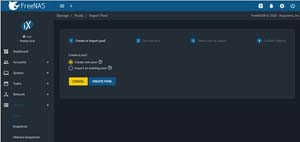
From the Storage drop-down menu, I selected Pools, and then selected Add. I verified that Create new pool was selected, and then clicked CREATE POOL.
 [Click on image for larger view.]
I entered nfspool01 in the Name text box, selected da2 and the → symbol (right arrow), and clicked Create. I then selected the Confirm checkbox and clicked Create Pool. Next, I clicked on the three vertical dots (options) to the right of the pool, and selected Add Zvol.
 [Click on image for larger view.]
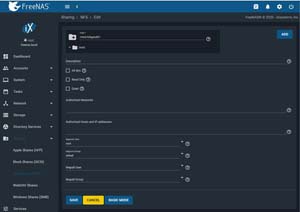
I entered nfszvol01 in the Zvol name text box and 75 GiB in the Size for this zvol text box, and then clicked Save. From the Sharing drop down menu, I selected Unix (NFS) Shares, expanded the /mnt folder, selected nfspool01, and clicked Save. Then, I clicked the three vertical dots to the right of /mnt/nfspool01 and selected Edit.
 [Click on image for larger view.]
I selected Advanced Mode. Next, I selected root from the Maproot User drop-down menu and Wheel from the Maproot Group drop-down menu, and then clicked Save.
 [Click on image for larger view.]
Using an NFS Share with vSphere
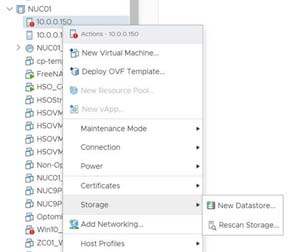
Once the share was created and configured, I added it to my vSphere environment. To do this, I logged in to my vSphere Client, right-clicked a host, and navigated to Storage > New Datastore.
 [Click on image for larger view.]
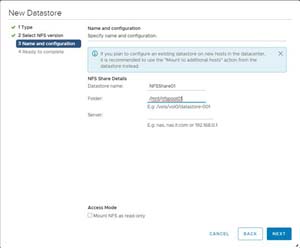
I selected NFS and Next, then verified that NFS 3 was selected and clicked Next. In the Datastore name text field, I entered NFSShare01; in the Folder text field, I entered /mnt/nfspool01; and in the Server text field, I entered 10.0.0.142. Then, I clicked Next and Finish.
 [Click on image for larger view.]
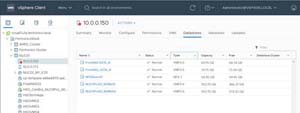
I verified that NFSShare01 was recognized within the Datastores tab.
 [Click on image for larger view.]
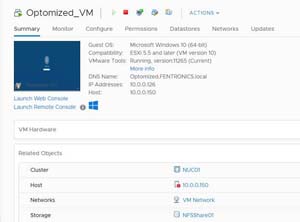
I then used the NFS share as backing for a VM.
 [Click on image for larger view.]
In my follow-up article, I show you how I used FreeNAS to create an iSCSI share and use it as backing for vSphere VMs.
About the Author
Tom Fenton has a wealth of hands-on IT experience gained over the past 30 years in a variety of technologies, with the past 20 years focusing on virtualization and storage. He previously worked as a Technical Marketing Manager for ControlUp. He also previously worked at VMware in Staff and Senior level positions. He has also worked as a Senior Validation Engineer with The Taneja Group, where he headed the Validation Service Lab and was instrumental in starting up its vSphere Virtual Volumes practice. He's on X @vDoppler.