How-To
Using AWS Comprehend for Document Classification, Part 2
After previously demonstrating how to create a CSV file that can be used to create a custom classifier for the AWS Comprehend natural language processing service, Brien Posey shows how to use that file to build and train the classifier, along with how to create a document classification job.
In the first part of this blog post, I showed you how to create a CSV file that can be used to create a custom classifier. Now, I want to show you how to use that file to build and train the classifier. Once I have done that, I will wrap things up by showing you how to create a document classification job.
To get started, log into AWS and then upload your CSV file to S3. Once you finish uploading the file, be sure to make note of the object's path, which you can see in Figure 1. As you look at the figure, you will notice that there is a Copy Path button at the top of the dialog box. You can use this button to copy the path to the clipboard for later use.
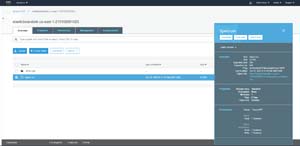 [Click on image for larger view.]Figure 1: Be sure to make note of the file's path.
Now, go ahead and launch Comprehend (it's located in the list of services in the Machine Learning section). If necessary, click the Launch Amazon Comprehend button. When you arrive at the Amazon Comprehend interface, choose the Custom Classification option, shown in Figure 2.
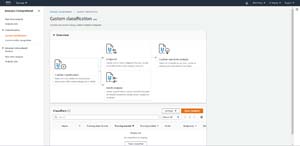 [Click on image for larger view.]Figure 1: Choose the Custom Classification option.
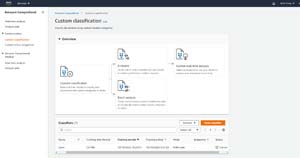
The first thing that you will need to do to get started is to create and train a classifier. Click the Train Classifier button, and you will be taken to the screen shown in Figure 3.
 [Click on image for larger view.]Figure 3: This is what the Train Classifier screen looks like.
As you can see in the figure, this screen is pretty simple. You will need to provide a name for the classifier that you are creating, and specify the language to be used by the classifier. Next, you will have to choose a classifier mode. As mentioned in Part 1, I am going to be using Multi-Class mode. Now, scroll down a bit, choose the CSV option, and then paste the path to your CSV file into the space provided. Finally, specify the S3 bucket location where you want to output your data, and choose the IAM role that you want the classifier to use (you can choose to create a new role if necessary). When you are done, click the Train Classifier button.
The amount of time required to train the classifier varies based on the length of the CSV file. In my case, I used the simple CSV file that I showed you in Part 1, and the training process took about half an hour to complete, as shown in Figure 4.
 [Click on image for larger view.]Figure 4: The training took half an hour to complete.
When the training process completes, the classifier can be used to classify a document. Before doing so, you will need to upload the documents that you want to classify to an S3 bucket. The bucket must exist in the same region as the classifier. For the sake of demonstration, I copied a spam message to a text file and uploaded the file to an S3 bucket.
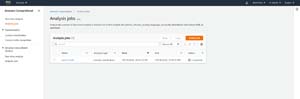
To perform an analysis of one or more documents using your custom classifier, click on Analysis Jobs, and then click the Create Job button. This will take you to the Create Analysis Job screen, which you can see in Figure 5.
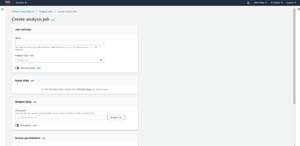 [Click on image for larger view.]Figure 5: This is the screen that you use to create a document analytics job.
The first step in the process is to provide a name for the job that you are creating. After that, you will have to choose an analysis type. Be sure to set the analysis type to Custom Classification and then set the classifier to the classifier that you just finished training.
After that, you will need to specify the location of your input file or the of the folder containing your input files. The input files are the documents that you want to analyze. It's also a good idea to set the input format to one document per file. Finally, set the location within S3 where you wish to write the output, and choose the IAM role that you want to use. You can see most of these settings in Figure 6.
 [Click on image for larger view.]Figure 6: These are the settings that I am using to create a classification job.
When you are done, click the Create Job button. It can take a while for the job to be completed, but after a few minutes you should see a completion notification, like the one shown in Figure 7. AWS will create a tarball file on S3 containing the classification results.
 [Click on image for larger view.]Figure 7: The classification job has completed.
About the Author
Brien Posey is a 22-time Microsoft MVP with decades of IT experience. As a freelance writer, Posey has written thousands of articles and contributed to several dozen books on a wide variety of IT topics. Prior to going freelance, Posey was a CIO for a national chain of hospitals and health care facilities. He has also served as a network administrator for some of the country's largest insurance companies and for the Department of Defense at Fort Knox. In addition to his continued work in IT, Posey has spent the last several years actively training as a commercial scientist-astronaut candidate in preparation to fly on a mission to study polar mesospheric clouds from space. You can follow his spaceflight training on his Web site.