How-To
Home Lab NAS (QNAP TS-431K) Part 3: Applications
Tom Fenton works with some of the QNAP applications for streaming and sharing data, and then adds another disk to this device for storage.
This is the third article in my series on the QNAP TS-431K. In the first article, I installed and configured the device; then, in the second article, I set up an iSCSI target on it and used that target for vSphere. In this article, I will work with some of the QNAP applications for streaming and sharing data, and then add another disk to this device for storage.
Qsync
I wanted to use the QNAP as a replacement for Dropbox. The application that QNAP has for this purpose is Qsync, which they advertise as follows:
Qsync enables efficient file synchronization between a QNAP NAS and linked devices such as computers, laptops, and mobile devices. With Qsync, you can easily access data across all your devices and share it among your team members.
Qsync has four major features: one-way file sync (files to the QNAP), two-way file sync, versioning of files, and team folders. With Qsync, you can sync files between the QNAP and another QNAP, endpoints, or the cloud. I will only be using it between the QNAP and endpoints, mainly a couple laptops. QNAP has Qsync clients for Windows, macOS, Linux, (Ubuntu), Android, and iOS.
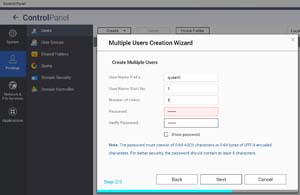
Following the steps listed in the Qsync tutorial/guide, I added user accounts to the NAS, created a shared folder on it, installed Qsync Central on the NAS, granted users access to the shared folder, and installed the Qsync client on my laptops.
 [Click on image for larger view.]
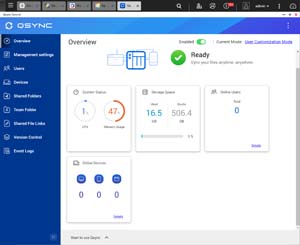
I then selected App Center from the main drop-down menu. The wizard walked me through the process of selecting a repository for apps and then installing Qsync. The Qsync dashboard displayed information about the users and resources that Qsync was using.
 [Click on image for larger view.]
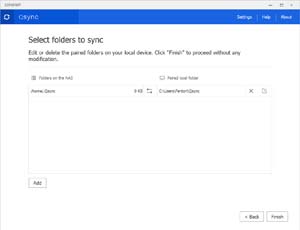
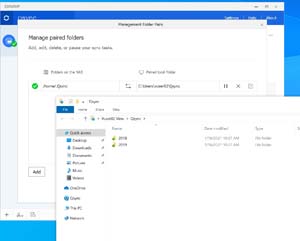
I then downloaded and installed the Qsync client to my laptop. When it was installing, it closed File Explorer on my laptop. Once it had installed, I launched the client and logged in as one of the users I had previously created.
It then paired a folder on the local device with a folder on the QNAP.
 [Click on image for larger view.]
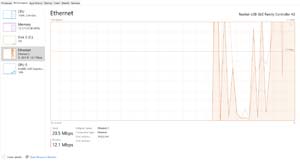
I then copied files on to the local paired folder, during which time I noticed considerable network traffic from the laptop.
 [Click on image for larger view.]
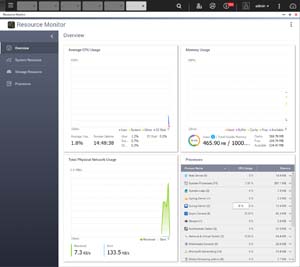
The TS-431K showed substantial network activity during the file copy, indicating to me that the files were being synced to the QNAP.
 [Click on image for larger view.]
Once the files finished syncing, I logged on to another laptop, installed the Qsync client, and launched it. I could access the files that I had synced on my other laptop from the new laptop.
 [Click on image for larger view.]
Video Station
I then moved on to home entertainment. The QNAP app store has many different entertainment packages. I chose to install Video Station, which QNAP describes as follows:
Video Station is the ideal management tool to organize your video files on the NAS. The videos can be classified as home videos, movies, TV shows, or music videos for your personal collections. You can also share these collections with your friends & family via the Internet.
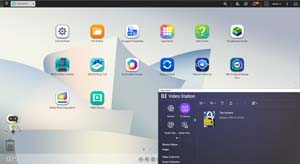
Following the instructions listed in the Video Station user manual, I installed the app in less than a minute. When I opened it, I was asked if I wanted to scan for new videos on my system in real-time or manually, and I chose the manual option. It also let me know that videos could be shared via a link, or through YouTube or Youku.
Video Station had me select a path for the videos. I created new shared folders, giving the admin read/write permissions and everyone else read permissions (Control Panel > Privilege > Shared Folders > Advanced Permissions). I then added content to the folder. From a Chrome web browser, I navigated to http://<NAS IP>/video and launched Video Station.
 [Click on image for larger view.]
Using this app, I was able to play videos from my web browser.
Adding Additional Storage
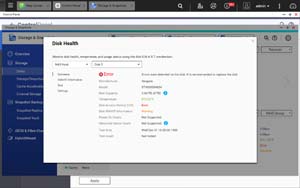
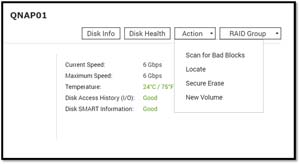
Next, I added a 4GB Seagate HDD that I originally tried to install to slot 2. The disk was detected automatically, but the disk health was reported as having errors.
 [Click on image for larger view.]
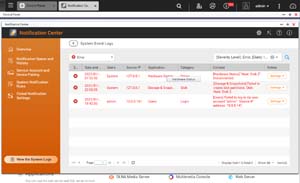
The TS-431K also showed errors in Notification Center.
 [Click on image for larger view.]
I pulled the drive and placed another 2TB Seagate FireCuda in slot 2. The system beeped twice, and then I verified that a disk in slot 2 was recognized by navigating to the Overview -> Storage dashboard screen. This disk had a purple circle on it rather than a green circle like the other disk. From the Actions drop-down menu, I selected New Volume.
 [Click on image for larger view.]
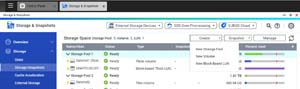
The wizard walked me through the process of creating a new 2TB volume on it. It only took a few minutes to format the disk and add it to a new RAID group.
 [Click on image for larger view.]
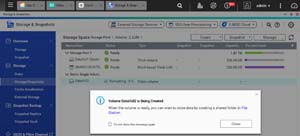
I then created a new storage pool and volume on it by using the wizard in Storage/Snapshots under Create.
 [Click on image for larger view.]
Conclusion
In my first article, I installed and configured the QNAP TS-431K; after dealing with a bad disk, the installation went smoothly. In this article, I set up the disk to act like a Dropbox substitute, and enabled it for streaming videos. I also verified that the first disk I tried to use with the device was indeed bad, and was able to add another disk without any issues. In my final article on the TS-431K, I will look at using the command line on the device and adding an SSD to it increase its performance, as well as provide my final thoughts about using the device for VM and data storage, and streaming.
Note: Part 4 is here.
About the Author
Tom Fenton has a wealth of hands-on IT experience gained over the past 30 years in a variety of technologies, with the past 20 years focusing on virtualization and storage. He previously worked as a Technical Marketing Manager for ControlUp. He also previously worked at VMware in Staff and Senior level positions. He has also worked as a Senior Validation Engineer with The Taneja Group, where he headed the Validation Service Lab and was instrumental in starting up its vSphere Virtual Volumes practice. He's on X @vDoppler.