CoreOS on vSphere: First Look
CoreOS is a lightweight Linux OS that supports running containers. While I'm no application developer, I do think that infrastructure professionals need to get CoreOS in their lab now. Make sure you know how to deploy this new OS, configure it and make it available in the datacenter. VMware says that it's committed to making CoreOS fit in nicely with other workloads; what the blog post doesn't say is that it's a pain to deploy.
A very detailed knowledgebase article, VMware KB 2104303, outlines how to deploy CoreOS on vSphere. I recently went through the drill; while it was long, no step of the journey is impossible. I'm also a Windows junkie, so the Linux-heavy aspects of CoreOS did slow me down a bit. Still, I found a way.
If you're an infrastructure professional, I recommend going through this drill so that when your application teams reach out, you already have experience deploying CoreOS and being container-ready. In other words, if you have nothing for them, they'll go elsewhere. Here are a few points to note when deploying CoreOS.
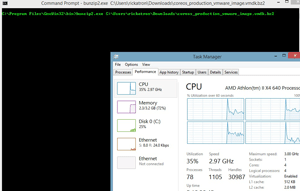
Bzip compressor is used for the base disk of the CoreOS image. You can run the Bzip compressor in Windows; downloading it was a straightforward process, although the bunzip2 command took quite a bit of CPU during the decompression task and made the SSD work hard (as you can see in Figure 1).
 [Click on image for larger view.]
Figure 1. The bunzip2 command line will decompress the CoreOS disk image.
[Click on image for larger view.]
Figure 1. The bunzip2 command line will decompress the CoreOS disk image.
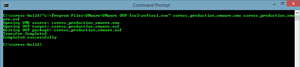
The image produced by CoreOS for VMware supports the Fusion and ESXi hypervisors. I prefer to use ESXi with vCenter, which means converting it to Open Virtualization Format (OVF). One way to do this is with VMware Converter, but there may be slightly more steps involved. The VMware Open Virtualization Format Tool was easy to use and swiftly converted the extracted disk file to an OVF-importable format. Windows (32-bit and 64-bit) and Linux versions of the tool are available; they make easy work of creating the OVF to be imported into vSphere, as shown in Figure 2.
 [Click on image for larger view.]
Figure 2. The CoreOS image must be imported to vSphere via an OVF.
file.
[Click on image for larger view.]
Figure 2. The CoreOS image must be imported to vSphere via an OVF.
file.
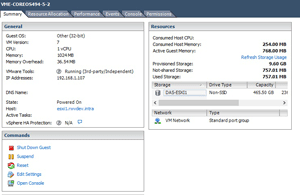
Once this step is done, the process of importing a virtual machine (VM) with the vSphere Client or vSphere Web Client becomes easy and familiar. But pay attention to the last parts of the KB article, where the security keys of the VM are created; just because you have a VM doesn't mean you're done. The VM is running Open Virtual Machine Tools (open-vm-tools), an open source implementation of VMware Tools, so it fits in well with a vSphere environment (see Figure 3).
 [Click on image for larger view.]
Figure 3. A CoreOS virtual machine, ready for application containers.
[Click on image for larger view.]
Figure 3. A CoreOS virtual machine, ready for application containers.
Containerized application development is a very interesting space to watch, and I don't expect it to go away. But if the applications are running anything important, I'd advise using the trusted platform to keep them available, manage performance and offer protection capabilities.
The current process of running CoreOS in vSphere is a bit of work, though I expect it to get easier over time. Additionally, save the OVF that you have made for future steps as it will make subsequent deployments easier. Are you looking at CoreOS or other ways of supporting these new application models? What considerations and priorities do you have to get there? Share your comments below.
Posted by Rick Vanover on 03/05/2015 at 2:43 PM