How-To
Use Amazon EC2 Fleets to Create Collections of EC2 Instances
You can automate the creation of multiple instances based on your preferences.
The Amazon Web Services (AWS) environment allows you to create a variety of instance types, including on-demand instances and spot instances. Occasionally, you may find that you need to create several instances at the same time, but don't necessarily want all of those instances to be of the same type. You may wish to create whatever instance type is the least expensive, for example, or you might want to create a set of instances consisting of multiple instance types. This is where Amazon Elastic Compute Cloud (EC2) fleets come into play. Fleets make it possible to automate the creation of multiple instances based on your preferences.
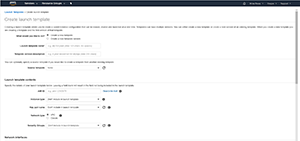
When you create a fleet, the virtual machine (VM) instances within the fleet will be based on a launch template. Launch templates are used to create VM instances in a standardized way. A launch template might, for instance, define the network interfaces, storage volumes and tags that are to be used by EC2 instances created from the template. You can see what the Create Launch Template screen looks like in Figure 1.
 [Click on image for larger view.]
Figure 1. EC2 fleets are based on the use of a launch template.
[Click on image for larger view.]
Figure 1. EC2 fleets are based on the use of a launch template.
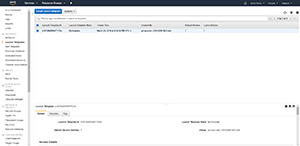
Although launch templates are commonly referenced by name, each launch template is also assigned a launch template ID. When you use a launch template as the basis for the creation of a fleet, you'll need to reference the template's ID. You can find the Launch Template ID on the main Launch Template screen, as shown in Figure 2.
 [Click on image for larger view.]
Figure 2. Make note of the Launch Template ID that's associated with your template.
[Click on image for larger view.]
Figure 2. Make note of the Launch Template ID that's associated with your template.
The next step in the process is to create a JSON file that defines your parameters for the creation of the launch fleet. Here's an example of what such a file might look like:
{
  "LaunchTemplateConfigs": [
    {
      "LaunchTemplateSpecification": {
        "LaunchTemplateId": " Lt-0f726bf099977139c",
        "Version": "1"
      }  }
  ],
  "TargetCapacitySpecification": {
    "TotalTargetCapacity": 2,
    "DefaultTargetCapacityType": "spot"
  }
}
This is a really simple configuration file. As you can see, it begins with a section called LaunchTemplateConfigs. The main thing that you have to focus on in this section is entering your Launch Template ID. You'll notice, for example, that the launch template ID listed in the block of code above matches the one shown in the previous screen capture.
You'll also notice that the LaunchTemplateConfigs section includes a version number. The version number is an attribute of the launch template. If you look back at Figure 2, you'll notice that I've selected a launch template, and that a version number is listed for the selected template.
The other section that's included in the previous block of code is the TargetCapacitySpecification section. This is the section that instructs EC2 as to the types of instances that are to be created.
In this particular example, there are two values provided. The first of these values is the TotalTargetCapacity. This is the number of instances that are to be created. This block of code sets the total target capacity to 2, meaning that two instances will be created.
The other value that's supplied in this case is the DefaultTargetCapacityType, which has been set to spot. This means that any EC2 instances that are generated by this file will be spot instances. If I wanted to create on-demand instances instead, I could do so by replacing the word "spot" with "on-demand" (be sure to use the hyphen).
So what if you wanted to create a mixture of on demand instances and spot instances? The easiest way to do so would be to modify the TargetCapacitySpecification section like this:
"TargetCapacitySpecification": {
  "TotalTargetCapacity": 3,
  "OnDemandTargetCapacity":1,
  "DefaultTargetCapacityType": "spot"
}
In this case, I've set the total target capacity to 3, meaning that three instances will be created. The OnDemandTargetCapacity line uses a value of 1, meaning that one of the three instances will be an on-demand instance. Because the DefaultTargetCapacityType is still set to spot, all remaining instances will be spot instances.
Of course, the real question is how do you actually generate instances from the JSON file? Doing so is actually really simple. Here's a command that you can use:
aws ec2 create-fleet --cli-input-json file://file_name.json
You'll need to replace file_name.json with the actual filename of your JSON file.
About the Author
Brien Posey is a 22-time Microsoft MVP with decades of IT experience. As a freelance writer, Posey has written thousands of articles and contributed to several dozen books on a wide variety of IT topics. Prior to going freelance, Posey was a CIO for a national chain of hospitals and health care facilities. He has also served as a network administrator for some of the country's largest insurance companies and for the Department of Defense at Fort Knox. In addition to his continued work in IT, Posey has spent the last several years actively training as a commercial scientist-astronaut candidate in preparation to fly on a mission to study polar mesospheric clouds from space. You can follow his spaceflight training on his Web site.