How-To
What's Microsoft Defender for Identity and Why Should I Use It?
As the threat of increased cyberattacks looms, many businesses are looking at different tools to keep them safe(r). There are of course many areas to cover such as endpoints, identity, email, infrastructure and data. One tool that's going to give you a fast upgrade to the visibility of what's going on in your on-premises network is Microsoft Defender for Identity (MDI).
As attackers gain a foothold in your environment by breaching one PC (patient zero) or successfully phishing someone's credentials, they utilize that access to move laterally in your network to find higher privilege credentials on other endpoints or servers. That activity always leaves a trace on your Domain Controllers, and because that's where MDI is laser focused, it'll spot such a trace quickly.
We looked at MDI as part of the overview of the Microsoft 365 Defender family, but in this article we're going to go deep on MDI specifically and why I think it's an excellent addition to the protection of your on-premises AD network. It requires Microsoft 365 E5 or E5 Security licensing, but there's a 90-day trial available.
Deployment
As a cloud service there are three parts to Defender for Identity, the cloud service itself where the analysis is done, the sensors that are installed on your Domain Controllers, Active Directory Federation Services (ADFS) servers or member servers (see below) and the console itself.
The console used to be a separate portal (https://portal.atp.azure.com/) before it moved to the Defender for Cloud Apps (formerly Microsoft Cloud App Security) portal at https://portal.cloudappsecurity.com. Just released to general availability is the integration with the overall Microsoft 365 Defender portal at https://security.microsoft.com. In this article I'll be using the new interface for all settings.
Sign in to the M365 Defender portal and scroll down to Settings -- Identities. The first time you go here you have to initialize your MDI tenant (which takes a few minutes), and after that, you can start configuring settings. This setup is completely automatic now; it required you to manually enter information in earlier versions.
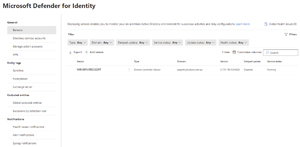 [Click on image for larger view.] Defender for Identity Settings Blade
In the Sensors settings, click Add sensor, which will let you download the agent and copy the access key required during the installation.
As mentioned, these sensors should be installed on all your Domain Controllers and all your Active Directory Federation Services (ADFS) servers. In a large environment with a jumpy security team, installing an agent on every DC might be too scary, in which case you can deploy the sensor on member servers, configure event log forwarding to this server from each DC, and configure port mirroring. It's more difficult to set up, but if it's your only option it's better than missing an intrusion. If your DCs don't have direct internet connectivity, you can configure the sensor with proxy information.
ADFS support is a recent addition, most likely as a result of the Solarwinds attack, where organizations that didn't store their ADFS root keys in a Hardware Security Module (HSM) were compromised.
The sensor will automatically update to the latest version. If you have a large environment and you want some control, set most of your agents to delayed update and monitor the few remaining pilot ones for issues after each update.
Your first configuration step is to set up the Directory Service Account. This account needs read access to everything in Active Directory, including the Deleted Objects Container. This can be either an ordinary account or a Group Managed Service Account (gMSA) with the latter being the recommended configuration as password rotation is managed automatically by AD.
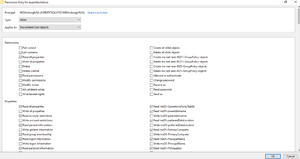
The next setting is an Action account (another gMSA) which will have permissions to take response actions on compromised accounts in AD such as disable them or reset their password. This has traditionally been a weak area in MDI -- it's fantastic at spotting attackers, less good at stopping them in their tracks. As Microsoft adds more actions, ensure you have your action account set up so it can take the right actions swiftly.
 [Click on image for larger view.] Creating a Group Managed Service Account for MDI Actions
Create the account on your DC, then set the correct permissions according to the link above (it's a long list so scroll down to find the correct ones).
 [Click on image for larger view.] Adding the Correct Permissions to the Action gMSA Account
Then define the account in the MDI portal.
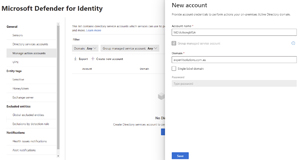 [Click on image for larger view.] Defining the Action Account in MDI
The VPN setting lets you integrate with your VPN/Radius servers for visibility into potential attackers connecting this way. Sensitive tags lets you mark certain accounts/groups as high value. By default, highly privileged groups -- and their members -- along with Certificate Authority servers, DHCP, DNS and Exchange Servers are automatically marked as sensitive, but you should add board members, executives and the like.
Honeytoken allows you to define "fake" accounts with juicy sounding names, (that should normally never be used) as a lure to trick the attacker into attempting to access them and thus triggering an alert.
If you get a lot of false positive alerts for particular user accounts, domains, devices or IP addresses you can exclude them for all rules (be very careful doing this) or for particular detection rules (better option) out of the 47 currently in MDI.
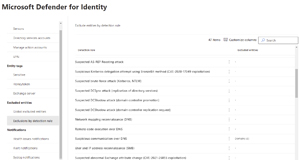 [Click on image for larger view.] Exclude Entities for Specific Detection Rules
Finally, make sure you enter email aliases/SOC distribution lists for health issue notifications and alerts. If you're using Syslog for monitoring or a third-party SIEM, configure MDI to let you know about security and health issues.
That's really all there is too it -- it's deceptively simple on the surface, whilst underneath there's a strong User Entity Behavior Analytics (UEBA) engine looking for anomalies, analyzing every relevant event log entry and pertinent network packet for signs of malicious activity.
If you're using the other products in the Defender suite (and let's face it, if you're paying for Microsoft 365 E5, you are using the other products), particularly Defender for Endpoint, go to its settings in the portal -- Advanced features and enable the integration, which will use signals from your endpoints in MDI.
Knock, Knock -- Who's There?
Once deployed MDI starts building a profile of each user and device and what's normal behavior, as well as monitoring for signs on malicious activity.
 [Click on image for larger view.] User Entity Page in MDI
Security alerts align to a "kill chain" of common steps such as:
- Reconnaissance
- Compromised credentials
- Lateral movement
- Domain dominance
- Exfiltration
While many security experts don't like the kill chain description (it gives the impression that attackers follow a script, while in reality they use any available weakness at any point in the attack), it's a useful framework for communicating with non-technical people, as well as a good grouping of the alerts raised by MDI.
The reconnaissance phase will raise alerts based on account, AD attribute, DNS, LDAP, User & group membership, and IP address enumeration. If you click the link above for each phase, it has detailed information for each alert, as well as steps to take when they're raised.
Compromised credentials raise alerts based on brute force attacks against Kerberos, NTLM, LDAP and SMB, Kerberos roasting and a few others.
Lateral movement alerts on the other hand comes mostly from Mimikatz and the discovery some years ago that Windows stores credentials for any user that has logged into a machine since it was rebooted in memory, and these can be accessed. If you're using Windows Defender Credential Guard, this obviates these attacks, but for any machine not protected, these alerts include pass-the-hash, pass-the-ticket, overpass-the-hash and others.
The Domain dominance phase include direct attacks against domain controllers such as DCSync, golden ticket and skeleton key activity. Finally, the exfiltration phase covers data theft over SMB and DNS.
MDI will also let you know about Lateral Movement Paths, in other words, if this user or device is compromised, the attacker can move to this device and compromise this user account and in x steps will achieve domain dominance by compromising a domain administrator account.
With the integration of MDI in the M365 Defender portal, alerts will show up alongside email/collaboration, endpoint, cloud SaaS apps and Azure Identity Protection alerts. If you are using Microsoft Sentinel you can have all the data flow from Microsoft 365 Defender into it and the integration is two-way so if you close an alert in one console, it's closed in the other.
MDI also contributes to Identity Secure Score, and you can see it's recommendations alongside the others to improve your overall security posture.
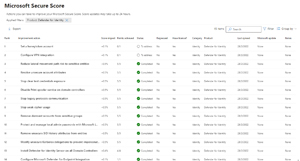 [Click on image for larger view.] Secure Score MDI Improvement Actions
Conclusion
Since Microsoft 365 E5 isn't part of the recent price hike for many other plans, it might be a little easier to convince your boss to budget for a tool such as Defender for Identity and realistically, if you still rely on Active Directory on-premises (as most enterprises do), you need MDI or a tool like it to spot the bad guys quickly.