How-To
Configuring ESXi 8 on a Raspberry Pi 5
I have written two articles on running ESXi 8 on a Pi 5: an overview of ESXi 8 on a Raspberry Pi 5 and one on installing ESXi on a Pi 5.
In this article, I will configure ESXi to use an NTP server for precise time synchronization, enable SSH access, and add a datastore for storing and running virtual machines (VMs).
Setting the Time
The first thing you should do is check and, if needed, set the time on the ESXi system, as many other services, such as SSH, depend on the correct time. To do this, I enabled and used an NTP time source.
To set up NTP from the ESXi Host Console do the following:
- Select the ESXi host button
- Click the Manage button
- Click the Settings button
- Under System, click Time & Date and then click Edit
- Click Use Network Time Protocol
- Select Start and stop with the host, enter NTP servers
- Click Save
 [Click on image for larger view.]
Checking License Status
The ARM ESXi server has a generous 180-day trial period, or you can license it using an existing unused ESXi license.
To check the license status from the ESXi Host Console do the following:
- Select the ESXi host
- Click the Manage
- Click Licensing on the top ribbon
 [Click on image for larger view.]
This page shows when the license would expire and what features it is licensed for. If you have an unused license that you want to use, click Assign license and enter the license.
Enabling SSH
I often find using SSH to connect to the ESXi host helpful.
To enable SSH from the ESXi Host Console, do the following:
- In the navigation pane, select Host
- Select Services from the Actions drop-down menu in the top ribbon.
- Select Enable Secure Shell (SSH)
 [Click on image for larger view.]
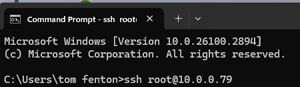
After enabling SSH, I could SSH into the ESXi host from my Windows laptop as root, by entering root@.
 [Click on image for larger view.]
For information about some of the interesting things you can do with SSH, check out my article on the topic.
Enabling USB Storage
Once ESXi is installed, you must add storage to save and run VMs. On larger servers, this is done using local SSD, NVMe drives, or network storage on Pi systems you can use USB or network storage.
Most people use high-quality USB drives or USB-attached NVMe drives for Pi systems. To store VMs on USB drives, you must allow direct access to a USB device on the physical ESXi host itself, rather than by the VMs running on it.
To add USB storage from the ESXi Host Client, do the following:
- In the navigation pane, select Manage under Host
- Select System from the top ribbon
- Select Advanced System Settings
- In the search box, enter USB.arbitratorAutoStartDisabled
- Select USB.arbitratorAutoStartDisabled
- Select Edit option
- Set the value to 1 and select save.
 [Click on image for larger view.]
- Plug the USB drive into your ESXi
- Reboot the ESXi
Adding a USB Datastore
Once added, you can create a datastore on the USB device.
To add a USB datastore from the ESXi Host Client, do the following:
- In the navigation pane, select Storage
- Select Devices from the top ribbon
- Click Rescan
 [Click on image for larger view.]
- Click New Datastore
- In the wizard, give the datastore a name, select the device, and tell it to use full disk
- Click Finish
 [Click on image for larger view.]
I clicked Datastores, and I saw the datastore I just created.
 [Click on image for larger view.]
Thoughts on Configuring ESXi on Pi 5
In this article, I configured VMware's ESXi 8 on a Raspberry Pi 5. The ESXi 8 Host Client looks more modern and polished when compared to ESXi 7 Host Client and I need to change the workflows a bit from when using the ESXi 7 Host Client.
The Pi is a great platform for learning about virtualization, hypervisors, and ESXi/vSphere. The setup cost me around $100, and the ESXi on ARM Fling is free for 180 days before reinstallation. While the Pi 4 works well with ESXi, the Pi 5 offers better connectivity, power efficiency, and performance, making the extra $5 worth it.
I ran the Pi 5 without a case or heatsink and did find that it ran a little bit hot so I did buy a case with a heatsink and fan for $15 for it.
In my next article I will show how I created and ran VMs on the Pi 5.
About the Author
Tom Fenton has a wealth of hands-on IT experience gained over the past 30 years in a variety of technologies, with the past 20 years focusing on virtualization and storage. He previously worked as a Technical Marketing Manager for ControlUp. He also previously worked at VMware in Staff and Senior level positions. He has also worked as a Senior Validation Engineer with The Taneja Group, where he headed the Validation Service Lab and was instrumental in starting up its vSphere Virtual Volumes practice. He's on X @vDoppler.