Removing Floppy Drives with PowerCLI
The virtual machine floppy drive is one of those things that I'd rate as somewhere in the "stupid default" configuration bucket. In my virtualization practice, I very rarely use it, and so I add it as needed. While it is not a device that is supported as a hot-add hardware component, that inconvenience can be easily accepted for the unlikely event that it will be needed. The floppy drive can be removed quite easily with PowerCLI.
To remove a floppy drive, the vSphere virtual machine needs to be powered off. This is easy enough to automate with a scheduled task in the operating system. For Windows systems, the "shutdown" command can be configured as a one-time scheduled task to get the virtual machine powered off. Once the virtual machine is powered off, the Remove-FloppyDrive Cmdlet can be utilized to remove the device.
Remove-FloppyDrive works in conjunction with the Get-FloppyDrive, which retrieves the device from the virtual machine. This means that Remove-FloppyDrive can't, by itself, remove the device from a virtual machine. The Get-FloppyDrive Cmdlet needs to pass it to the Remove-FloppyDrive command. This means a simple two-line PowerCLI script will need to accomplish the task. Here's the script to remove the floppy drive for a virtual machine named VVMDEVSERVER0006:
$VMtoRemoveFloppy = Get-FloppyDrive -VM VVMDEVSERVER0006
Remove-FloppyDrive -Floppy $VMtoRemoveFloppy -Confirm:$false
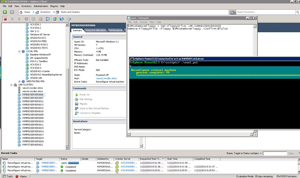
This is done with the "-Confirm:$false" option to forego being prompted to confirm the task in PowerCLI. Fig. 1 shows this script being called and executed to the vCenter Server through PowerCLI.
 |
|
Figure 1. The PowerCLI command reconfigures the virtual machine to remove the floppy drive. (Click image to view larger version.) |
This can be automated with PowerShell as a scheduled task, and used in conjunction with the Start-VM command to get the virtual machine back online if the tasks are all sequential in a period of scheduled downtime.
Posted by Rick Vanover on 11/22/2010 at 12:48 PM