How-To
Building a Desktop-as-a-Service Environment in the AWS Cloud, Part 2: Create a WorkSpace
After previously stepping through how to create an Active Directory environment, Brien Posey continues the discussion by showing you how to create the actual WorkSpace.
In the first part of this article series, I showed you how to create an Active Directory (AD) environment. Now, I want to continue the discussion by showing you how to create the actual WorkSpace.
To get started, go ahead and open the Workspaces service and click on the WorkSpaces option within the navigation pane. When you arrive at the WorkWpaces screen, click on the Launch Workspaces button.
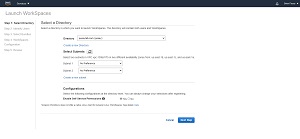
The first thing you need to do when creating a new WorkSpace is to choose the directory you want to use. As you can see in Figure 1, the directory you have just created is selected by default. While you are on this screen, you will also need to choose which subnets you want to use.
 [Click on image for larger view.]Figure 1: Choose the directory that you want to use, and then pick the subnets that you want to use for your workspaces.
Click the Next Step button, and AWS will configure your Active Directory environment, and then take you to the Identify Users screen (Figure 2).
 [Click on image for larger view.]Figure 2: Choose the directory that you want to use, and then pick the subnets that you want to use for your workspaces.
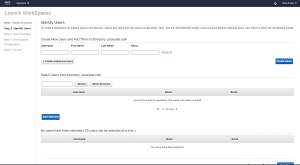
The Identify Users screen allows you to create or select Active Directory user accounts.
As you can see in the figure, this screen allows you to add Active Directory users to the WorkSpace you are creating. Simply enter a username into the Search box and click the Search button. When the correct result is returned, select the user account and click Add Selected.
If you have a relatively small number of Active Directory user accounts, you can just click the Show All Users button rather than searching for a specific user. You are allowed to select and add up to 20 user accounts at a time.
Of course since the Active Directory environment was just created, there is a good chance that you have not yet created any user accounts. If so, you can create user accounts directly from this screen. Just enter a username, first name, last name and email address in the space provided and click the Create User button.
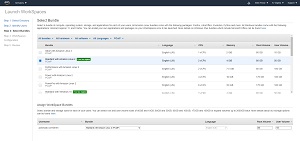
Once you have chosen the user accounts you want to add, click on the Next Step button, taking you to the Select Bundle screen, which you can see in Figure 3.
 [Click on image for larger view.]Figure 3: You will need to select an operating system and hardware bundle.
The Select Bundle screen allows you to pick the OS you want to run on your virtual desktops. Amazon Linux is the default choice, but you can choose a Windows desktop instead. Once you choose a bundle, take a moment to make sure that the selected language, root volume size, and user volume size meet your needs. You can make adjustments to the language and volume sizes if necessary. When you are done, click Next Step.
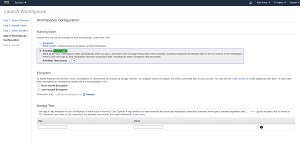
The next screen you will see is the Workspaces Configuration screen, which you can see in Figure 4. This screen is relatively simple, as it only includes three configuration options. First, you will need to choose whether you want the workspace to stay powered on all the time, or if you want to shut it down after a period of time. You will also need to choose whether or not you want to encrypt the WorkSpace's volumes, and if you want to apply any tags to the workspace. When you are done, click the Next Step button.
 [Click on image for larger view.]Figure 4: Be careful when selecting a running mode, because the mode that you choose will directly impact your overall cost.
At this point, you will be taken to a summary screen that shows the configuration options you have chosen. Take a moment and make sure that the configuration options seem to be correct. If so, then click the Launch Workspaces button. Your new workspaces should appear on the Workspaces tab, as shown in Figure 5. It can take up to 20 minutes for a new WorkSpace to be made available for use.
 [Click on image for larger view.]Figure 5: A new workspace is being created.
Once everything is ready to go, AWS will send an email to the users (at the address that you provided when you created the user accounts) with detailed login instructions.
About the Author
Brien Posey is a 22-time Microsoft MVP with decades of IT experience. As a freelance writer, Posey has written thousands of articles and contributed to several dozen books on a wide variety of IT topics. Prior to going freelance, Posey was a CIO for a national chain of hospitals and health care facilities. He has also served as a network administrator for some of the country's largest insurance companies and for the Department of Defense at Fort Knox. In addition to his continued work in IT, Posey has spent the last several years actively training as a commercial scientist-astronaut candidate in preparation to fly on a mission to study polar mesospheric clouds from space. You can follow his spaceflight training on his Web site.