How-To
Creating a Horizon Linux Client, Part 1: Installing Ubuntu 20 Server
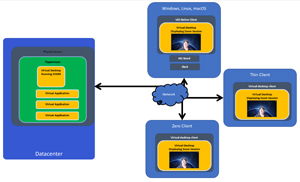
Since the start of the pandemic, many companies have had to move a lot of their employees' work from office to remote settings, which in turn has brought on a need for workers to have secure and manageable desktops. To address this, one of the solutions companies have utilized is virtual desktop infrastructure (VDI) technology, where the desktop is hosted securely in a datacenter and accessed via a client at a remote user's location.
VDI provides a wide range of clients that can be used: from zero or thin clients, to laptops and mobile devices running a VDI native client. Thin and zero clients are dedicated to only running the software to connect to remote desktops, while VDI native clients run as an application on top of Widows, Linux or other OSes.
 [Click on image for larger view.]
Due to the recent chip and storage shortage, I am seeing more and more companies and educational institutions unable to purchase new systems. To work around this issue, many people have decided to repurpose old systems. The problem with this hodgepodge of hardware is that they have different versions and editions of MS Windows running on them, not all of which can be updated and patched to the latest Windows versions.
To create a common platform, many organizations have installed Linux on these older systems and then installed a VDI native client on them. In this article, I will show you how I installed Ubuntu 20.04 on a wide range of systems and then how I installed the Horizon native client and used the systems to connect to remote desktops.
Although Ubuntu does have a desktop version of 20.04, I will be walking you through how I installed the server edition and then installed the packages to make it suitable for desktop use.
Installing Ubuntu 20.04
After downloading Ubuntu-20.04-Live-Server-amd64.iso from their web site, I spun up a virtual machine (VM) on ESXi to verify that it was working correctly. Later, I installed it on physical system after verifying that it worked. The VM had 2 vCPUs, 4GB of RAM and a 32GB disk.
 [Click on image for larger view.]
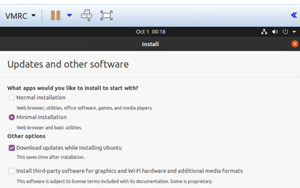
I booted the ISO image and installed the image by accepting the defaults without any issues.
 [Click on image for larger view.]
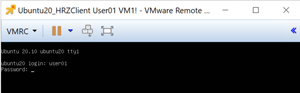
After the system rebooted, I was presented with command-line interface (CLI) as the server edition doesn't have a GUI.
 [Click on image for larger view.]
After logging in to the VM, I switched to root user and installed VM Tools by entering:
    sudo bash
    apt -y install open-vm-tools-desktop
I then installed GNOME desktop and Firefox by entering:
    apt install -y gnome-session gdm3
    apt install -y gnome-terminal
    apt install -y firefox
I set the GNOME desktop to start by default and rebooted the system by entering the following:
    systemctl set-default graphical.target
    Init 6
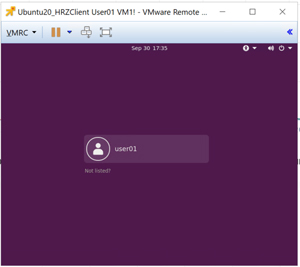
After the system booted up, I was presented with a GNOME desktop.
 [Click on image for larger view.]
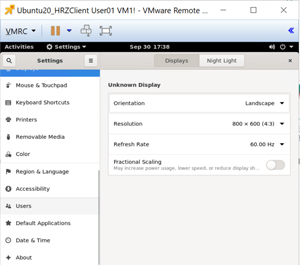
From the settings dialog (Activities -> Settings), I saw that my display was set to 800 x 600. I was unable to change the resolution settings.
 [Click on image for larger view.]
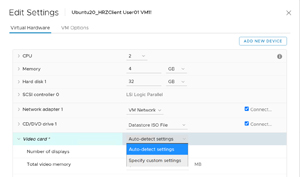
I shut down the guest and in the VM's settings selected Auto-detect settings.
 [Click on image for larger view.]
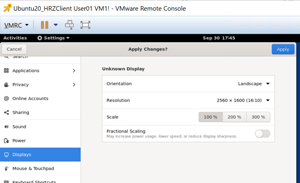
I booted up the VM and was then able to change the resolution to 2560 x 1600.
 [Click on image for larger view.]
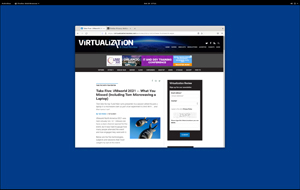
I was then able to bring up applications like Firefox and use them without any difficulties.
 [Click on image for larger view.]
After I created a VM running Ubuntu, I then installed Ubuntu on two physical systems: a Lenovo Ideacentre Stick Computer and Intel NUC 8 that used to run Windows. Ubuntu installed on both without any issues.
The Lenovo system was powered by an Intel Atom Z3735F 1.33 GHz processor and 2GB RAM, with a 32GB SSD for storage. The NUC system had an Intel Celeron J4005 processor, 4GB RAM and 32 GB eMMC for storage. Neither of these systems could be considered powerhouse machines, but they are representative of the older systems that may be lying around in a pile of obsolete desktops that could be repurposed for VDI.
I found the process of installing Ubuntu on a VM on two rather old systems that used to run Windows to be fast and easy. In the next article in this series, I will install the VMware Horizon Client on them and see how well they perform as VDI clients.
About the Author
Tom Fenton has a wealth of hands-on IT experience gained over the past 30 years in a variety of technologies, with the past 20 years focusing on virtualization and storage. He previously worked as a Technical Marketing Manager for ControlUp. He also previously worked at VMware in Staff and Senior level positions. He has also worked as a Senior Validation Engineer with The Taneja Group, where he headed the Validation Service Lab and was instrumental in starting up its vSphere Virtual Volumes practice. He's on X @vDoppler.