How-To
TerraMaster F2-212 NAS Device, Part 2: Setup, Configuration and Remote Access
In a previous article, I looked at the specifications and some use cases for the F2-212, TerraMaster's new low-cost private cloud NAS device. As it has an ARM V8.2 Cortex-A55 64-bit quad-core ARM processor running at 1.7GHz, I am sure it can handle its primary use case, the synchronization and delivery of files locally and remotely.
Its documentation also states that it can transcode and deliver videos to PCs, tablets and other devices; as this is far more demanding, I will be interested to see how it can handle this load. Lastly, I want to know if it can be used in my home lab to store and run virtual machines (VMs), a use case that it was not designed for.
In this article, I will look at how easy it is to set up, how well it acts as a backup device for documents and videos, and how easy it is to access the device and its files remotely.
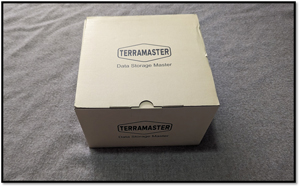
Unboxing
The T2-12 came in a beige 258 x 220 x 170 mm cardboard box.
 [Click on image for larger view.]
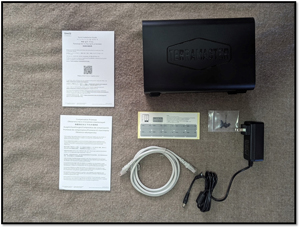
Inside the box was the F2-212, power supply, ethernet cable, labels for the drive, user guide and warranty card.
 [Click on image for larger view.]
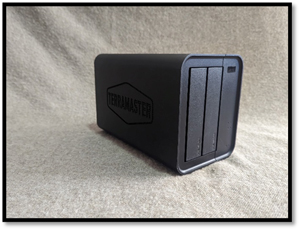
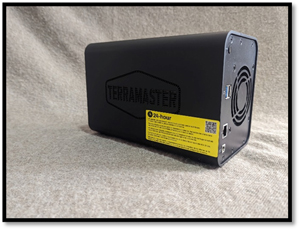
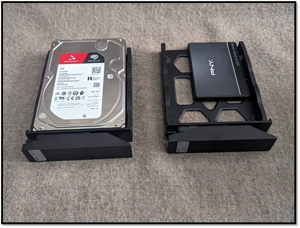
The case is made of plastic, and the two drive caddies are easy to remove by pushing the top of them.
 [Click on image for larger view.]
 [Click on image for larger view.]
Initial Setup
I will be using a 1TB PNY CS900 2.5-inch SSD, which is rated with a read speed of up to 535 MB/s and a write speed of 515MB/s in one slot, and an 8TB 3.5-inch Seagate Ironwolf ST8000VN004 HDD drive with a transfer rate of 210MB/s drive in the other.
Following the online instructions, I installed the 3.5-inch HDD and 2.5-inch SSD drive in their caddies. The 3.5-inch drive was a toolless install, whereas the 2.5-inch drive required installing four screws in the device's base. I then slid both drives into their slots.
 [Click on image for larger view.]
I attached the device to my network via the 1Gb NIC, connected it to its power supply and powered it on via a button at the back of the device.
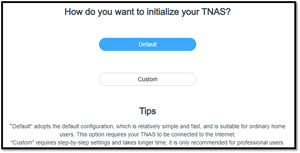
The device has no video-out ports, so all setup, configuration and usage are done via a web browser. Following the user guide, I entered http://tnas.local/ in a web browser. The device was found without issues and displayed a message that the bootloader was initializing. After a short wait, I was presented with a start button, which I clicked. I was given a list of compatible drives for the device; unfortunately, the list did not include the new F2-212 device at the time of this writing. I let the wizard set up the device with the default configuration.
 [Click on image for larger view.]
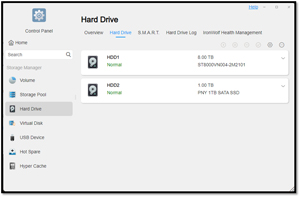
It took about 10 minutes to install the system, and then another hour or so to sync the drives. It prompted me to create a user and initialize the storage pool so I could see my two drives.
 [Click on image for larger view.]
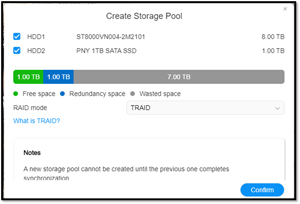
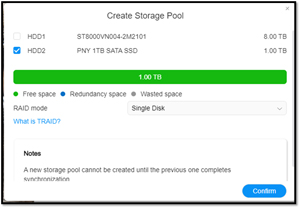
As I chose to use the default setting, it created a single volume that was TRAID together, so only 1TB of the 8TB drive was being used, and 7TB would be wasted. TerraMaster RAID (TRAID) is a flexible disk array management tool developed by TerraMaster that automatically combines disks, has hard disk failure redundancy protection and automatic capacity expansion.
 [Click on image for larger view.]
A storage pool is the collection of one or more physical drives that can use RAID to protect or extend the capacity. One or more volumes of specific sizes can be created on a storage pool. Volumes hold the shared folders and iSCSI LUNs.
I deleted the 1TB storage pool and created a separate pool without RAID for each drive.
I then created a new 6TB volume on the HDD drive and SMB share on it.
 [Click on image for larger view.]
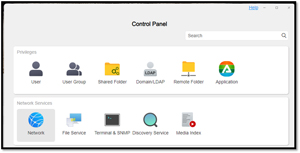
The share was created by going to TOS Desktop> Control Panel> Privileges> Shared Folder.
The process of doing this was covered in a previous blog post of mine and is explained in the user guide for the product.
Enabling SSH
I find using SSH to get command-line access to my systems useful. To use SSH on this device, I needed to enable it by going to Control Panel > Networking > Terminal & SNMP and allowing SSH access.
 [Click on image for larger view.]
The default port for SSH in TNAS is 9222. I was able to access the system via SSH without any issues. You can read how to use SSH on Windows in my article here.
Backing Up Files to the T2-212
I wanted to back up my existing QNAP NAS to this device. To do this, create a new folder in the volume on the HDD drive. I enabled the rsync server by going to Control Panel > File Service.
On the QNAP device, I went to HBS 3 (a backup application), selected Sync from the navigation pane, selected On-way Sync Job from the dropdown menu, selected Remote Rsync Server, and then used the wizard to sync a few of my folders to the T2.
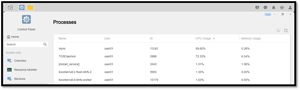
During the transfer, the CPU usage on the F2-212 was 40 percent and transferred the data at 84MBs, equivalent to 672Mbps, about half of what a 1Gbps NIC is theoretically capable of.
Looking at the process showed that rsync was using 85 percent of a core and TOSD was using 75 percent of a body. As this is a four-core processor, there is 400 percent CPU possible in the Processes table.
 [Click on image for larger view.]
Remote Access
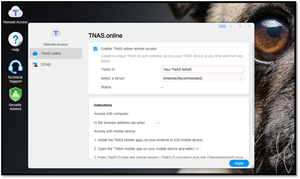
TerraMaster makes it incredibly easy to access the device remotely. This feature is enabled by clicking the Remote Access icon, clicking Enable TNAS online remote access, entering a name for it in the TNAS ID text box, and selecting Enable.
 [Click on image for larger view.]
It took about 15 minutes for my name to be registered with the name I gave it. I could access it remotely (away from my home network) by entering the name I gave it prefixed with TNAS.online (that is, https://TNAS.online/MyTNASName).
After accessing the TNAS desktop remotely, I could use File Manager to navigate and download the files I had saved.
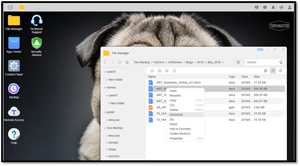 [Click on image for larger view.]
Conclusion
I found the black case of the F2-212 an attractive departure from the silver or white points of the other personal NASs I have reviewed. Its Realtek 1619B processor with four cores performs well for the use cases I have tried. Although its main feature is its low cost (about $170), which is a bargain, it does have some quirks and limitations, like the power button being on the back of the device, 1GB of non-upgradable RAM and a lack of a video port. I liked the tool-free installation of 3.5-inch drives and the easy accessibility of the drive trays. It is a quiet device; I only heard the popping sound of the HDD drive when doing file transfers. Its small size and black case suits it for a home or office.
With two 22TB drives, this device has a capacity of 44TB, enough for even the biggest hoarder of video or audio content. Its 1GbE NIC has a theoretical limit of 115MB/s of data. Still, this limit will only come into play when doing backups, as steaming high-resolution multimedia only takes a fraction of this bandwidth. If the bandwidth becomes a factor and your home network supports it, TerraMaster offers a 2.5GbE USB NIC, which, when coupled with a fast SSD drive, might speed up file transfers considerably.