How-To
Using a Raspberry Pi as a $50 Edge Time-Lapse Camera
In a previous article I looked at the new Raspberry Pi (RPi) Zero 2 W. Although it is low-priced at $15, it comes with a 1GHz quad-core 64-bit ARM Cortex-A53 CPU, GPU and 512MB RAM, and has Wi-Fi 4 and Bluetooth 4.2 with BLE support.
For expandability, the Zero 2 W has solder points for a 40-pin GPIO (General Purpose Input-Output) header and analogue composite video, and, most importantly for this project, a CSI-2 camera connector that I plan to utilize to take time-lapse photos of my garden this summer. In a separate article, I discussed how easy it was to install Raspberry Pi OS on the device, which is the OS that I will be using for this article.
Yes, there are dedicated time-lapse cameras on the market, but they cost around $200 and offer limited expandability and flexibility. These factors as well as my desire to become more acquainted with the RPi drove me to try and put together a low-cost, flexible time-lapse camera.
The Camera
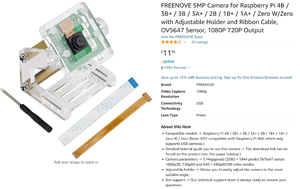
There are many camera options for RPi; the ones I looked at ranged in price from anywhere between $6 to $120. You do need to be aware, however, that the RPi Zero has a different cable connector than some of the other RPis currently available, so you need to make sure to get a camera that has the correct cable. I examined the options on Amazon and then ordered a Freenove camera. I chose it as it comes with a holder for the camera and a detailed downloadable tutorial guide.
 [Click on image for larger view.]
Below are the specifications for the camera:
- Sensor: OV5647
-
Still resolution: 5 megapixels
-
Sensor resolution: 2592 × 1944 pixels
-
Sensor image area: 3.76 × 2.74 mm
-
Pixel size: 1.4 µm × 1.4 µm
-
Lens: fixed focus
-
Field of view: 62°
-
Aperture: F/2.4
- Video modes: 1080p30, 720p60, and 640 × 480p60/90
As I have Amazon Prime, I was able to get the camera the day after I ordered it.
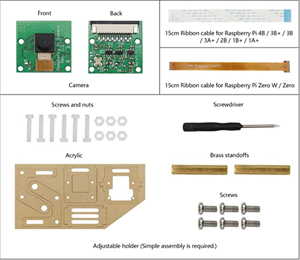
Inside the box was:
-
Camera
-
15cm ribbon cable for Raspberry Pi 4B / 3B+ / 3B / 3A+ / 2B / 1B+ / 1A+
-
15cm ribbon cable for Raspberry Pi Zero W / Zero
-
Adjustable holder
-
Screwdriver
 [Click on image for larger view.]
The camera holder was built of clear plastic, and it assembled easily.
Using the Camera
After assembling the holder and putting the camera in it, I powered down the RPi, attached the camera to it and powered it back up.
The tutorial on the camera was outdated as it showed using the raspistill command, which has now been deprecated by the libcamera command set. Fortunately, cameras are well supported on the RPi and I was able to find information on how to use it with libcamera.
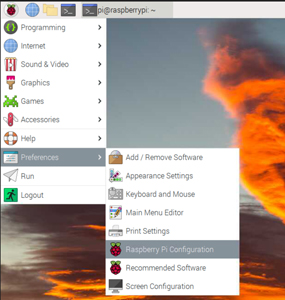
I first enabled the camera by selecting Raspberry Pi Configuration in the Preferences drop-down menu.
 [Click on image for larger view.]
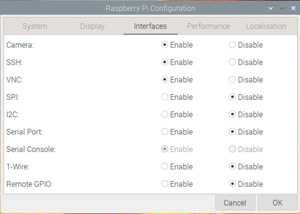
I clicked the
Interfaces tab and selected
Enabled in the Camera row
 [Click on image for larger view.]
To test my camera, I opened a console on the RPi and entered the following command:
libcamera-jpeg -o image01.jpg
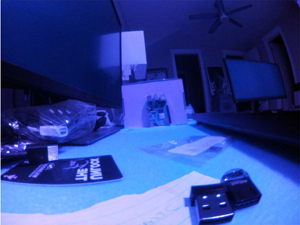
This took a photo and wrote the output to a file named image01.jpg, which I located in File Explorer and opened. The captured image had a blue tint to it.
 [Click on image for larger view.]
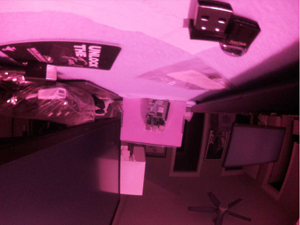
I then adjusted the white balance to indoors by entering:
libcamera-jpeg --awb indoor -o image02.jpg
The photo now had a red tint to it.
 [Click on image for larger view.]
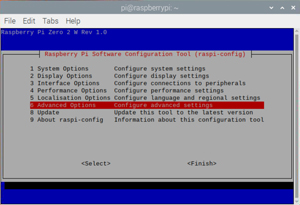
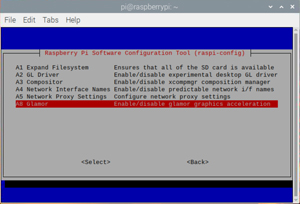
To try and correct the problem, I updated my system but still found that the photos had a tint to them. After searching the web, I found a solution to my issue. From the command line, I entered raspi-config; then, I navigated to Advanced Options, enabled Glamor graphic acceleration and rebooted the RPi.
 [Click on image for larger view.]
 [Click on image for larger view.]
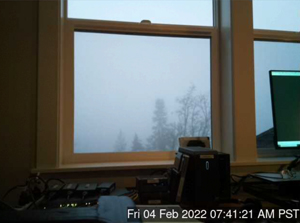
When I took a photo with the camera, the photo did not have any of the tint that I had seen previously.
 [Click on image for larger view.]
As I wanted to put a timestamp on the photo, I installed imagemagick on the system by entering:
apt install -y imagemagick
When I ran the following convert command, which is included with imagemagick, the photo had a timestamp in the lower right.
convert image03.jpg -pointsize 24 -fill white -undercolor '#00000080' -gravity SouthEast -annotate +0+5 "$(date)" TLPhoto01.jpg
 [Click on image for larger view.]
Now that I had the camera working, and the commands to take pictures and tag them with a timestamp, I created the following script to take a photo every 30 minutes and timestamp them.
for i in {1..48} ## take a photo every 30 minutes for 24 hours
do
  libcamera-jpeg --width 640 --height 480 -o test10$i.jpg
  convert test10$i.jpg -pointsize 24 -fill white -undercolor '#00000080' -gravity SouthEast
   -annotate +0+5 "$(date)" TLPhoto$i.jpg
  rm test10$i.jpg ## remove the original photo
  sleep 1800 ## sleep for 30 minutes
done
Conclusion
After updating my system and enabling Glamor, I found that my RPi worked well as a time-lapse camera. In total, I paid $44 plus shipping ($33 for the RPi with a 32GB SSD, power supply and heat sink; $11 for the camera). In contrast, the lowest-priced dedicated time-lapse camera that I could find on Amazon was $148; yes, it did have a case and a battery, but since my camera was built on an open Linux system, I can easily modify it to do multiple things such as have it upload the photos to the cloud via its built-in Wi-Fi. It is unlikely that a large organization would go through the trouble of assembling and deploying a large number of these on the edge as time-lapse cameras, but business units within large organizations or a smaller business might see the value in using affordable and customizable devices such as these.
Although I used my RPi to create time-lapse photos, there are many other purposes and projects that you can accomplish with an RPi and camera, such as a magic mirror, smart video doorbell, security camera, or any other use that can use a low-priced computer with a camera attached to it.
About the Author
Tom Fenton has a wealth of hands-on IT experience gained over the past 30 years in a variety of technologies, with the past 20 years focusing on virtualization and storage. He previously worked as a Technical Marketing Manager for ControlUp. He also previously worked at VMware in Staff and Senior level positions. He has also worked as a Senior Validation Engineer with The Taneja Group, where he headed the Validation Service Lab and was instrumental in starting up its vSphere Virtual Volumes practice. He's on X @vDoppler.