How-To
How I Set Up Remote VPN Access to My QNAP NAS in Less than 5 Minutes
After a series of articles on the enterprise-grade Tailscale VPN whose free version suits his needs just fine, Tom demonstrate his quick-and-easy process of utilizing the VPN on a home network-attached storage setup.
I have been on a tear lately using my new favorite IT tool, Tailscale. Tailscale is an enterprise-grade VPN that I use to access my home servers remotely. Their free version meets all my needs, and I have been pleased with it.
In a previous article, I demonstrated how I set up Tailscale on two systems in less than two minutes, which allowed me to remotely access my home lab machines via RDP. Following that, I installed Tailscale on a local and cloud Linux instance and connected to them using SSH over a Tailscale VPN without any issues. In that article, I also reviewed some of the technology that powers Tailscale. My last article described how to transfer a file using an Android cell phone running Tailscale.
This article will demonstrate how I utilized Tailscale VPN on a QNAP TS-431K NAS system for network-attached storage, which I evaluated a few years back. As anticipated, the process was just as effortless on the QNAP as it was for any other device, and I could set it up in under five minutes.
I am quite satisfied with my QNAP, but I needed a way to access the files on it regardless of my location. Although QNAP has its own VPN service called QVPN, I wanted to consolidate my VPN using a single technology. After some quick research, I discovered that Tailscale is compatible with QNAP systems.
Installing Tailscale on a QNAP System
Tailscale has a KB article about installing it on a QNAP system. This article directs you to the QNAP App Store for the application. Using this method, Tailscale can be installed directly on a QNAP system, but when I searched for it in the QNAP AppCenter, I couldn't locate it.
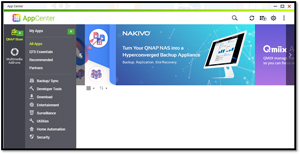 [Click on image for larger view.]
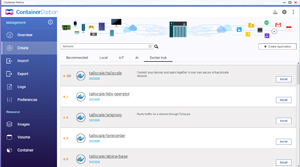
But I did find Tailscale in the QNAP Container Station. Container Station allows you to install and centrally manage Docker and LXD containers on QNAP devices.
To the Tailscale container I launched Container Station, clicked Create in the left navigation bar, entered Tailscale in the search text box, and located the Tailscale container image.
 [Click on image for larger view.]
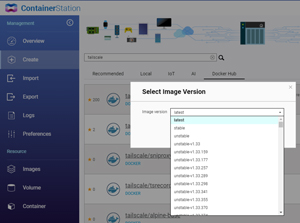
When I clicked the image, I displayed different versions that I could install. I chose to install the latest image.
 [Click on image for larger view.]
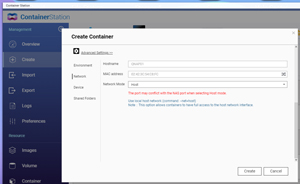
A wizard then popped up. I clicked Advanced Setting, set the Network Mode to Host in the Network tab, and used all the other defaults.
 [Click on image for larger view.]
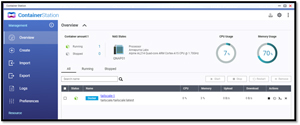
It took a few minutes for the container to start.
 [Click on image for larger view.]
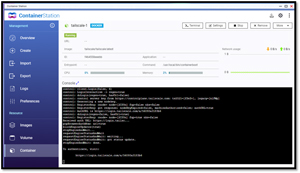
Once it did, I clicked it. This brought up the console with a URL I needed to paste into a browser to authenticate the node to my Tailnet VPN network.
 [Click on image for larger view.]
I then went to my Tailscale Admin Center, where I could see the QNAP system and its Tailscale VPN IP address and name.
 [Click on image for larger view.]
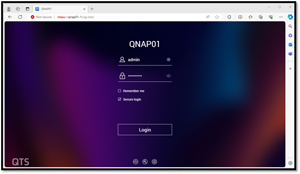
I could access the QNAP admin console from my laptop using the VPN IP address and DNS name.
 [Click on image for larger view.]
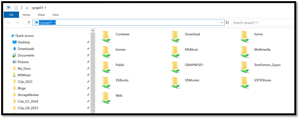
I could even map an SMB share I had set up on the QNAP using the VPN name.
 [Click on image for larger view.]
Remote VPN Connectivity
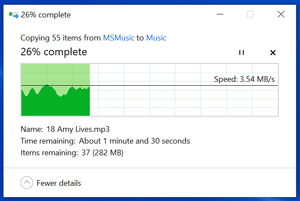
I had no difficulty accessing the QNAP via the VPN from my laptop from home, but the real power of this is using it remotely. So, I took my laptop skiing with me during the weekend and connected to the ski resort's Wi-Fi. I connected to the QNAP admin console and SMB share using the ski area guest Wi-Fi system. It took a bit longer to download files from the SMB share. I believe this was due to the limited bandwidth of the Wi-Fi rather than the VPN.
 [Click on image for larger view.]
Notes on Usage
As I ran Tailscale in a container, when the QNAP system reboots or if the container exits, the Tailscale container will need to be restarted and reauthenticated. This will give you a new Tailscale VPN IP address, but the Tailscale DNS name will be the same.
I got Tailscale up and running on my QNAP NAS in less than five minutes and connected to my QNAP admin center and SMB shares without issues. I have been using Tailscale for over a month and have not had any problems with it, and I highly recommend it.
About the Author
Tom Fenton has a wealth of hands-on IT experience gained over the past 30 years in a variety of technologies, with the past 20 years focusing on virtualization and storage. He previously worked as a Technical Marketing Manager for ControlUp. He also previously worked at VMware in Staff and Senior level positions. He has also worked as a Senior Validation Engineer with The Taneja Group, where he headed the Validation Service Lab and was instrumental in starting up its vSphere Virtual Volumes practice. He's on X @vDoppler.