News
Increasing Storage on a Windows EC2 Instance in AWS Cloud
One of the most common problems that IT pros encounter with EC2 instances is creating an instance, only to outgrow it later on. An admin might, for example, provision an instance with a certain amount of storage only to later realize that the instance's storage is inadequate. Thankfully, you can expand the storage that is available to an instance. In this article, I will show you how.
To get started, open the EC2 console and then click on the instance whose storage you need to modify. When you do, you will be taken to the Instance Summary page. You will see several tabs displayed about half way down the page. Select the Storage tab, as shown in Figure 1.
 [Click on image for larger view.] Figure 1: Click on the Storage tab that is displayed on the Instance Summary page.
As you can see in the figure, the Storage tab lists the storage volumes that are being used by the instance. The instance shown in the figure for example, has a single 30 GB volume attached to it.
Now, click on the volume that you want to expand and you will be taken to the Volumes screen. Select the volume's checkbox and then choose the Modify Volume command from the Actions menu, as shown in Figure 2.
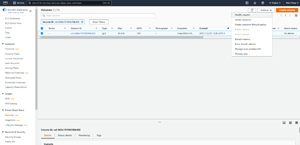 [Click on image for larger view.] Figure 2: Select the volume and choose the Modify Volume command from the Actions menu.
At this point, the console will display the Modify Volume screen. As you can see in Figure 3, this screen gives you the ability to change the volume's size and/or type. Go ahead and enter the new volume size and click the Modify button. When you do, you will see a warning message telling you that you are about to change the volume's size and that you will also need to modify the instance's file system to accommodate the change. Go ahead and click the Modify button to initiate the modification. It may take several minutes for the size modification to be completed.
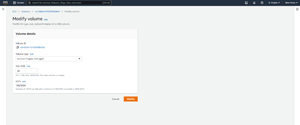 [Click on image for larger view.] Figure 3: Enter the new volume size and click Modify.
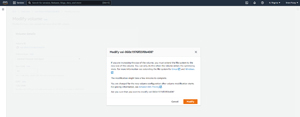 [Click on image for larger view.] Figure 4: EC2 warns you that you are going to have to make some changes to the instance's file system once the expansion is done.
Everything that we have done so far will work regardless of which operating system is running on the instance. As previously noted however, you are going to have to modify the instance's file system in order to complete the process, and the steps for doing so are OS-specific. For the purposes of this article, I am going to be focusing on Windows.
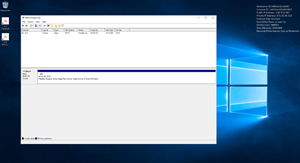
So with that said, go ahead and log into the instance. Next, right-click on the Start button and select the Run command from the resulting menu. Next, enter the DISKMGMT.MSC command at the Windows Run prompt. This will cause Windows to open the Disk Management Console.
As you may recall, the virtual machine instance that was displayed in the previous screen captures was initially equipped with 30 GB of storage. For the sake of demonstration, I extended the storage to 40 GB. If you look at Figure 5, you will notice that the C: volume contains 30 GB of storage space, but there is an additional 10 GB of unallocated space as a result of the expansion that we did earlier.
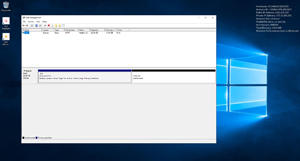 [Click on image for larger view.] Figure 5: Windows has a 30 GB volume and 10 GB of unallocated space.
To expand the C: volume, right-click on the volume and select the Extend Volume command from the shortcut menu. This will cause Windows to launch the Extend Volume Wizard. Click Next to bypass the wizard's Welcome screen. You will now see a screen asking you to select the amount of space that you want to add to the volume. Use the default values, shown in Figure 6, if you want to use all of the available space.
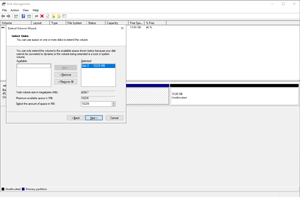 [Click on image for larger view.] Figure 6: Specify the amount of space that you want to add to the volume.
Click Next, followed by Finish to complete the process. You should now see that the volume has been expanded, as shown in Figure 7.
 [Click on image for larger view.] Figure 7: Specify the amount of space that you want to add to the volume.
The volume has been expanded.
About the Author
Brien Posey is a 22-time Microsoft MVP with decades of IT experience. As a freelance writer, Posey has written thousands of articles and contributed to several dozen books on a wide variety of IT topics. Prior to going freelance, Posey was a CIO for a national chain of hospitals and health care facilities. He has also served as a network administrator for some of the country's largest insurance companies and for the Department of Defense at Fort Knox. In addition to his continued work in IT, Posey has spent the last several years actively training as a commercial scientist-astronaut candidate in preparation to fly on a mission to study polar mesospheric clouds from space. You can follow his spaceflight training on his Web site.