Reviews
Installing and Running VMware Workstation 17 Pro on a NUC 13 Pro Desk Edition
Tom Fenton investigates performance differences between virtual and physical machines.
In my first article on the NUC 13 Pro Desk Edition, I reviewed its specifications and unboxed the NUC. I found it to be a well-spec'ed machine that should be able to handle the most demanding applications with its i7-1360P processor. It's also the best-looking NUC I have seen, with its white top and silver body.
In my second article, I installed some monitoring software (Speccy and Edge DX) on it, and I ran Cinebench to better understand its overall performance. It has an Intel processor with efficient (E) and performance (P) cores. I disabled its E-cores and then its P-cores to see what type of performance hit it would take when either of these was disabled. I discovered that when it only ran the P-cores, it would only be two-thirds as performant as when all cores were enabled.
To fully utilize the power of this system, I installed VMware Workstation on it to see how well it would perform. In this article, I will discuss how I did so, as well as my findings. I do a lot of work with VDI thin clients, and I figured that running them as virtual machines (VMs) on the NUC would be far more convenient than running the spate of physical thin clients that I have.
 [Click on image for larger view.]
Installing Workstation
Workstation is a type 2 hypervisor, which means that it runs on top of an OS, like Windows or Linux, rather than running on the bare hardware like ESXi, which is classified as a type 1 hypervisor. It is VMware's oldest product and was first released in 1999. It has found a rabid following among code developers and testers, as well as home users, hobbyists and business users who need to run Windows applications on Linux and vice versa or need a convenient way to run additional OSes without the expense and hassle of having additional physical hardware components to run them on. A powerful system such as the NUC 13 Pro will not have a difficult time running multiple OSes at the same time.
 [Click on image for larger view.]
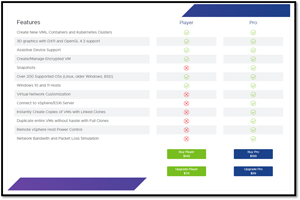
There are two versions of Workstation: Player and Pro. Pro has features geared more towards professional users, such as creating snapshots, cloning VMs and replicating network issues with the VMs. The MSRP for Pro is $199, and Player is $149.
 [Click on image for larger view.]
I downloaded a 30-day evaluation version of Pro directly from VMware's web site. This did not require any of my information, and the installed package was only 622MB in size.
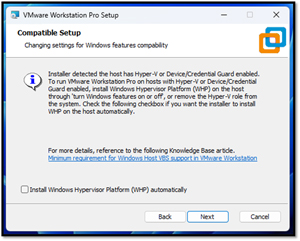
While installing the product, it informed me that Microsoft Windows Hypervisor Platform (WHP) needed to be installed. It asked me if I wanted to install it, and I did.
 [Click on image for larger view.]
It took less than three minutes to install Workstation.
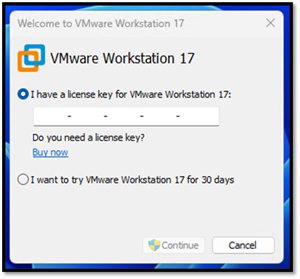
When I launched it, I was given the option to license it or try it for 30 days. I opted for the trial license.
 [Click on image for larger view.]
Windows Virtual Machine
Workstation has a wizard to create VMs. The first VM I wanted to create was a Windows 10 VM using an ISO image I had previously downloaded to the NUC.
I launched Workstation and clicked Create a New Virtual Machine.
 [Click on image for larger view.]
This launched the Wizard. I selected Typical Installation and was queried for the installation ISO location. I gave the VM a name (Win10-VM-A) and gave it a 40GB hard disk size (40GB), two processors and 4GB of RAM. Then, I clicked Finish.
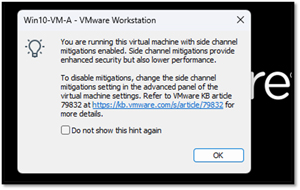
When the machine booted, I was notified that it would run with side channel mitigations enabled for security reasons and a note on how to disable it.
 [Click on image for larger view.]
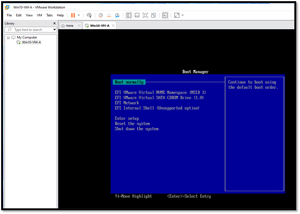
I was booted into the boot manager and selected boot from the virtual CDROM.
 [Click on image for larger view.]
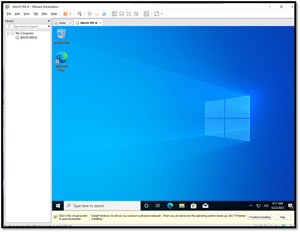
I was presented with a regular Windows installation wizard, which I used to install Windows 10 Pro. Overall, it took about six minutes to install Windows 10 as a VM.
 [Click on image for larger view.]
I clicked Finished Installing in Workstation. This allows you to install VMware Tools.
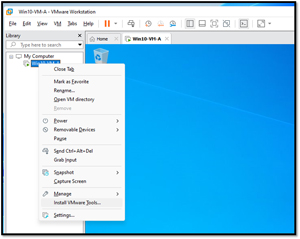
VMware Tools is a set of drivers that make VMs run better. To install them, I right-clicked the VM in the left navigation menu and selected Install VMware Tools. This mounts the installation tool as a CDROM.
 [Click on image for larger view.]
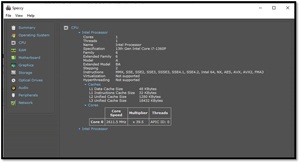
I followed the instructions and installed the tools on the VM, and rebooted it. I updated the VM to the latest version of Windows 10. I found I could use the VM just as I could with a physical machine. I installed Speccy on the VM, and it reported the two CPU cores, which were the same make and model as on the physical machine (i7-1360), and also that it had 4GB of RAM.
 [Click on image for larger view.]
Benchmarking VM vs. Native Performance
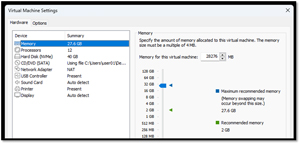
I downloaded and installed Cinebench on the VM. I powered off the VM, right-clicked the VM and selected Settings. I set the VM to use the max number of RAM (27.6) and 12 cores.
 [Click on image for larger view.]
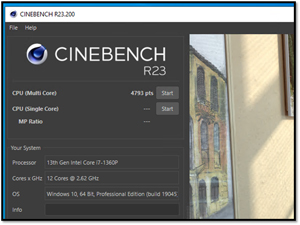
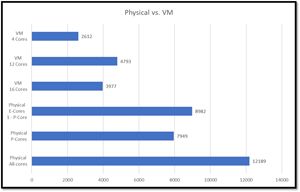
I powered on the VM, logged into it and ran Cinebench on it. It reported a score of 4793.
 [Click on image for larger view.]
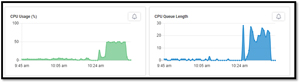
Edge DX showed that the physical system was only using 50 percent of its CPU power.
 [Click on image for larger view.]
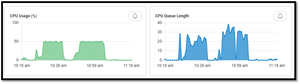
I shut down the system, increased the CPU count to 16 (the total number of physical CPU threads) and reran the benchmark. This time it reported a score of 3977; this is far below the score of 12189 that Cinebench reported when it ran native on the NUC and even worse than when only 12 cores were used. Edge DX again showed only 50 percent of CPU usage.
 [Click on image for larger view.]
I set the CPU count to four (the number of performance cores) and reran the test. This time it came back at 2616.
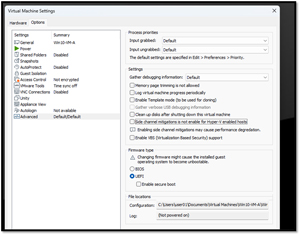
There was a note when I first installed Workstation about a KB which talked about performance. However, when I went to my settings, it was not enabled.
 [Click on image for larger view.]
Looking at the data, the benchmark tests showed that the tests ran on the physical machine far outperformed the benchmarks that I ran on the VM by quite a margin.
 [Click on image for larger view.]
In the past, I have run benchmarks on VMs on other systems without big.LITTLE architecture and found the performance of the VMs was far closer to that of the physical machine. Looking through blogs and comments, it seems like others are seeing that the performance is stuck at 50 percent CPU utilization for VMs, which I am seeing.
One suggestion was to run Workstation as Administrator. I did this and reran my test using four cores. This time the benchmark came back with a result of 6154, which was much better than any other result for a VM, but still not equal to any of the tests I ran on the physical machine.
Another suggestion was to change the settings on the physical machine to Best Performance.
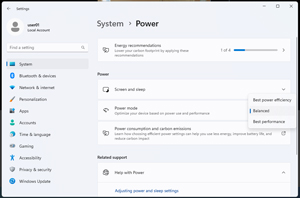 [Click on image for larger view.]
I did this and reran my test using four cores. The score was slightly better than just running it as Administrator, with a score of 6216.
 [Click on image for larger view.]
In the past, I found that a VM's performance was far closer to the physical machines than what I am seeing now. Running Workstation as Administrator and running in Best Performance mode helped, but it is still not what I was expecting. Upon searching further, I found that others have seen this on big.LITTLE machines. In fact, one post conjectured that "If the virtual machine grabbed any E-cores for use on the host, all cores on the VM session appeared to be treated as and performing as E-cores."
I use Workstation to run many different OSes; performance is of secondary importance to me. However, it would be nice to see the performance of the processors with P- and E-cores performing better. I will be launching Workstation and using the Best Performance setting on the physical system from now on.
In my next article, I will look at running different thin client OSes as VMs on the NUC 13 and working with Workstation's ability to configure bandwidth, packet loss and network latency on these VMs.