Reviews
Thin Clients as VMs on an Intel NUC 13 Pro
In a previous article, I looked at the NUC 13 Pro Desk Edition. In another article, I ran a benchmark test to see how well it performed. In my third article, I looked at creating a Windows VM on the system and examined the performance of that VM. These prior articles were lead-ups for this article, where I will be running different thin client OSes under VMware Workstation on the NUC 13. In my next article, I'll be using Workstation's ability to manipulate the network performance of these VMs.
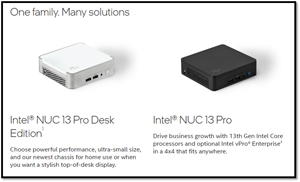
For background, the NUC 13 Pro Desk Edition is a very well-built, small (117 x 112 x 37 mm) form factor PC. It is powered by an i7-1360P processor and came with 16GB of RAM but is upgradable to 64GB. The specs for the Desk Edition are the same as for the Pro except it comes with a white top and silver case. This is the first time it has come in any color except black or gray.
 [Click on image for larger view.]
Workstation Features
As VMware Workstation needs a base OS to run on top of it, it is classified as a type 2 hypervisor. Hypervisors such as VMware ESXi, Xen and Hyper-V are classified as type 1 hypervisors. That said, Workstation has many of the same features as ESXi has and a few that it doesn't.
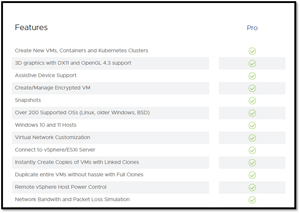
VMware has a list of some of the features included in Workstation Pro.
 [Click on image for larger view.]
Some of the features we will look at in this article are support for running other OSes or cloning virtual machines (VMs).
Cloning Virtual Machines
One of the features that it has in common with ESXi is the ability to clone VMs. Cloning creates an exact copy of a VM. These can be full or linked clones. Full clones are bit-for-bit copies of the VM, whereas linked clones will only track changes to the base image. As linked clones do not need to copy all the bits, they can be made very quickly and use considerably less space as they only write the changes to disk. Linked clones are great for reproducing bugs and testing out changes to a VM. The downside to linked clones is that full clones may perform better than linked clones.
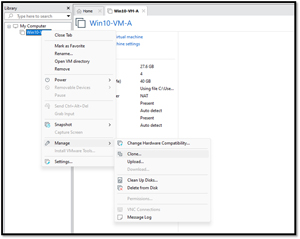
To create a clone, right-click the VM and select Manage > Clone.
 [Click on image for larger view.]
This will take you to a wizard that walks you through the process of creating the clone. This includes asking you if you want a full or linked clone.
 [Click on image for larger view.]
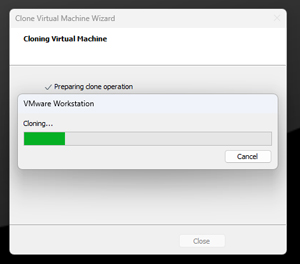
It took less than a minute for me to clone a Windows 10 VM I had previously created.
Once the Windows VM was cloned, I was able to power it on and use it as I would any other Windows system.
Other OSes
Workstation supports a wide range of Windows and Linux OSes, but the thin client OSes I was looking to run were not on the guest OS compatibility guide.
 [Click on image for larger view.]
From experience, I knew that even if an OS is not on the list, there is a good chance that it will work. As many of the OSes I wanted to run are based on Linux, I was hopeful they would install without any issues.
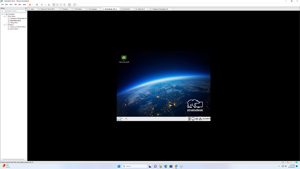
The first thin client OS I installed was Stratodesk from an ISO image I downloaded to the physical PC. When I installed it, I needed to use an IDE rather than an iSCSI virtual HD. It took about 10 minutes to install, which was at least twice as long as when I installed it on a physical machine.
I noticed that the screen size was smaller than I liked, so I changed the settings for the VM to 1920 x 1080, but it didn't have any effect on the VM. I also changed the setting inside the VM, but again it didn't have any effect on the virtual monitor size. My guess is that without VMware Tools installed on the guest, you are limited to changing the monitor.
 [Click on image for larger view.]
This really didn't concern me, and I didn't pursue it further; for my purposes, I don't need to interact with the Stratodesk desktop very much.
Once installed, I cloned it off as a template, which took less than a minute. Having a template will allow me to deploy additional VMs for testing quickly.
The next thin client OS that I wanted to work with was 10ZiG. I downloaded the ISO and booted off it without any issues, but as I went through the installation wizard, the mouse was overly sensitive and jumpy, and I couldn't click the "Agree "button. I tried adjusting the mouse's sensitivity on the NUC and input settings for the VM, but I couldn't get it to work.
 [Click on image for larger view.]
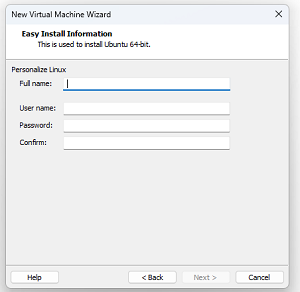
The last VM that I created was based on Ubuntu 23.04 desktop. I was presented with an Easy Install Information dialog when I started the wizard.
 [Click on image for larger view.]
After a few more clicks, the installation process began. About a minute later, I was presented with a login screen. I entered my username and password but was unable to log in. On further investigation, I discovered that this is a well-known issue.
 [Click on image for larger view.]
I was able to get around the Easy Installation process by starting the installation process again and clicking I Will Install the Operation System Later, and at the last screen, selecting Customize Hardware and setting the CD/DVD to point to the Ubuntu Image. After I booted the VM, I installed Ubuntu just as I would on a physical machine.
After Ubuntu was fully installed, I noticed that VMware Tools was installed. I could adjust the monitor settings, and the keyboard and mouse worked as expected.
 [Click on image for larger view.]
Conclusion
Even though installing thin client OSes and having them be fully functional on VMware Workstation would have been nice, VMware's guide does not show them being supported. Furthermore, as these OSes are highly optimized and designed with security being a high priority, I was not surprised that they didn't install cleanly.
The NUC 13 Pro flawlessly handled running four different VMs, each with different OSes.
In my next article I'll take a look at injecting network issues using VMware Workstation, as I continue to investigate how various OSes running the Horizon client react when network conditions are less than ideal, for example, when networks drop packets, have limited bandwidth and/or experience latency issues.
About the Author
Tom Fenton has a wealth of hands-on IT experience gained over the past 30 years in a variety of technologies, with the past 20 years focusing on virtualization and storage. He previously worked as a Technical Marketing Manager for ControlUp. He also previously worked at VMware in Staff and Senior level positions. He has also worked as a Senior Validation Engineer with The Taneja Group, where he headed the Validation Service Lab and was instrumental in starting up its vSphere Virtual Volumes practice. He's on X @vDoppler.