How-To
Windows Sandbox, Part 1: How To Install Windows 10 Insider Preview Build 18323
Run untrusted or new software in Windows Sandbox without affecting your host desktop.
Windows Sandbox, a new feature that Microsoft announced will be included in the April 2019 release (now deemed Windows 10 version 1903, or May 2019 Update, and code-named "19H1") of Windows 10 Pro, Enterprise and Education, allows you to create a temporary desktop environment that runs inside of, but is isolated from, the host Windows 10 system that you're running. The main use case that Microsoft describes for this feature is to allow you to run untrusted or new software in the Sandbox without affecting your host desktop. Once you're done working with the untrusted software, you delete the Sandbox and any files and states (registry entries and so on) that were used within the Sandbox will be permanently removed from your system.
While the Windows 10 version 1903 isn't yet released, the Insider Preview Build 18323 does have Windows Sandbox included in it. In this article I show you what I had to do to get a version of the OS that had Sandbox included, how I enabled the Sandbox feature, and what the networking and disk drives look like on a Sandbox. Then I'll talk about the technology behind Sandbox, my attempt to run it on a virtual machine (VM) running on vSphere and, finally, I share my final thoughts on this new feature. Please remember that I'm using a beta version of Windows 10; Windows Sandbox may or may not be included in Windows and may vary from my description here.
Due to the length of this article, I broke it up into two parts; in this part I cover prerequisites for Sandbox and how I installed a version of Windows that can run it, and in the second part I go over how I installed and used the feature.
Prerequisites
Microsoft has laid out the following prerequisites for Windows Sandbox:
- Windows 10 Pro or Enterprise Build 18305 or later
- AMD64 architecture
- Virtualization capabilities enabled in BIOS
- At least 4GB of RAM (8GB recommended)
- At least 1GB of free disk space (SSD recommended)
- At least 2 CPU cores (4 cores with hyperthreading recommended)
Installing Sandbox
Although Windows Sandbox is due to be released in 19H1, I was able to work with the product by joining the Windows Insider Program and downloading and installing an Insider build of Windows on my laptop. The program is free, but as you'll be running beta software, you'll want to avoid doing so on a production system.
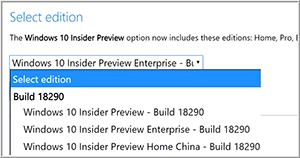
My laptop had an existing Windows 10 Pro system running on it; I downloaded the Windows 10 Insider Preview Enterprise version from the Microsoft Windows Insider Program (Figure 1).
 [Click on image for larger view.]
Figure 1. Downloading the Windows 10 Insider Preview.
[Click on image for larger view.]
Figure 1. Downloading the Windows 10 Insider Preview.
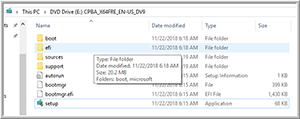
Build 18290 came as 4.5GB ISO. I double-clicked the ISO image, which automatically mounted it and opened File Explorer. From File Explorer, I double-clicked setup (Figure 2) to install it.
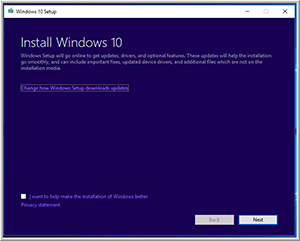
A dialog appeared that informed me that Windows 10 would be installed (Figure 3).
 [Click on image for larger view.]
Figure 2. Selecting setup from the File Explorer window.
[Click on image for larger view.]
Figure 2. Selecting setup from the File Explorer window.
 [Click on image for larger view.]
Figure 3. Installing the Windows 10 update.
[Click on image for larger view.]
Figure 3. Installing the Windows 10 update.
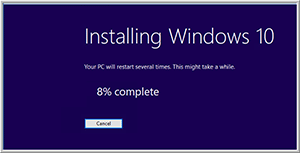
I accepted the license terms and was then told that my personal files would be preserved, and Windows 10 Pro Insider build would be installed. After I clicked Install, I was told that my PC would restart several times during the process and that it might "take a while" to install the update (Figure 4).
 [Click on image for larger view.]
Figure 4. The installation dialog window.
[Click on image for larger view.]
Figure 4. The installation dialog window.
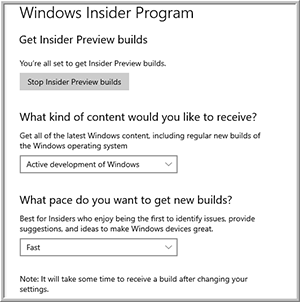
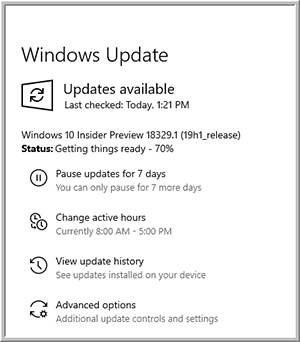
After the update finished installing, I logged back in to the system and got another message stating that the updates were installing, and that it might take several minutes, after which time I was presented with a login prompt. I logged in and ran winver from the command line, which indicated that I was running Windows Version 1809, Build 18290. This build did not have the capability to run Sandbox; I needed to sign up for a fast pace of getting new builds (Figure 5) to get a Windows build that had Sandbox on it; after doing so, I updated my system again (Figure 6).
 [Click on image for larger view.]
Figure 5. Selecting the pace to receive Insider builds.
[Click on image for larger view.]
Figure 5. Selecting the pace to receive Insider builds.
 [Click on image for larger view.]
Figure 6. Updating my system with the latest build again.
[Click on image for larger view.]
Figure 6. Updating my system with the latest build again.
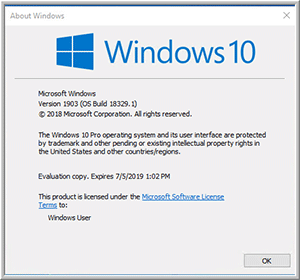
After about 30 minutes I got a message that a restart was required, and when I ran winver again it showed that I was now running Version 1903, Build 18329 (Figure 7).
 [Click on image for larger view.]
Figure 7. Confirmation that Version 1903 has been installed on my system.
[Click on image for larger view.]
Figure 7. Confirmation that Version 1903 has been installed on my system.
In the next article, I'll focus on how to I installed and used the new Sandbox feature.
About the Author
Tom Fenton has a wealth of hands-on IT experience gained over the past 30 years in a variety of technologies, with the past 20 years focusing on virtualization and storage. He currently works as a Technical Marketing Manager for ControlUp. He previously worked at VMware in Staff and Senior level positions. He has also worked as a Senior Validation Engineer with The Taneja Group, where he headed the Validation Service Lab and was instrumental in starting up its vSphere Virtual Volumes practice. He's on X @vDoppler.