How-To
Using AWS Honeycode to Create Codeless Apps, Part 1
Brien Posey shows how to use this AWS service that lets you take a drag-and-drop approach to application development, allowing for the creation of apps without ever writing a single line of code.
In this world of hyper-agility, IT pros are often expected to be able to rapidly locate, acquire and deploy applications. The problem with this, of course, is that an application might not always exist that does exactly what the business needs it to do. Even if such an application does exist, licensing the application may prove to be cost prohibitive.
In those types of situations, the solution is often to build a custom application. Of course, building a custom app comes with challenges of its own. It takes time to build and thoroughly test the application, and there are costs associated with the development process. Never mind the fact that unless the organization has developers on staff, it will have to outsource the development effort.
One possible alternative is to build an application using AWS Honeycode. It lets you take a drag-and-drop approach to application development. In fact, you can build applications without ever writing a single line of code. As you would probably expect from a codeless development tool, Honeycode does have its limitations, but it is a viable option for building simpler applications. In this blog post series, I want to show you what the basic Honeycode development process looks like.
The first step in creating an application with Honeycode (besides adding team members who you want to collaborate with) is to create a workbook. A Honeycode Workbook is similar to a spreadsheet. The workbook will act as the data source for the application. You can create a workbook from scratch if you like, but Honeycode also provides a number of pre-built templates that you can use.
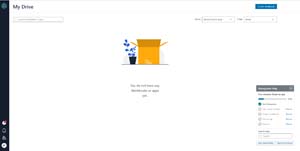
To get started, click the Create Workbook button, shown in Figure 1. When you do, you will be taken to a screen that's similar to the one shown in Figure 2. As you can see in the figure, you can create a workbook from scratch, but you can also build a workbook by importing a CSV file or selecting one of the built-in templates.
 [Click on image for larger view.]Figure 1: Click on the Create Workbook button to get started.
 [Click on image for larger view.]Figure 2: You can build a workbook from scratch, by importing a CSV file, or by selecting a template.
Once you have made your selection, you will see a screen asking you to provide a name for the workbook that you are creating. You will also need to choose the team with whom the workbook is to be shared. There may be some additional options depending on which method you have chosen to use when creating the workbook. Figure 3 shows what it looks like when you choose to create a workbook from a template.
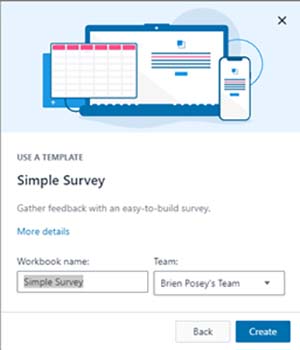 [Click on image for larger view.]Figure 3: You will need to provide a name for the workbook and choose who it will be shared with.
Click the Create button, and the workbook will be created. You can see what a newly created workbook (created from a template) looks like in Figure 4.
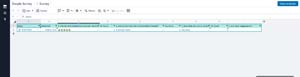 [Click on image for larger view.]Figure 4: This is what the newly created workbook looks like.
Now that we have created a workbook, it is time to create an application. Remember, the workbook will act as the data source or data repository for the application that we are about to create. If you look back at the previous figure, you will notice a vertical black bar running down the left side of the screen. The second icon from the top (the one that looks like a stack of paper) is the Builder icon. You will need to click this icon to begin creating the application.
When you click the Builder icon, you will be taken to a screen that lists any existing applications that have been created. If you are starting from scratch then this list will be empty. You will need to click the plus icon to create a new application. If on the other hand, you created the workbook from a template, then a sample application will already exist. You can use this sample application as-is, modify the sample application or create a new application (by clicking the plus icon). If you look at Figure 5 for example, you can see that I have access to an app called Survey because I created the workbook from the Simple Survey template.
 [Click on image for larger view.]Figure 5: When you create a workbook from a template, you will be provided with access to a sample application.
For the purposes of this blog series, we will be modifying the sample application. I will show you how to do that in Part 2.
About the Author
Brien Posey is a 22-time Microsoft MVP with decades of IT experience. As a freelance writer, Posey has written thousands of articles and contributed to several dozen books on a wide variety of IT topics. Prior to going freelance, Posey was a CIO for a national chain of hospitals and health care facilities. He has also served as a network administrator for some of the country's largest insurance companies and for the Department of Defense at Fort Knox. In addition to his continued work in IT, Posey has spent the last several years actively training as a commercial scientist-astronaut candidate in preparation to fly on a mission to study polar mesospheric clouds from space. You can follow his spaceflight training on his Web site.